Wednesday, 3 April 2024
Echo Park ~ Telling Our Story #1 📖
Wednesday, 23 August 2023
Heidi Swapp - Set Sail - Unchartered Escape
Hello everyone,
Claire here, back to share my second layout this month using the beautiful Set Sail collection from Heidi Swapp.
For todays layout, I'm featuring lots of ephemera, offset against a mixed media background.
I took a piece of Premium White Cardstock and applied a generous coat of Gesso all over to help it handle the paints and water I would add to the page.
Once it was dry, I took a large leaf stencil from my stash (similar stencils can be found here and here) and positioned it diagonally, knowing my photo would sit in the middle of the two leaves. I applied some clear embossing paste, leaving to dry.
Using the colours in the collection as a guide, I mixed some blue and peachy watercolours and painted directly onto the paper, using a medium sized paintbrush to guide the paint around the page.
When the paint hits the dry texture paste, it acts as a resist, so you can see the image of the leaf coming through the colour. This is a lot clearer at the top of the page where the paint is darker. When the paint was dry, I added splatters in white and gold to create a bit more interest.
I repeated the paint colours in the top right corner to help balance the page.
I backed my photo using the Strip Page paper and a piece of blue cardstock from the Matchmaker pack. For a bit of extra seaside sparkle, I also added a gold foiled ephemera journaling piece which I used as a layer underneath the top edge of my photo.
To create an anchor for my photo, I tore 2 strips of the Cut Aparts paper as the 'b' side is a sandy coloured paper with a textural pattern. I thought this would look good as sand!
I placed my photo on top, raising on foam and then pulled out all those lovely ephemera pieces to create some clusters.
I used a combination of shells from the Cardstock Stickers and fussy cut from the Logo Cut Apart sheet. I stuck some of these flat, and raised others on foam to create height.
I layered some deco web, art stones and moss around the cluster to create extra interest, and added some small chipboard embellishments from P13 and a ticket, fussy cut from the Tags paper.
To extend the height of my cluster, I pulled out the palm trees form the Ephemera Pack and tucked these into the top of my cluster.
I also added a few small banners just above and of course, one of those lovely seagulls on top.
On the other side of the photo, I extended the ripped paper by adding some strips of coloured paper which I cut form the Strip Page paper.
I cut the ends into fishtails to create a banner shape, and added some more chipboard pieces from P13.
For my title, I added some of those gold foiled puffy stickers - wow! These are really beautiful, and are such a statement piece for your layouts. They really elevate the page.
To finish, I added some ephemera and a fussy cut ticket into the top cluster, to stretch the design and balance the layout.
I have totally fallen in love with this collection! The colour palette, the ephemera, the gold foiling...really beautiful.
I hope you've enjoyed seeing the layouts made.
Until next month, happy scrapping!
Claire xx
@Scrappysoulmate
Monday, 21 August 2023
Shimelle ~ Main Character Energy #1 ☀️
Wednesday, 5 April 2023
Paige Evans ~ Blooming Wild #1 🌼
Saturday, 22 January 2022
Photoplay ~ Frostival #2
Wednesday, 22 December 2021
'Hot Cocoa and Cookies' Holly Days Simple Stories by Meg
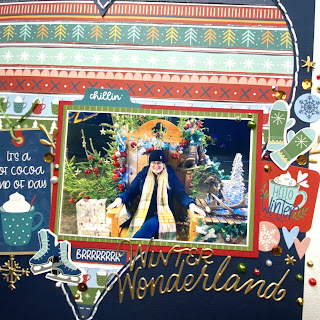
Hello everybody! It's the 22nd already - how did that happen?! And if you're anything like me, you still need to do your gift buying and wrapping but have been busy scrapping instead ha ha!
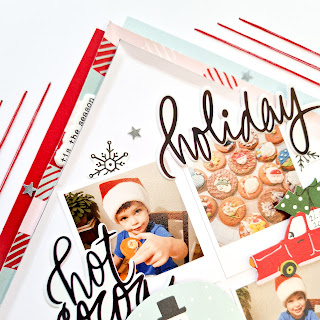
Here's my latest page, create using Simple Stories' Holly Days. This is a wonderfully festive collection and even a small amount as shown here can make your page feel warm and Christmassy!
I started by picking out my photos and I wanted to use these three of my son decorating Christmas biscuits - they went really well with the Vicki Boutin Warm Wishes Puffy Phrase Sticker sentiments 'Hot Cocoa' and 'Cookies'. I used these puffy stickers on my last Holly Days page and I really love how they look together! I adhered my little photos to white cardstock to make them look like mini Polaroids and decided I wanted them to be a square formation in the centre of my page.
I had some fussy cut elements from the Tags paper that I played with to decide which piece would be the final 'square' in my grid and chose the little snowman in his snowglobe, but Santa was a close second!
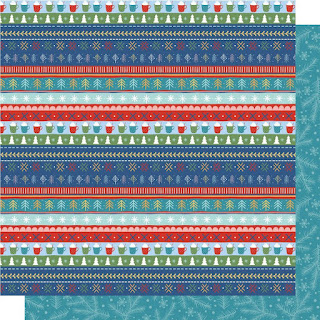
I cut out a square of white cardstock and folded the edges up to create a sort of diamond shaped 'tray' which I really liked the look of. I cut a second slightly larger square of the patterned paper Let's Get Cozy to layer behind, plus a square of blue Bazzill Jetstream cardstock and red Bazzill Cherry Splash cardstock in the same size. I offset these behind to create a blue side and a red side!
After sticking these bits down and using foam to pop the little snowman up, I started embellishing around my photos. I used the fussy cut little car and Merry Christmas banner from the Tags paper, the 'Holiday', 'Hot Cocoa' and 'Cookies' sentiments from the Vicki Boutin Warm Wishes Puffy Stickers, some fussy cut snowflakes from the other side of the Let's Get Cozy paper, some red thread to handstitch some large lines around the edge of my centre diamond and I scattered a few little mirrored stars around to finish. My journaling is tucked in there too, on the diagonal.
And that's it! My second page using Holly Days. I hope you like it and I'll leave you now to your festivities! Thank you so much for popping by and I hope you have a very Merry Christmas!
Meg x
Wednesday, 8 December 2021
Simple Stories Holly Days - 'Warm Wishes' by Meg
Hey hey everyone!
It's getting close to Christmas now and I'm sure you've been busy! As have we on the Papermaze Design Team, scrapping with some wonderfully festive collections 😃
I'm here today to show you a page I've made using Simple Stories 'Holly Days' - I always love Simple Stories for their fun and cheery designs, so I am so super excited to be sharing this with you today!
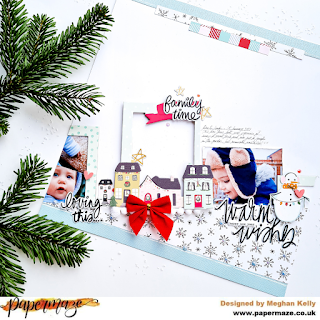
I had the Holly Days Chipboard Frames in my pack so the first thing I did was open that packet up to pick out my favourite frames! One that really caught my eye was this one I used in the centre of my design, with the sweet little houses on it.
This chipboard frame was actually a double frame and at first I thought I was going to use both sides but then I ended up deciding I only wanted to use it as a single frame and layer around it, so I cut it apart with my scissors to create a single frame instead.
I decided I wanted to create a diagonal design and so I cut a triangle out of the Holly Days Let's Get Cozy paper to make a gentle snowy slope on the bottom of my page. After that it all seemed to come together naturally! I positioned the chipboard frame on the top and the middle of the slope and cut out a house from the other side of the chipboard frame, plus another fussy-cut house from the Home For Christmas paper, which I arranged either side of my chipboard frame to create like a little street of houses!
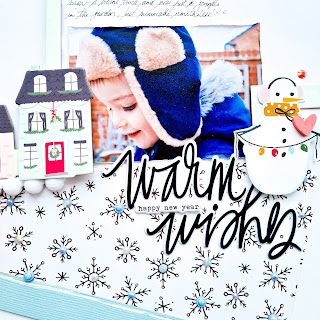
I had already sorted through my photos and had picked out my Christmas/Winter photos ready to possibly use with this collection, so I had a quick look through and picked out these three photos of my two children and arranged them either side of the chipboard frame, using a section of another frame to frame my smaller photos on the left and another piece of chipboard frame on the right to create a trio and balance out the page.
I tucked some pom pom trim under the chipboard frame for some texture and because I love it, it just makes a page feel so Christmassy! There was a banner on the top of the frame that said 'Merry Christmas' but I'd cut it in half and it only said 'Merry', so I used a Warm Wishes Puffy Phrase Thicker sticker by Vicki Boutin American Crafts that said 'family times' to cover it up. These puffy stickers go so nicely with the Holly Days collection and have lovely festive sentiments, so I used two more to create another trio around the page and some golden puffy stars. I also added a snowman that I'd fussy cut from the Holly Days Tags paper, some Bramble Fox red heart Perspectives and a big red bow to add a few more pops of red.
I added blue Jetstream Bazzill cardstock to the top and bottom of the page which matched the other blues perfectly, plus some strips of Let's Get Cozy paper to the top of the page. I finished with some blue crystal and pearl flatback gems on each of the snowflakes at the bottom of the page for some sparkle and shine!
I hope you've enjoyed seeing my layout today and that you get a chance for a little scrappy downtime during this busy season - I'll be back again soon with another Wintery layout!
Merry Christmas and lots of love from our family to yours,
Meg x