Friday, 30 January 2015

Crop Christmas Challenge Kit


It might seem like Christmas was a long time ago now, but if you're like me, you've got loads of festive photos to scrap.

At the Christmas crop, Vanessa puts together a challenge kit
it contains card stock, patterned paper and embellishments to create a layout.
Its the one kit I always do, partly to challenge myself as someone else has chosen the papers, but also I find it hard to do Christmas layouts.
The papers were very traditional in colour and I loved the poinsettia's on the patterned paper. So fussy cut these out, found a scrap frame I had  and covered in the patterned green card paper. Used the silver ribbon and edged all my paper with black distress ink.
I wanted to add some journaling and some of my own stash of letter stickers I had accumulated. so mixed and matched my stickers and thickers until I was happy. I'm sure many of us have lots of letters in our stash and this is a unique way to using them up. 

And just to show how one kit can produce many layouts, here are some that the other ladies at the crop made.  Vanessa apologises for not making a note of who did which one, so shout if it's yours!


Wednesday, 28 January 2015

28th January

Hi, Carol with you today….I am still playing with the great new range of Graphic 45 paper in the shop - Time to Flourish…

Today I have made this card with matching tag…


firstly my card:-


I am currently favouring the 5 x 7" card bases and by doing so and cutting my 12x12 paper vertically this allowed me to fussy cut the flower head, stamp and seed packet exactly with 1/2 sheet left intact.  Firstly I doodled the edges of the card and inked with walnut stain distress ink…the fussy cut elements were edged with walnut stain distress ink and then adhered over the matching components with silicone gel to add depth to the card… I added stickers from the sticker sheet… the corners were stamped with a corner stamp, glue added and then some gold foil….

To complement my card and add to my present I made this tag:-


The base was cut using kraft cardstock… matching graphic 45 cardstock was adhered and then the edges inked with walnut stain distress ink.  I cut a bow using cream cardstock, the wooden leaf shapes were given a swirl of pine needles distress ink and the large bloom was given a bit of bling…. some stickers from the sticker sheet were added to add details…

TFL xx

Wednesday, 21 January 2015

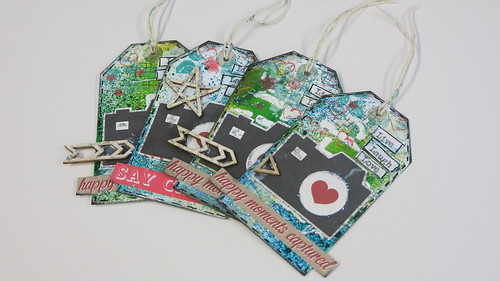
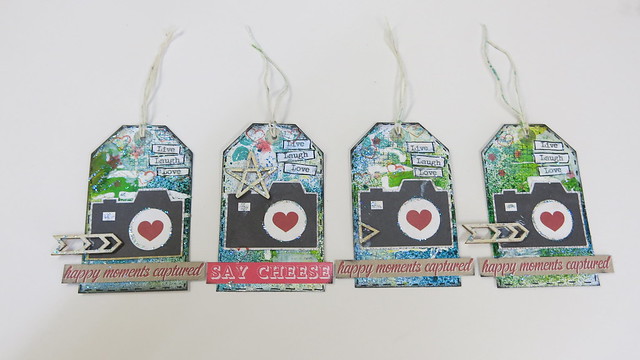
Mixed Media ATC Tags

Hello and welcome to my messy blog post today.
Yes, today be prepared to get inky, painty fingers.
No posh frocks allowed today!!

If you aren't familiar with ATC's. They stand for 'Artist Trading Cards'.
It's a mini piece of art created roughly on a credit card sized piece of card. The idea is that you have your details on the reverse and then you swap them with other artists.


It can be really fun and you can have a wonderful collection from your arty/scrappy friends. It's also a great way to use up your scraps and experiment with different techniques too.
If you don't want to give them away, you don't have to. I like to make up a few in one go (as I will show you here today) and then use them as card toppers, embellishments for scrapbooking and Project Life pages and pretty gift tags too. 


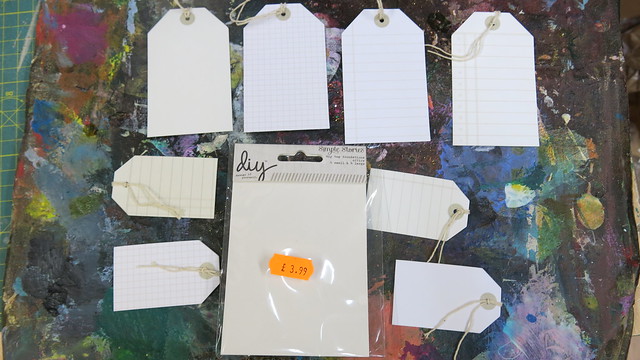
1. So to start you need your base to create on.
I have used these Simple Stories DIY tags. But you can also use plain tags, cardboard cut up and I've even seen these made on old playing cards. Anything goes.


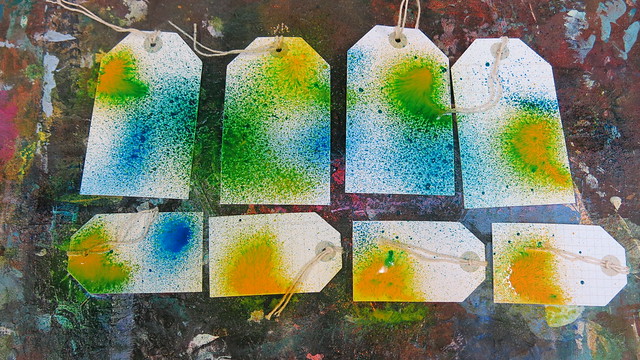
2. Place your bases on something that doesn't matter if it gets messy, as it will. I use an old piece of thick cardboard whenever I create. Now take some mists and spray.


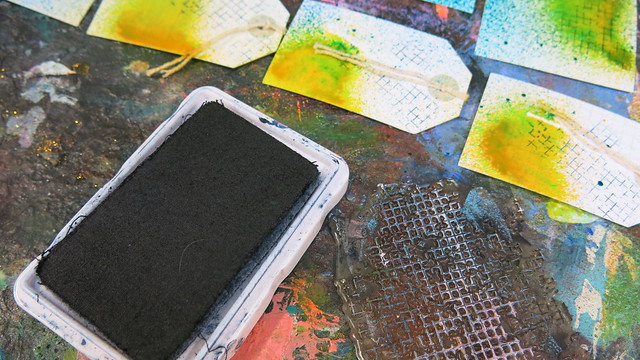
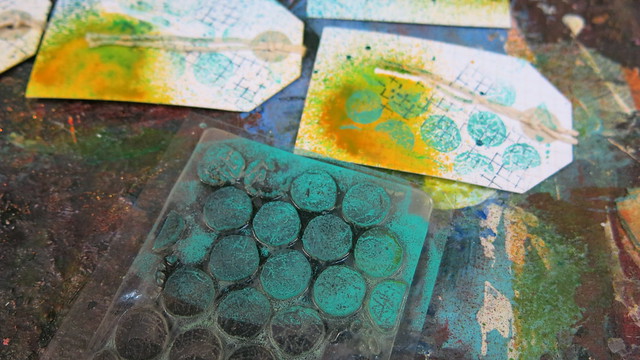
3. Once dry (I use a heat gun to speed this bit up) it's time to reach for your ink pads and background stamps.
 I have quite a few favourite background stamps from KaiserCraft. I find them very inexpensive and they work great. I've always been so pleased with them and highly recommend.


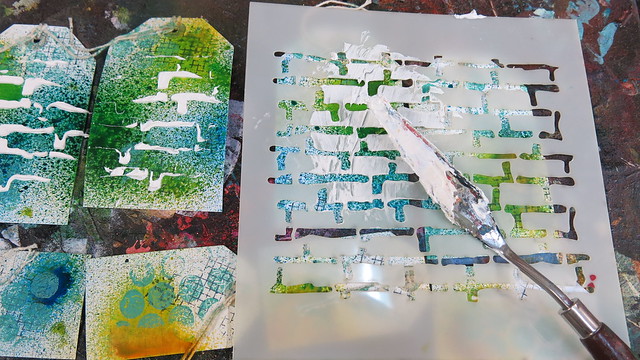
4. Next I use some moulding paste which adds a lovely texture to my tags. I use a palette knife (but an old credit card will do too) and a good quality mask/stencil. I mention good quality as this is important. Some of the thinner masks and also those with intricate details won't work quite so well with the moulding paste. It's thick stuff and needs to be able to spread easily across the mask.   I used the Papermaze 'Brickwork' mask here.


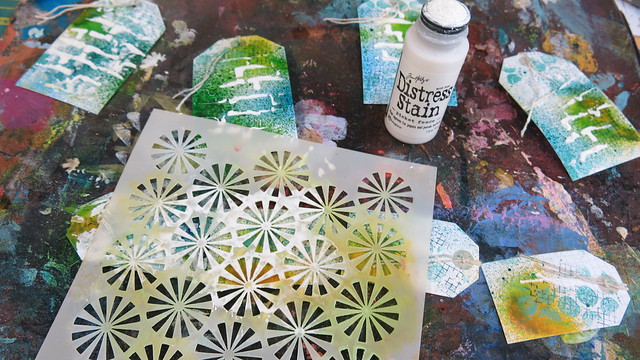
5. Once the paste is dry, I take another mask. A Crafters Workshop Mask, these are my favourites and I use a Tim Holtz Stain this time. It's all about creating layers.


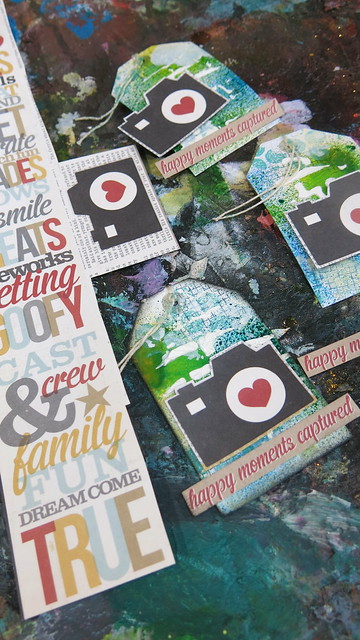
6. Now time for some pretty papers. Like I said before, this is a great way to use up your scraps. I've gone for one of my favourite 2014 collections, Simple Stories 'Say Cheese'. I saw from the CHA photos that they have a part 2 of this collection coming. I can not wait!!
I have taken my scraps and cut up bits and pieces and stuck on my tags.


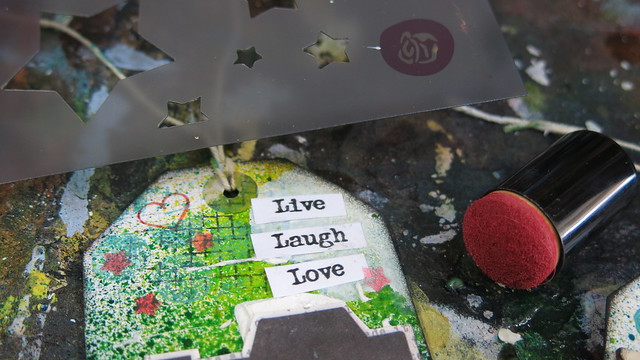
7. I want to add some more red to my tags so I take a red ink and use this Prima Star mask.


8.I have a few little saucers on my desk with bits and pieces in. I like having these when I'm scrapping. I always end up adding a  few random bits when I create. Today I grab some wooden embellishments that I spot. I also print off some words on my paper on to normal white print paper and cut in to strips to stick on my tags.

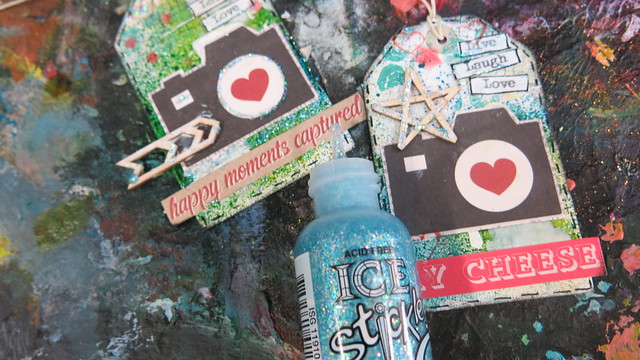
9.. To finish these tags need some sparkle. I love my Stickles. I use these on so many projects.


And that's it. My ATC's tags are finished.

I hope you've enjoyed this little step by step tutorial.
They are so much fun to make, there are no 'dos & don'ts'. It's all about playing, experimenting and having fun.

Lisa x


Monday, 19 January 2015

Trio of cards

Hi I am hoping to help kickstart your creative week with a trio of cards I created using the Amy Tangerine - Stitched collection
I shared a layout I created earlier in the month HERE

 
It's always good to have a stash of cards ready for any event and I kept these fairly neutral so they can be used for Birthday's, Anniversaries, Valentine's Day or anything really.
 
 
They are quite simple in their construction, strips and blocks of paper along with some elements from the Bit's pack.
 
 
I kept to the same design for all 3 cards and on this one the addition of the Squirrel and an acorn gives a fun feel that can be used for adults and children alike. I like how the doilies give another dimension to any card or project, you can either use some pre cut ones or you could use a die in your cutting machine. You can find a good selection from various manufacturers here in the shop.
 
Hope you have a creative week
Tracee x


Friday, 16 January 2015

2015's first crop!

Yes, tomorrow is the first crop of 2015!  Where does the time go?!  This month's kit uses Crate Paper's Open Book line - when these first arrived in the shop I knew I had to use them, they are beautiful.  The photo is of my youngest daughter celebrating her birthday 3 days after Christmas :) 


As usual there will be cakes, tea and coffee on tap, the whole day starts at 10am and finishes at 5pm, so if you'd like to join us, just drop me an email.  And, as we're in the middle of our January sale, there will be 20% off any shop purchases!

I also thought I would add in this post all the dates for this year's crops - if you picked up a list at the December crop, please note there was a mistake with next month's date - it is actually on 28th.

Hope to see you tomorrow!

 2015 CROP DATES
17th January
28th February
21st March
25th April
23rd May
20th June
18th July
15th August
19th September
17th October
21st November
12th December


Wednesday, 14 January 2015

Notebook...

Hi, Carol with you today…. Using some graphics 45 papers I decided to make myself a notebook to try and organise myself this year…

Using an old stamp set I stamped and cut two covers from board and some paper inserts….using a large die you could get the same effect…

I then covered the outer covers with the bold patterned paper, adding matching bazzil card to the inside panels.  For my pages, I added lines and some distress ink around the outside and stencilled lightly across the pages…. once this was finished I then bound my covers and pages using a bind it all.

I then decorated the front using washi tape, torn pieces of paper - this paper has large sunflowers on it, so I fussy cut a sun flower to add to the decoration, a Tando creative butterfly and a Ideology phrase slide….a book frame with a piece of the patterned paper inside and the number sticker attached finished off the front cover.


Inside cover - waiting for my notes….. a letter sticker from the set was added for each month...


a heart shaped stencilled page for February - what else will do?


See you soon…

TFL

Wednesday, 7 January 2015

Ways with Busy Papers and Bringing Sticker Sheets to Life

Wow, that was a long blog title : )
Happy New Year to you.
Here's my first blog post of 2015.

I had so much fun with the Carta Bella 'All Bundled Up' collection last year.
The colours are 'me'.
But when going through my stash recently I realised that I still had some papers left over, but they weren't calling out to me. They were beautiful, but a tad busy for my liking.
They were too good to leave to one side, so I decided to go with it and embrace the busy.
I thought that it would be a good blog post as I'm sure we've all felt like that about pretty papers at some stage.

Here is the LO, so you can see the papers in their finished glory.


The problem I find with busy papers is that they can detract from the photo. This is a shame as the whole purpose of scrapbooking is to display our photos and document our stories.
I find that by toning down the papers slightly can work a treat.
In this instance I used a glassine envelope that came as some packaging. Vellum would work in the same way. What I like most about this is that you can still see the pretty paper, but in a more subtle, toned down version. It no longer interferes with the photo.
You can see this here.


Another technique I like to use is by painting down some gesso. Again, the patterns can still be seen a little, but you are giving your photo a base.

Another good way to use patterns is to use smaller pieces of the papers.
Here I have layered them up. I used 2 larger rectangles at angles underneath the glassine envelope. I then added a smaller strip again to make it look like a third piece of the paper was there.


You can also use punches on these papers. Flower and circle punches are my favourite. The papers seem less overwhelming.

 Now for the sticker sheet.
I love adding the matching sticker sheets when I buy papers. But sometimes stickers need to be brought to life a little.

You can see on the photo above where I made a little strip of bunting from 5 small stickers from the sheet. I stuck them on with 3d foam tape and pieced a hole on each corner of each flag. I then threaded through some embroidery thread which was tied at one end in a knot and in a bow on the other end.

Next is the snowflake.


Look how pretty it looks. All it needed was 3d tape in the centre, some Stickles  and a gem in the centre to finish.
I have used the stickles glitter and small gems on quite a few of the stickers on the page. It makes such a difference.

And finally. A little hand stitching.


I used the alpha stickers on the sheet and stitched a little on each line.


 There are still a few of these papers and matching stickers etc...if you love this collection as much as I do. You can see them here.
Don't forget, there's 20% off right now too.

Have fun!!
Lisa x

Tuesday, 6 January 2015

Amy Tangerine - Stitched

Hi Tracee with you today, I hope you all had a good Christmas and that 2015 brings you all you hope for & more.
I am up to share my first layout of the year created with the Amy Tangerine line Stitched, oh boy I love this line.
 
 
Unfortunately the weather here has been so dull that the photo of my layout doesn't show the gorgeous gold of the "Good Life" title embellishment (and is also why I didn't include any close ups)
This title came from the bits pack, it is stuffed to the gills with the most adorable elements for your pages or cards.
 
I used a cut file on my cameo for the circle background and used some of the papers from the 6 x 6 pad to add pops of colour & the little chipboard heart on the camera was actually from the simple stories DIY Christmas collection, but it looked so sweet in the centre.
I hope my page has provided some inspiration for you and I will be back later in the month to share a trio of cards that I have created with this collection.

Sunday, 4 January 2015

Happy New Year!

Hello, Its Carol with you today wishing you all a very Happy New Year and I hope you all had a great Christmas.

I don't know about you, but, at this time of year, after the fast crafting of Christmas cards and tags over the last month I feel a little flat! I find it really hard to get motivated…so, for this post I have sat and played..

Whilst sorting out my craft room and putting away my christmas crafting pieces I found a piece of white cardstock, I added various paints, then added further paint using cut and dry foam thro' a stencil and then using rulers, pen lids, ends of pens added more paint to my cardstock, I then stamped a text  and graphic stamp and then added hi-lights with white and black pens… I then ended up with this:-


So, to make use of what I'd made I cut it up and made:-

I mounted my painty cardstock onto black card to make it pop  and then stamped a sentiment and cut out a tag before adding to my card using silicone gel.

I then decided to make some little notecards, these are 3.5 x 3.5" in size:-


Each card has been treated differently and guess what?

I still have all this left…

Thank you for looking today, see you soon.