Wednesday, 29 November 2017

set sail


this is a home decor piece i have been working on using the prima St Tropez collection
the wooden anchor i bought ages ago, saw it and thought that it would be great to alter.
The "set sail" was stamped with my free set of nautical stamps from a paper craft magazine
and then i went over that with my pyrography set so the words were etched into the anchor


starting at the base of my anchor i made a film strip from grunge board, which i coloured using distress oxides and mists and some stamping.I then cut  my photos to fit into the apertures layered this with patterned paper from the 8x8 paper pad. Added metal cogs and left over  fishnet chipboard. made a paper flower to the base.


working up to the top of the anchor, i made 2 more rolled paper flowers and some more chipboard. Finally at the very top another flower and a small glass bottle containing shells and the small circular waste from sequins in gold and silver.


Monday, 27 November 2017

G45 Winter Wonderland

Hello again, it's Anita with you today.
I have been playing with some sheets from the stunning festive collection from G45 called Winter Wonderland. It is a Scandinavian inspired collection with the addition of swallows, robins and traditional holly berries and poinsettias.
I thought for a change, rather than create a scrapbook page, I would make a bauble for our tree and a couple of cards to start off the pile I need to make ( I am so NOT a natural card maker and really struggle with them!)


So, I started with a large glass bauble which I removed the metal hook and top from until I had finished it. I cut lots and lots of strips from various sheets, with widths ranging from 1 cm to 1.5 cms and into lengths of 6 inches long.

Woodland Whimsy
Scandinavian Sampler
Yule Post
Pretty Poinsettia


I rolled each length up into tight little coils and then popped them into the bauble before they slightly un-ravelled. I carried on until the bauble was almost full, then popped the hanging hook and metal top back on. The top was a shiny silver and didn't really sit well with the vintage tones in the papers, so I cut a thin strip from one of the sheets and wrapped around the top. Then cut a few short lengths of organza ribbon and tied them onto the hanging hook to finish it off. I think I will probably make a set of 4 or 6 to put on our actual Christmas Tree when we get one. I always look forward to our annual visit to the local Christmas Tree farm to pick one.


These papers also lend themselves well to creating cards.....and as I am not really very good with cards, it was an ideal opportunity to use the Rustic Holiday sheet with its decorative panels to adorn the front of my cards. I also matted each layer with some Antique Gold mirri board.


And then popped on a few red flat backed crystals just to finish them off.
So now I need to pull my finger out and make a little pile of cards to give to my fellow crafty friends when we next meet at our Christmas crop.

,

There is a vast selection of paper collections from G45 over on the shop site and they cover all sorts of themes.....or if you specifically wish for the Christmas collection I have used today, you can find it here.

Warmest wishes
Anita xx

Friday, 24 November 2017

Elfis is in da house with Doodlebug

Hi Tracee with you today and I have a really fun layout to share using Doodlebug's Milk & Cookies collection. A couple of years ago I created my own human version of "Elf on a Shelf"  For 15 days I posed in different "Elf" situations, this was my 'Elfis' impersonation! I have never scrapped these photo's and the Milk & Cookies collection is such a fun line that the two went together perfectly.


Elvis was a superstar and so I cut out the Star circle cut file to be the main feature on my page, I put some patterned paper behind some of the bigger stars. Each month Vanessa sends some goodies to use on my pages and I save them all in a little bag and pull them out sometimes it's a couple of months later before I use them, the "Daily Details" frame was originally plain white cardstock and I used silver embossing powder to give it sparkle. I drew a  striped border all around the page as it didn't quite look finished somehow.


I used the sticker sheet from the Milk & cookies collection to make a little Christmas cluster next to my photo. I used a sticker from a sheet of Bella Boulevard "little bits" and cut it into pieces to spread across my page. 


In recent years I have collected American Crafts Thickers and my drawer is full to bursting, new ones keep appearing in the shop and I am almost powerless to resist, I was happy to use some these foam ones on my page. I added a wood veneer speech bubble that said "Perfect" but it wasn't right for my page so I covered it with some stickers to make it fit what I wanted, I quite often do this.

Hope you are all ready to craft for Christmas, if you are stuck for inspiration there are lots of lovely things in the shop to get your creativity flowing take a look here


Thursday, 23 November 2017

A Perfect Christmas with Echo Park #1

Hi all, it's Anna back with you today and I'm here with my first Christmas post with the lovely Echo Park ~ A Perfect Christmas collection
I will be sharing a few Christmas makes with this collection. I love Christmas and Christmas shopping. I love the feeling of buying or making something that I think the recipient will be really pleased with. 
First up, some Christmas tags! 
I began by using this sheet in the 'A Perfect Christmas' collection. I cut out a selection of the tag designs. 
Then I found some tags to use along with some Christmas embellishments.
I changed some of the string on the tags to gold twine and added some punched out Christmas shapes, wood and sticker embellishments. 


Now I just need to find some matching wrapping paper, pretty bows and ribbons and I'm ready to wrap my Christmas gifts!

Thanks for looking, I hope I've given you some festive inspiration for Christmas crafting! 
Have a great week. 
Anna 
X

Tuesday, 21 November 2017

Creative Journaling with Odds and Ends


Hello everyone,

I'm back this month with a post all about creative journaling, and how to put a page together when you've only got scraps left! I created this page primarily with some scraps from the Turn the Page collection, a few puffy stickers from Amy Tangerine, the ends of two washi rolls and the last of some enamel dots.


Before I start, yes I am a crazy dog lady who bought some hats for her dogs... I promise they were just for a photoshoot! Haha. Firstly, I used a strip of the #05 paper from Turn the Page, to create a flip-up insert in my creative journal. This maximises the space in my journal, and means I can create multiple layouts per page! To do this, I cut a strip to size, and secured it at the top of the page with washi so that it can flip up... so simple! Later, I will reinforce the washi with some selotape to ensure it stays in place.


My layouts are always simple, and quite similar. I adhered some doilies at the bottom of the page, and layered my photos on top of these. I felt that the page needed a title, so I used some old stickers from Simple Stories in the bottom right-hand corner. I then put together some embellishment clusters with the puffy stickers, washi and enamel dots.


To finish off the page, I stamped the date and doodled around the edge. I'm sure I've said it before, but I really feel that a few doodles finish off a layout when you just can't quite figure out what it's missing.

So there we have it! I hope you're all well and that you enjoyed my photos.

ChloƩ

Youtube | Instagram


Friday, 17 November 2017

Bo Bunny - Christmas Carousel

Hello, Lynn here today - to show you the fun I have been having with the Bo Bunny - Christmas Carousel collection, and an idea for counting down to the big day. The delightful papers have some lovely images in soft shades of pink, yellow, green and blue. For my first Christmas project this year, I have created an Advent Calendar, each day revealing memories from previous years in the form a tiny photograph.


For the background I used a sheet of  'Ocean Blue' Bazzill cardstock. Then I cut 0.5" off the bottom and one side of 'Magic' paper, to maintain the images at the top of the paper. I inked the edges with Victorian Velvet Distress Ink and mounted it onto the centre of the cardstock. Then I set about fussy cutting baubles and other details from the 'Believe' paper. 

I cut out all the numbered baubles from 1 to 25, then several more bows from other baubles.  Then I cut more images from the 'Wonder' paper. The images were inked with Distress Inks using the following shades -Victorian Velvet, Peeled Paint, Fossilized Amber and Weathered Wood.

Having printed some small photos, I cut circular images from them, each one about 1.25" in diameter. Once I had arranged everything on the background I took a photo on my mobile phone for reference, and drew a tiny pencil mark behind the hanger on each bauble. Then with a piercing tool I made a hole in the centre of each hanger and through the corresponding pencil mark. I attached each bauble to the background using a small gold brad. 


A photo was then glued in place under each paper bauble, making sure it could not be seen when the bauble was in place. With the intention that one bauble be swung aside each day to reveal the photo underneath. 

The next job was to embellish the images. Paper bows were added to the top of the baubles, and Stickles & Liquid Pearls were added to give sparkle and dimension. A coat of Glossy Accents gave a glassy effect to the snow globe and the panes of the lantern. I used Baker's Twine to add tiny bells here and there, and to string the mitts together. 

Strings were drawn in place with some glitter gel pens. Then I cut a title (greeting) from glitter card using the Crafter's Companion 'Merry Christmas' die and added this to the top of the layout. 


Finally I stiffened the whole page by glueing it to a sheet of 12" x 12" cardboard, from the back of a pad of papers, which made it sturdy enough to display on this small easel.

Thanks for looking
Enjoy the countdown to Christmas.
Lynn x

Monday, 13 November 2017

Very Merry.....with Simple Stories.

Hello There, it's Anita here with you today with my first posting for November.
I have used some papers from the Very Merry collection by Simple Stories this time and teamed them up with a photo taken in the lead up to Christmas 2016. (apologies for the poor quality of the photos, the lighting has been dreadful with such dreary and drab weather)
I had just got the Snapchat App on my phone and had great fun playing with the various filters on there that add some really cute and often funny features to your faces ( not to mention some random ones that are just downright bizarre!!!).
We were heading on a family trip out to do some Christmas shopping, but our youngest Daughter was busy elsewhere, so we sent her a Snapchat message of my eldest Daughter and I.


As with all collections from Simple Stories, there are various double sided sheets. Some are purely patterned each side but there are also some sheets of Journalling elements plus Vertical and Horizontal Elements and of course the various sticker sheets and Snap Cards.

I based the layout on a sheet of  Seasons Greetings
I also cut a couple of Vertical Elements out, one of which I used as a photo mat.


I then cut various flower and leaf clusters out from a sheet of Peace on Earth 
and placed them around the page in various places. I cut up a few random
rectangles and stacked them to look like presents and tied them up with some red organza ribbon.


Various papers blooms, glittered Ivy leaves, Sequins and MDF laser cut shapes were added just to finish off the page.

 I have several other Snapchat photos that I have had printed and I am looking forward to scrapping with those too!
 I will have to have a look and see what other Simple Stories Collections will work well with them.....there are so many various sets available at the SHOP covering all different themes that I am sure finding something suitable will not be a problem.

Hope you have had lots of scrappy fun so far this month and I look forward to catching up with you later in November,

Warmest Wishes
Anita xx


Friday, 10 November 2017

November Crop

It seems like only yesterday that it was October's crop, but November's is here already, a week earlier than usual!  This month's crop kit features a mix of blue papers. 


We're at our usual venue, Otley Village Hall from 10am until 5pm with homemade cakes, refreshments, a variety of punches & dies and shopping of course!

Monday, 6 November 2017

photos by the beach

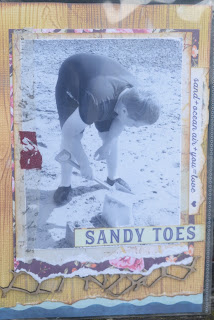
Firstly sorry in my delay with posting another project with the stunning  prima st tropez collection, but life just got in the way and my scrapbooking had to take a back burner. So i haven't done a project life page for sometime and i wanted to use up my scraps from my previous layout. Each 6x4 mat starts of with some beige card stock which has been dry embossed with an embossing folder and then distressed with the distress oxides, water and some splatter stamping.
In 4 of the pockets i have placed photos but mounted them on the stunning patterned papers that are from the 8x8 paper pad and some of my left over 12x12 paper


Here is a close up. The bottom of each of the mats is torn, tissue tape and strips form the patterned paper added. along with some cotton and metal embellishment. The other pocket i have stamped a journal block and die cut "photos by the beach" from gold glitter card stock using some of the fantastic tim holtz/sizzix word set.


Another close up of one of the 6x4 pockets


Under this mat i have used some of the die cut chipboard fish net from the previous layout and more quotes from the paper pad


This stamped image is from a free set of stamps in a paper crafting magazine and i coloured this in using a water brush and the distress oxides. Created a frame from one of the papers and added twine for texture.
It was nice to do a project life page and uses up multiple pictures of the same day. Now to get started on my next project.