Here are my first two layouts:
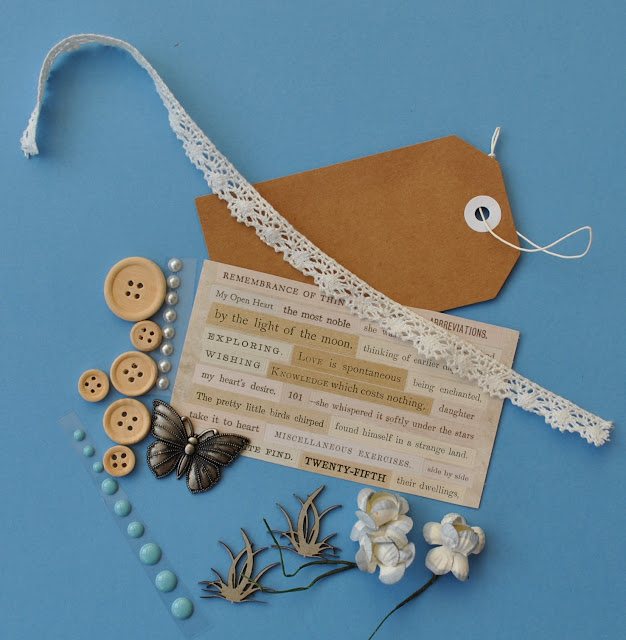
Before looking at how the layouts were made, here is a list of what you will receive in the kit.
Patterned papers:
Authentique - Poised - #1 Dress Form
Bo Bunny - Bee-utiful You collection - Charming
Ciao Bella - Broccato Estense - Rinascimento Estense
Kaisercraft - Journey collection - Globe Trotter
Pink Paislee -Indigo & Ivy - #02
Stamperia - Blue Land - Flower
Bazzill Cardstock - Twig and Wildberry Pie
 |
| Reverse side of patterned papers |
 | |
| Bazzill Cardstock |
Admiral, Candle Glow Medium, Brown and Stonehenge
 |
| Embellishments |
Daring Duo
This layout shows a photo taken at my daughter's wedding in July. It features my two great nieces, climbing a tree in their wedding finery!
This layout was inspired by a Page Maps Sketch from July 2019.
I started off with a sheet of scrap paper 12" x 12" on which to mount the cut down papers and card. I cut the Stonehenge Bazzill into a strip 12" x 2.5" to place along the top and a piece 12" x 3.5" to place across the bottom. Then I machine stitched in navy all around the page about 1cm in from the edges.
Making sure the stripes and the script run horizontally, I cut the Globe Trotter paper as follows:
Cut off and keep the manufacturer's strip.
Script side piece measuring 12" wide x 7" deep
Strip side 5" wide x 12" deep
I stuck the stripe paper in place (Avoiding getting adhesive near the edges to allow for stitching and tucking elements under later.) - about 1.5" in from the left. I stitched around the edges. Then I placed the script paper across the centre to cover the scrap paper gap. This is about 2" down from the top, again I stitched around the edges.
I tore a sheet of lined paper from a spiral bound notebook, and trimmed it to 4.5" wide x 5.5" deep and stuck this on the left side of the layout, over the script paper. I mounted my photos onto the Candle Glow Medium Bazzill, making a very narrow border to make them stand out from the navy paper. These were stuck side by side to the right of the lined paper.
Then with the quote from the manufacturer's strip, I divided this up and placed the words in a row down the right side of the lined paper. Then I added my journalling to the left of the lined paper.
Using the Tim Holtz Sizzix Thinlits Crochet die set, picking the large and small die of the same lacy design, I cut my lace from Bazzill. The smaller die and Admiral Bazzill and the larger die from Stonehenge Bazzill. I added pieces of the Admiral lace wither side of the stripe paper, and the Stonehenge lace along the bottom of the lined paper and photos.
I added the pearls from the kit, adding a few smaller pearls from my stash.
Finally I cut my title from more of the Admiral Bazzill, using a Tim Holtz Bigz XL Handmade Alpha die.
Notre Dame
This layout shows two images from our Paris trip in 2004.
To start I gutted the Wildberry Pie Bazzill, creating a frame 1" wide all the way around.
I inked all the edges with Chipped Sapphire Distress ink.
Onto this I placed the Ciao Bella paper, please note this paper is 12" x 12", but the measurement includes the manufacturer's strip on one side. I tore around the edges of this paper and the resulting piece is about 11" x 11".
To make the central panel, I tore the lace area from the Stamperia paper to make a panel 11" x 2.5", then I added narrow strips torn and left over from both papers and attached these either side of the wider strip. I wanted to show a variety of different designs from the papers. The whole panel was attached about 3.5" in from the right side of the edge of the layout. I trimmed the right side of this panel with the cotton lace from the kit.
I placed my photos where I was planning to stick them later, so I could arrange the other elements. I fussy cut the flowers and butterflies from the Stamperia paper and placed them onto the layout.
From the remains of the patterned paper I die cut some Wildflower Stems using Sizzix Thinlits dies. I also cut some Vintage Lace edges to trim the top and bottom of the panel. I used a Sizzix Decorative Sizzlits Die. Then all this was stuck in place with the addition of the three paper flowers from the kit.
I used some Scrapiniec Die Cut Decorative Chipboard pieces from the shop to add to the page - a circular one to highlight the lamps on the photo, and others top and bottom of the panel and one in each corner.
My title was cut from scraps using the Tonic Studios Windsor Alphabet dies for 'Notre Dame' and Pink Fresh - Indigo Hills, mini puffy alpha stickers for 'Paris'.
Finally I added some Stickles to the flower centres and butterfly wings, and some Nuvo Crystal Drops dots around the leaves.
That's all for today, I will be back with another pair of layouts from this kit in about two weeks.
Thanks for looking.
Lynn x.


2 comments:
Really Lovely pages Lynn, I especially love the blue one....just gorgeous xx
I don't know how you come up with so many lovely layout ideas each month Lynn! These are great and 2 very dirrent layouts from the same kit. x x
Post a Comment