Lynn here today with the beautiful July Kit and
my first pair of layouts for this month. The pretty kit has a selection
of dreamy, watercolour effect papers, which are great for feminine,
romantic, family history (and many more) layouts. The kit is now
available in the shop or online.
For today's layouts I have chosen floral papers and embellishments.
Patterned paper:
P13 - When We First Met collection - #03 & # 06
Prima - Watercolour Floral collection - Dreamy Florals & In the Water Garden (both foiled)
American Crafts - Maggie Holmes' Garden Party collection - Blossom in Blue
Pinkfresh Studio - Keeping it Real collection - Deep Breath
Bazzill Bazics Cardstock - Avalanche & Boysenberry Delight
Reverse side of papers:
Sheet of 49 & Market rubons, 12" washi tape, 2 Prima Waltercolour Floral flowers (1 glittery), 6 wooden hearts, 1 star, 7 pieces Prima Watercolour Floral ephemera, 5 silver heart stickers, a pinch of sequins
Extra Bazzill Basics Cardstock pack:
Romance, Wildberry Pie, Aqua, Heidi
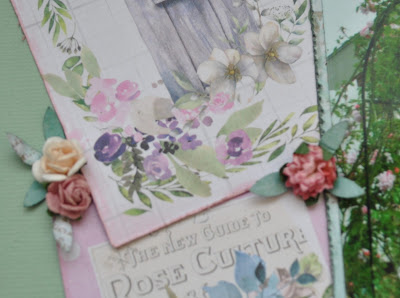
Roses Around The Door
- The photo for this layout shows the progress of the climbing roses
around the arbour in front of our door, after three years.
The base for this page is the Aqua Bazzill. The papers were distressed and inked with Iced Spruce Distress Ink.
With the sheet of 'Dreamy Florals' paper, I picked a few of the images I wanted to use and cut them out. Then preserving a few more images for later use, I backed my photo with the remains of this paper. With a circle template, the photo and images arranged in place, I outlined, with pencil the space where I wanted the stencil to show.
The photo and images were set aside. With the Tim Holtz, Layering Stencil - Scribbles
(I think this looks like roses.) and texture paste mixed with Distress
Stain - Worn Lipstick; I worked this through the stencil to fill the
space marked out. I altered the strength of the stain to vary the colour
of the 'roses'. I also made two small areas of stencilling on the edges
of the cardstock - I set this aside to dry.
Once I had adhered the images and photo in place, I added a selection of paper roses from my stash (in shades of pink and cream). I worked around the stenciled area, between the images. A few roses were also added to the areas of stencilling on the edges of the cardstock.
I scattered a few roses among the images too. The title was made with some scraps of Pinkini Bazzill from a previous kit and some Sizzix alphabet dies. Finally I added the date with some alphabet stickers.
Christine - Another black and white negative found among my Dad's collection - this time his cousin Christine. Another relative found to add to my family scrapbook album.
I started by making a 2.5cm frame with the Boysenberry Bazzill. Over this I placed the P13 - #03 paper, which I trimmed by 0.5cm on all four sides. I cut four notches into the edges of this
paper and trimmed behind these with a little lace. I distressed the edges of all the papers and card.
With Distress Oxide Inks in Dusty Concord and Faded Jeans, I brushed some colour onto the background, then splattered it with water, and black ink.
The
photo was mounted onto scrap white card, then onto Boysenberry Bazzill.
I placed this where it was to go and arranged some burlap, corrugated
card and cheesecloth under the photo. Once arranged it was all stuck in
place.
Then
came the embellishments - I created two large clusters and one smaller
cluster of flowers by using a selection of the following:
Fussy cut rose clusters from P13 - #06, inked and raised on 3D foam pads
Two Prima paper roses from the kit
Additional paper flowers from my stash
Silver stamen
Rose ribbon
Owl Charm and purple Baker's Twine
Sizzix
Thinlits - Tim Holtz Wildflowers set and Boysneberry Bazzill and scraps
of P13 - #06 - all inked with the Distress Oxide Inks.
Finally I added the title - 'Christine' with some alphabet stickers.
That's all for today, back with more from this kit soon.
Thanks for looking
Lynn x


No comments:
Post a Comment