Friday, 11 November 2022

Pinkfresh Studio - Simply The Best - Love This!

Hi everyone,

Claire here and today I'm excited to be back with a new layout using the Simply The Best Collection from Pinkfresh Studio.

I've heard it said that this collection has quite a masculine colour palette - It is packed full beautiful tones of blue, green and hues of neutral browns and creams that really do inspire you to scrap anything and everything - I just love it. I think it is one of my favourite collections of the year!

For my first layout, I'm focusing on THAT paper - you know the one - full of blue diamonds in an ombre blue colour. I am slightly obsessed with this paper. It's called Just Chill.


As soon as I saw this paper, it reminded me of a 3d wall pattern that draws you right in. I decided to add to the dimension I felt but cutting two of each shade of squares from the paper and folding them into quarters to create a pyramid effect and cascading them vertically down the page.

Once I had rough placement in mind, I added gesso and three shades of ink, stencilling and splattering over them in the same shade once dry:


To secure the squares to the page, I overlapped them and added Glossy Accents just to the corners of each square and left them to dry before embellishing.

From the Cardstock Ephemera Pack  I used the green date strip as an anchor down the centre of the page, from which my tags would extend from. These were fussy cut from the Happy Times paper.


Next, I added a frame from the Chipboard Frames to back my photo before raising on foam and adhering to the patterned paper squares.


The Today's Stories and Adventures subtitle is from the Ephemera Pack, and I added more embellishments from the Puffy Stickers and Cardstock Stickers packs.


The puffy stickers were raised on 3mm foam for extra dimension, whereas the cardstock stickers I added with small foam pads as they were easier to manoeuvre on to of the raised squares.


For a little bot of contrast from the squares and harsh edges, I added some clusters of enamel dots and a round chipboard flair before finishing off with some black and white splatters.


I hope you like how it turned out. I enjoyed making this so much! Can't wait to pop back with another layout later this month.

See you then!

Claire xx
@Scrappysoulmate


Wednesday, 9 November 2022

November Crop

 Our crop this month is on Saturday 12th November, this coming weekend.  We have a lovely kit designed for us by Janina.... 


There will be the usual array of dies and punches available, plus homemade cakes, tea and coffee - drop us an email if you'd like to come along!

Monday, 7 November 2022

Paige Evans ~ Garden Shoppe #3 🌻

Hello! It’s Anna back on the blog today and I’m sharing my third and final layout using Paige Evans Garden Shoppe
You can find this collection in the Papermaze shop here.
I have found this collection to be very versatile, it is suitable for a variety of themes of scrapbook pages ranging from Summer Sunflowers to Autumnal Leaves. 


To create this layout, I used the B side of Paper #19 as my base. 
I then used my silhouette cameo to cut out a sunflower cutfile, which is also by Paige Evans. I backed the cutfile using Paper #7 and Paper #14 and some scraps of brown cardstock for the centres of the sunflowers. I trimmed it down slightly and adhered it to the left side of the layout.


I had lots of pictures that a wanted to use of a visit to some sunflower fields during the summer. So I decided to cut them out in circles with the hope of using at least 3 or 4, but I’ve ended up with 6! To cut out circles, I always use my trusty Creative Memories circle cutters or circle punches depending on the required sizes. 
I mounted the photos using Paper #7 and then distressed the edges. 


I chose some coordinating flowers and leaves from the floral ephemera to tuck in behind several of the photos. 


I added some word sentiments from Paper #23 to add a little detail to the top right side of the layout as well as adding some in between the photos. 


To finish the layout off, I added a title using coordinating alpha stickers by LDRS Creative. Unfortunately in the photograph they aren’t showing up very well, but in real life they coordinate well! 


Thanks so much for looking! 
See you soon with a brand new collection. 
Anna 
X


Friday, 4 November 2022

Carta Bella Welcome Fall - Remember, Remember the 5th of November

Hello, Karen here today with another layout to share using the Welcome Fall collection from Carta Bella. 

Here in the UK, tomorrow (November 5th) is Guy Fawkes Night also known as Bonfire Night when we celebrate a failed gunpowder plot in the 1600s to blow of Parliament's House of Lords. We mark the occasion with bonfires, fireworks and sparklers. Every year I try unsuccessfully to photograph the fireworks but some years ago I did manage to capture in a rather blurred photo my young daughter's thrill of the sparklers and that is the photo on today's layout.

Onto a sheet of 12x12 white cardstock I layered several pieces of patterned paper and card - an 11.5" square of the 3x4 Journalling Cards  (B Side), a 10" square of white cardstock and an 8.5" square of Fall Flannel paper which was matted with a thin border of gold mirror card. Before sticking down the journalling card paper I choose a card form the centre of the paper and saved this to use on the layout later. The hole in the paper where the card was removed is thankfully hidden by the other paper layers.

I then used one of my favourite methods of adding texture, by machine stitching along the edges of all the papers with white thread.


Using my Silhouette Cameo I cut a star border cut file by Paige Evans. The border was cut twice - once in white cardstock and once in black cardstock. The two die cuts were then layered slightly offset on top of each other, to create a shadow effect, and when placed on the layout made the cut file stand out more against the multi-coloured background. Some of the stars were backed with gold mirror card and some were left open. The cut file was then place diagonally across the layout and one extra star was also tucked into the left side of the layout.

My 6x4 photo was matted on gold mirror card and placed on the layout with some 3D foam underneath for dimension.


I created a tag from the 3x4 journalling cards which I had saved earlier. I matted the card on gold mirror card and added a hole reinforcer and black and white Bakers Twine. The tag was tucked behind some of the stars on the right side of the layout.


The title was added to the bottom of the layout.


'5th' and 'November' were die cut from black and white cardstock and layered in the same was as the stars to create a shadow effect.


Additional words were created with letters die cut from black fun foam. I like to mix fonts, etc when creating titles to give some extra interest. 


Finally I sprinkled a few gold sequins here and there.

I really enjoyed creating this layout and have loved working with the Welcome Fall collection which can be found here in the shop.

Take Care, Karen x x

Wednesday, 2 November 2022

October Papermaze Kit - Part 2

Lynn here today, with my second set of layouts made using the Papermaze Kit for October. A beautiful collection in subtle colours. Please see the shop or website for details of the kit and other items used.

Before looking at how the layouts were made, here is a look at what's in the kit. 
For full details, please see the shop website or Blog Post Part 1


Conversation with the Sea - A recent day out at Aldeburgh when we walked along the coast to Thropeness for lunch, then back to the Yacht Club at Aldeburgh for tea. A round trip of 12K with pebble collecting and paddling along the way.


I used Brief Glimpse paper as the base for this layout, I cut off the detail strip and placed this across the paper, about 7cm up from the bottom.

From Rain Bazzill, I cut two rings of 16.5cm circumference. I overlapped these and placed them in the centre of the paper.

With a Simple Stories Stencil - Waves, I created waves in the centre of the circles using Distress Texture Paste mixed with some Uncharted Mariner Distress Oxide Ink. Allow this to air dry.


I mounted my photo onto Almond Cream Bazzill and wrapped some blue twine around the base of the photo, I tied this in a bow, catching the Thought Token into the knot. I placed this to the lower right of the circles.

From the Grandma's Attic #05 paper I cut three of the tickets. I punched a hole in one end of each token, and applied a brad to the holes. I wrote my journalling on the tickets then stuck them to the bottom left of the circles. I threaded a length of twine through the eyelets and looped it loosely, sticking in place in a few spots. 


With some sewing thread and a needle, I stitched eight small silver charms along the inner side of one of the rings, so they hang down and swing a little.


I die cut letters for my title, and arranged them around the circles, adding s touch of sparkle with Nuvo Glitter Drops - Silver Moondust.


Finally, I used some wooden numbers from my stash to add the date.

You're the Best - When Morty first arrived he liked to place himself inside small spaces, like shelving and this basket. 


I chose the Fluttering Trio paper for this layout, and trimmed 1cm from each side, then distressed the edges. I used a Martha Stewart border punch to create small clusters of pattern on three of the edges. The paper was glued in place over the Aloe Vera Bazzill. 


With the Dusty Attic Dragonflies Stencil, Faded Jeans Distress Oxide Ink and Distress Texture Paste, I added tiny insects over the top of the layout.

From the Grandma's Attic #05 paper, I made a mount for my photo from the floral side, I placed the photo to the right of the layout. I cut six of the tickets from the flip side of the #05 paper and placed them to the left of the photo.

I discovered 49 & Market Rubons in the Papermaze store this weekend, and they are a delight to use. I chose Artistry Serenity 12" x 12" Sentiments to use with this layout. I rubbed on the word 'BEST' to the bottom right of the layout. 


I applied two smaller sentiment rub-ons, one below the big 'BEST' rub-on and one over my tickets.

I used some letter stickers to add to my title and I found a Kaisercraft Curio in my stash which was just the right colour and sentiment for the layout. 


Finally I added gems from the kit to the punched areas, and some dots of Nuvo Crystal drops to the background.

That's all for the October Kit. I'll be back with the November kit soon.
Thanks for looking.
Lynn x

Monday, 31 October 2022

Pockets, Tags & Layers

 Hello, Lisa here with pockets, tags and layers.


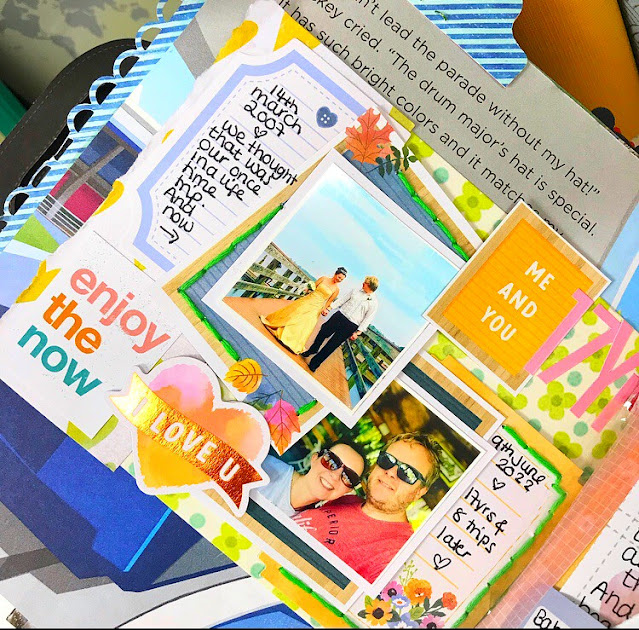
I'm creating in my Disneyworld journal today.

It's not a disney page though it's more of a memory page. 

We went back to the resort that we used to stay in years ago and it's also where we got married in 2007. So it's more of a 'then & now' page. 


I've used the 'Garden Shoppe' collection from Paige Evens here.

It was this paper here that inspired me and caught my eye.

I layered some of the frames from this paper with some of the coordinating die cuts.

I took some green embroidery thread and sewed around the frames to add more texture and colour.

I also used some alphabet stickers from Doodlebug Designs.

These are my favourite alpha stickers.


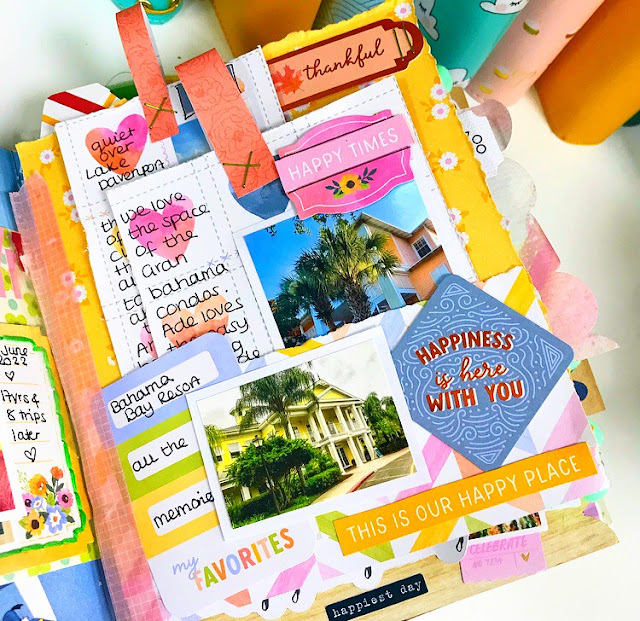
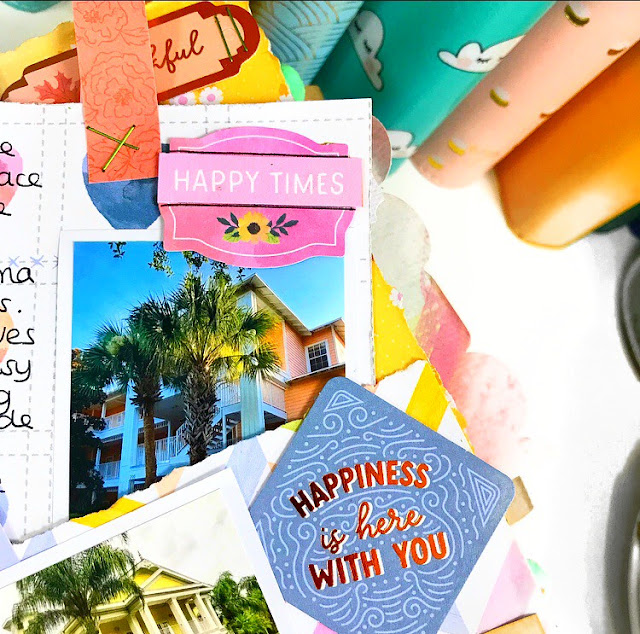
Over the side I had a few photos and some stories to tell, so I created a pocket and some little journal tags.


I distressed the edges and stapled a loop from scrap paper to the top of each one. 

This way they pull out of the pocket easily.


The tags flip over and I've journaled and added more die cuts.


I've also cut up some word strips from one of the patterned papers and added too.


I'm so happy with this page and love how easy this collection made it all come together.
I do have a process video to go with this page here.


Happy scrapping

Lisa x

Friday, 28 October 2022

Hitchin Lavender - Paige Evans’ Garden Shoppe Collection

Hello, it’s Rebecca with you today sharing my final layout created with Paige Evans’ Garden Shoppe collection. I’ve used this collection to document a few summer photos now, as the bright colours are perfect - but I also think this collection could work for Autumnal layouts too - so that’s my next challenge! You can shop the full collection here.


I started with Paper #19 and cut a strip about 7 inches wide, tearing it diagonally along the bottom to add some texture. I placed this centrally onto a sheet of Premium White Cardstock - sticking the top flat, but raising the torn edge up on foam pads. To the top of this, I added the flower border sticker from the Accent and Phrase Stickers. I then replaced all the internal flowers, but raised up on foam to add a bit of interest. 


I matted my photo with a layer of the B Side of Paper #19 to coordinate with the colours in my photo, and placed it onto the layout, raised up with foam. 


I then moved on to embellishing the layout. The photo I’m documenting today is of my little boy sat among a field of lavender - so I wanted lots of florals on this page. The Floral Ephemera pack was perfect for this - I added a few flowers to the page, arranging them in  three clusters to create a visual triangle around my photo, and curled the edges up to add dimension. 


For my title, I selected some of the alphabet stickers from the Sticker Book. I went for a mixture of colours for ‘Hitchin’ to coordinate with the background paper, and then focused on the purples for the word ‘Lavender’. (The Lavender Farm is in a place called Hitchin!)


To complete the layout, I added a sprinkling of sequins among my floral clusters to add a bit of sparkle. 


Thank you for reading! I hope you’ve enjoyed this layout and the previous 2 I’ve created with the Garden Shoppe collection. I’ll be back next month, creating with Simple Stories ‘Harvest Market’ collection. 


Take care,


Rebecca x

@preciouspagespapercraft