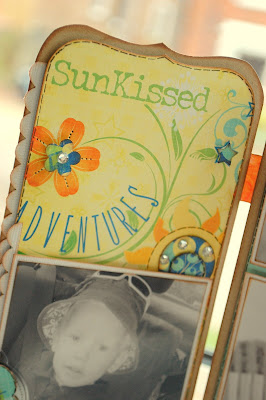
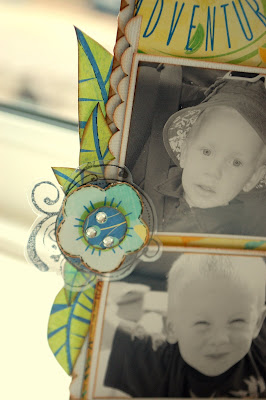
I wanted to move away from making pages for a little while and have a go at something different. So i decided to make one of these. Not sure of the name so i am going to go with frame!
Here is how it is made...
Step one: Using a piece of kraft card, i cut out the templates. The size that they are... 23.5 cm by 9.5cm. To make the scallop edge at the top i used the large die from the label nestabilites set to draw round.
Step two: i inked around the edges with brown ink.
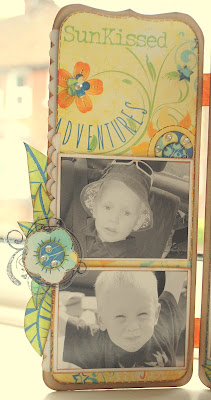
Step three: I chose this pattern paper from the Fancy Pants Summer Soiree for one reason. It has alot of different details on it and that makes life easier when decorating something. You dont have to start from scratch you can just embellish and change what is on the paper in front of you.
I cut out the same pattern as with the kraft cardstock but half a centimetre smaller on this pattern paper. I then adhered it to the kraft card, but with pop dots to make it stand out.
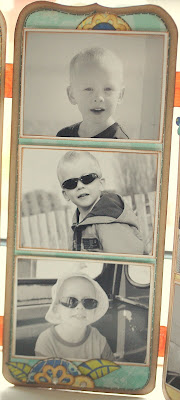
Step four: I printed off some photographs that i love and backed them with white card and adhered them with pop dots to the 3 pieces of card.
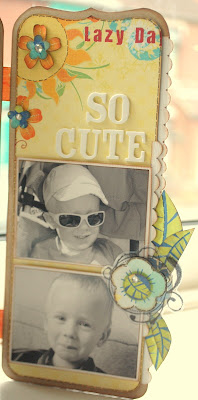
Step five: after that i embellished the whole thing using punches and bits cut out from other sheets of the Summer Soiree line. I used the pattern on the pattern paper as a guide as to where to add my bits and pieces.
Apart from printing out the photographs this frame didnt cost me very much:
3 sheets of pattern paper
2 sheets of card
some letters from my thickers stash
a basic grey stamp which i already had.
You can find all the Fancy Pants Papers here that i used - Fancy Pants
It is really easy to make and makes a really nice present for someone :) thanks for popping by!
Wednesday 29 April 2009
Sunday 26 April 2009
Fancy Pants.
There are some paperlines that i love everything and there are some lines that i only like certain ones. Fancy Pants is one of the ones that i love all their lines. These ones are no exception.
The new lines that have arrived at Papermaze are bright, colourful and very different.
The first line that i used was called Summer Soiree. The colours are so bright! but not to bright that you could have trouble using them. You get their usual gorgeous sheets of little cards,which i have had to buy two off as the pattern paper on the otherside is gorgeous and i used it as a full sheet!!! lol!
Here is the first page done using this line... ( and before you say it, yes i know i left out a 's' on the word sunshine, need to fix that!!!) Sometimes ( not often) i do a page with a photo that as no story behind it it is just a photo that i love and this was one of those times.
The paper that i used as the base for this page is this one...The new lines that have arrived at Papermaze are bright, colourful and very different.
The first line that i used was called Summer Soiree. The colours are so bright! but not to bright that you could have trouble using them. You get their usual gorgeous sheets of little cards,which i have had to buy two off as the pattern paper on the otherside is gorgeous and i used it as a full sheet!!! lol!
Here is the first page done using this line... ( and before you say it, yes i know i left out a 's' on the word sunshine, need to fix that!!!) Sometimes ( not often) i do a page with a photo that as no story behind it it is just a photo that i love and this was one of those times.
Hence why i had to buy two sheets!!!
The frame round the edge was cut out from this sheet...
I cut out the green part of the frame and used it to frame the photo on the page. I distressed the edges and inked them.
The leaves and flowers at the corner of the layout came from this paper...
At first glance this paper seems very loud and bright abd not one that you would always use, but it is a great one for cutting out the different parts of it, which i have done on this page.
The top of the layout seemed really bland and boring so i added these little butterflies with a single gem and inked round the edges just to add some detail to that part of the page.
The next line that is at the shop is the Kraft Cuts line. I was a bit apprehensive about this, they looked sooooooo gorgeous online and i had set myself up so i wouldnt be disappointed if they were not that nice in real life.
But they are gorgeous! seriously gorgeous!!!! I am the biggest fan of the Kraft colour and the muted colours on the paper works really really well...
The one thing i do love about it, is the thickness of the card, really thick and strong.
Here is the page i did using the Kraft Line...
I started off with this paper...
I used some of the die cuts from this sheet. LOVE THE TREE!
And i used this paper at eh backing for my photos...
Vanessa also used this line as well, she used a Technique Tuesday swanky frames tile to cut a piece of the Princess Sky paper, and backed it onto some bright pink and green bazzill. She also used some of the die cuts from the same sheet, and here is her finished page.
The title is a mixture of Scenic Route chipboard, Banana Frog stamps and Making Memories tiny alphas. There were a few die cuts left on the sheet so Vanessa used one of these and some scraps to make a quick card!
Thursday 23 April 2009
Photo collages
If you are like me (a keen scrapbooker but not the best photographer in the world!), you will probably find that a lot of the photos you take are less than perfect. The ratio of mediocre shots to standout photographs tends to increase on nights out when I'm perhaps not entirely in control of all the settings on my camera! However, its a shame not to scrap an event, just because all the photos are pretty poor.
This is where photo collages come in. Of course, its simple enough to print a lot of photographs out in different sizes and move them around on the page yourself. But it doesn't give you a lot of room for trial and error. So using a photo software package like Picasa is ideal. The software is free to download, and allows you to view all of your photographs and upload them easily to web albums. But it also allows you to create different types of photo collages which are easy to manipulate and change around until you are happy with the result. You can set the overall page size too, so you don't end up printing anything too big to fit on a scrapbook page.
The positives of this type of software is that you can easily change the arrangement and size of the photos, as well as their relative angles, without printing them out first. Here is my first attempt at a collage:
And here is how I used it on a page. I actually printed off two of the same collage so that I could layer up some of the photos on foam pads for added dimension. The photos were taken on Valentines night this year - we went out with friends, and ending up messing about with the camera in the pub. The photos were naff, but put together in a collage, they get across the fun feel of the evening.
The Cosmo Cricket Girl Friday papers are gorgeous - the colours are vibrant and fun, perfect for celebration or girlie layouts. One of the papers also has lots of different words and phrases which would be perfect for embellishing. On this layout though, I made use of the cutout strip at the bottom of the paper, which is also very pretty, to create some custom embellishments - a very thrifty technique in these credit crunch days!
Tuesday 21 April 2009
BasicGrey Porcelain
I was very unsure of this release from basic grey but I soon realised that by adding a vibrant colour cardstock, the colours of the papers were really enhanced.
I took a piece of vibrant green card and spritzed it with lime green glimmer mist
Next I took the clear scraps acrylic circle and embossed it using my cuttlebug and the Cuttlebug Embossing Folder - Swiss Dots
I put some white paint on my finger and smeared the paint over the acrylic circle, I also applied paint round the edge of the acrylic circle
I stuck a large flower slightly off centre on the acrylic circle, and added some buttons and pearls
I took the Technique Tuesday - Capture The Moment clear stamp and inked with a brown ink pad.
I stamped the image on to peach bazzill cardstock. I then cut out the image to give me a journalling card. I inked the edges of the card with the same brown ink that I stamped the image with.
I took the Technique Tuesday - Capture The Moment clear stamp and inked with a brown ink pad.
I stamped the image on to peach bazzill cardstock. I then cut out the image to give me a journalling card. I inked the edges of the card with the same brown ink that I stamped the image with.
I then took a sheet of BasicGrey Porcelain - Bellamy paper, drew three scallops on the reverse of the paper and cut the strip of scallops out.
I cut out a rectangle from the BasicGrey Porcelain - Silver Birch paper and used an EK success corner rounder to round the corners of the rectangle. On the patterned side of the paper I used the scallops that I cut out earlier as a template and drew, in white pen, two scallops.
I took the BasicGrey Porcelain - Rosenthal paper and cut out another rectangle from this paper and I cut along one of the zig zag lines to give me a zig zag edge, I rounded the top two corners of this paper.
I then cut along the scallop line that I drew in earlier and stuck the zig zag paper on to the spotted paper and, using a white pen, drew round the edge of the spotted paper.
I cut another rectangle from the peach cardstock, rounded the corners and then a drew a border round the edge of this card using first the white pen and then on the inside of the white pen a brown pen.
I matted my photo on white bazzill cardstock, then I attached my photo to the scallop that I cut from the BasicGrey Porcelain - Bellamy paper. I didnt stick down the right hand side of the scallop as I wanted to attach an embellishment under the scallop later.
I then cut a thin zig zag from the BasicGrey Porcelain - Rosenthal paper and stuck onto my cardstock
I then took the flower embellishment that I made earlier and attached to my LO, I pushed the acrylic circle under the scallop and then stuck the scallop edge onto the acrylic circle.
I finished my Lo by adding the journalling card, some buttons, rub-ons and the title.
Here is my finished LO
Saturday 18 April 2009
May workshops.
The May workshops are going up on the website in the next few days and i am here to give you a glimpse into what they are going to be.
You guys that come to the workshops have asked for page workshops so that is what i have done for the next couple of months. If you have not been to one of our workshops before, please come along. It doesnt matter if you have no one to come with. I keep the classes small and friendly and it doesnt matter wether you are a beginner or a an advanced scrapper these classes are open to everyone.
When putting a page together for a workshop, i make sure that there is something different on the page from the last one. For example, the last page workshop we did, i taught the ladies that came how to use a scallop edge punch, and how to scallop the corners of the squares so they all lined up.
We have fun, tea and normally chocolate and a really good time.
Anyway the next class is on 6th May.
We are using the new 'New Minds Eye' line from CHA 09, one of my favourites for this page. There are 3 photographs on this page and they all measure 8cm by 8cm. We are stamping on transparencies and using the Cricut machine.
The next class is on the 20th May. This page is done using transparency as the base of the page, but making it into a shape instead of a normal square. Making patchwork hearts and using the cuttlebug with transparency.
This is a page with a difference and it is done using the Basic Grey Marrakesh line. The photographs on this page are wallet size- 8cm by 6cm and you will need 3 of them.
To book a place for one of these classes go here. All the classes start at 7.30 and you need to bring your general cropping stuff, glue scissors inks etc.
Thursday 16 April 2009
Basic grey sultry collection pack
Ooh i just love this collection of papers the colours are so bold perfect to go with my little smiling beauty sophie. I started off by cutting three different strips of patterned papers as shown below
and glued into place find the best position for your photo to be glued.Using the sticker diecuts out of the paper pack place as shown below.
using some scraps of rubons i went over the pink patterned paper to give it more detail i thought the fancy pants felt flower was the perfect colour embelishment to use down the right hand side of the photo.
finish the layout with some stitching and a few chosen embelishments as shown the two stitched hearts i used shimmer chalks to give it that extra touch.
Wednesday 15 April 2009
Answers and a winner!
Thank you to everyone who entered our Easter Egg hunt - we had a huge number of emails and lots of you said how much you had enjoyed it! So, without further ado, here are the answers:
Monday: Allegro - Cuttlebug embossing folder
Tuesday: Borderline - Tim Holtz mask
Wednesday: Woolworths - October Afternoon Hometown paper
Thursday: Butterscotch - Acrylic paint dabber
Friday: Daiquiri - American Crafts thickers (red vinyl)
Saturday: Monday - Cosmo Cricket Girl Friday paper
Sunday: Ruby Slippers - Glitz stickles
And the winner - drawn at random by my husband - is Elaine Kettle!! So congratulations Elaine, send us an email with your address and we'll get your prize out to you!
Sunday 12 April 2009
Finally!
Well I hope you have all had a lovely Easter day and enjoyed lots of chocolate!! It is time for our final clue for the week, which will hopefully give you seven answers. You need to email these to me at vanessa@papermaze.co.uk by 7pm Tuesday evening, after which time a winner will be drawn at random from those with the correct answers. OK, here it is then:
What helped Dorothy to get home?
I hope you manage to work it out, and hope that you have enjoyed our Easter egg hunt! Good luck and happy hunting!
What helped Dorothy to get home?
I hope you manage to work it out, and hope that you have enjoyed our Easter egg hunt! Good luck and happy hunting!
Yet another....
Cosmo Cricket page! Seriously in love with Cosmo Cricket at the moment. And after reading some of your comments and emails you have sent , it appears you all are as well!!!!!
So i played with the SnOrKeL Line yesterday. First thing i noticed was the amazing colours in this line, seriously bold and gorgeous!!!!And just perfect for the photos of the piggy back ride i took photos of, of my husband and son on a beach in France. I dont normally scrap colour photos. I normally opt for black and white, which means that i can use any type of pattern paper i need to, but these ones fitted perfectly!!!
The little starfish etc that i used on this page where cut out of several different pattern papers from the line, i thought they where all so cute i had to find away of putting them on the page. ( especially the submarine!)
I am not one for using card as the base of the layout, i normally like to use pattern paper and the decision is still out as to wether i like it or not!!!
So after using both of the new lines from Cosmo Cricket, i can truthfully say that i love ever single sheet they have bought out and i have got some more to use as well!!!! lol. Just in case!!!! Have a fab Easter!!!
Saturday 11 April 2009
Next one
The next egg is in hiding and ready to be found, so here's your clue:
This child is fair of face!
Happy hunting!!
This child is fair of face!
Happy hunting!!
Friday's clue
Apologies for the delay in posting yesterday's clue - my internet went down at the crucial time! Anyway, if you're ready, then here it is - and today's clue will be posted this evening with any luck!!
This is a cocktail made from rum, lime juice and sugar syrup. And as an extra help for the colour - this particular one may be strawberry flavoured!!
Happy hunting!
This is a cocktail made from rum, lime juice and sugar syrup. And as an extra help for the colour - this particular one may be strawberry flavoured!!
Happy hunting!
Friday 10 April 2009
Soooooooo Cosmo Cricket!!!
I am in lurveeeee with the new lines from Cosmo cricket. Last time i was at Papermaze i grabbed some of the 'girl friday' line, seriously not much left on the shelves of this one and i can see why!! The colours are amazing!!! and when all used together the colours are even better!!!
I have been in a scrapbooking rut recently and i wanted something different to start my mojo going again and this was it!!!
I made a page to start with. I wanted to make sure that i put all the pattern papers together to get the best out of them, so i made heart!
I cut out a heart made of card and then cut out small 4cm by 4cm squares of all the different pattern papers that i picked out to use and made it into a patchwork heart. I did the stitching marking with a black pen.
I loved the heart patchwork so much that i made it the focal point for a card with the scraps that where left over.
I am off to play ( as my mojo has returned!!! yeah!!!!!) with the other line of Cosmo Cricket did which is the Snorkal line.
Subscribe to:
Posts (Atom)