Wednesday 26 January 2022

Always Happy - Simple Stories - Simple Vintage Weathered Garden Collection

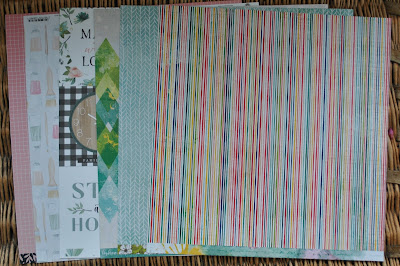
Hi everyone, Rebecca with you today sharing my second layout for January. I can't believe how quickly this month is going... feels like it was only Christmas last week! I've been working with Simple Stories' Simple Vintage Weathered Garden this month, which you can find in the store here.


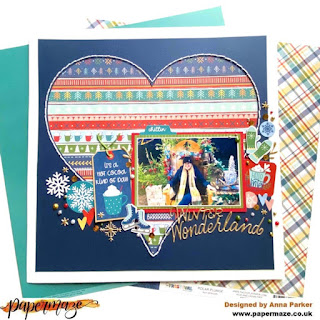
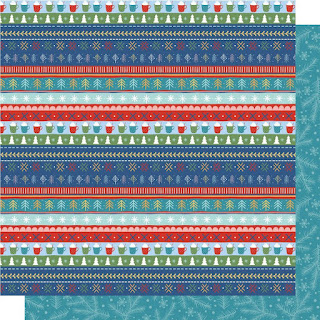
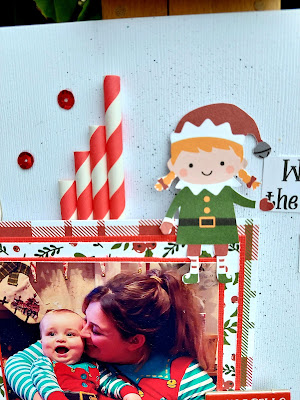
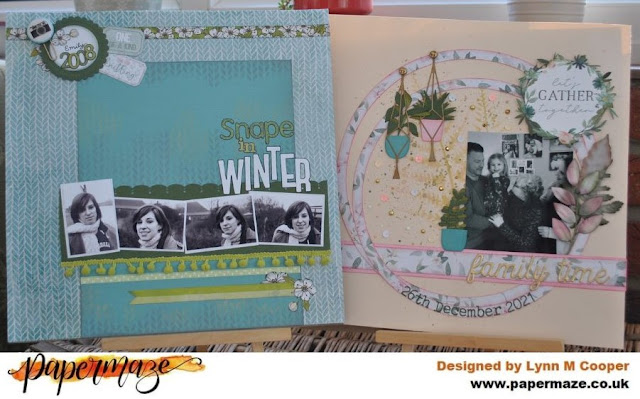
I began this layout by cutting squares from some of the patterned papers and the dark green cardstock from the 12 x 12 Basics Kit and layering them horizontally across the page in three clusters. For the central cluster, I cut 3 x 3 inch squares from the green cardstock and the Journal Elements paper, and for the outer two clusters I cut 2.5 x 2.5 inch squares from the green cardstock, the Love You More paper and the Cherish Today paper. I then layered the squares on top of each other, but rotating each one slightly to produce an almost star, or flower shape. I added a layer of foam behind my photo and sat it on top of the center cluster.


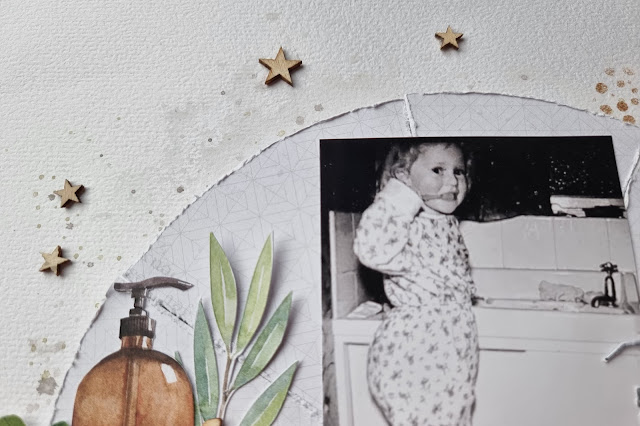
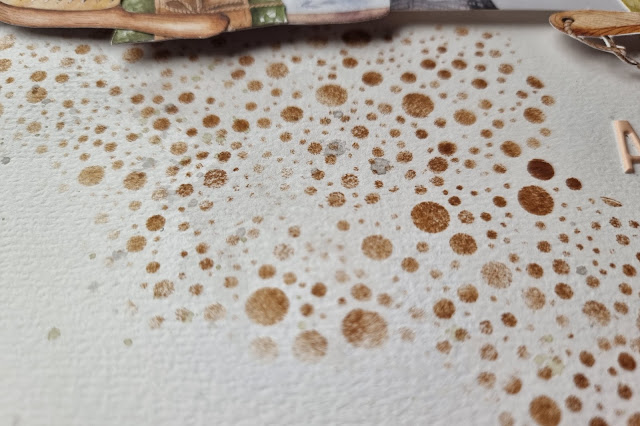
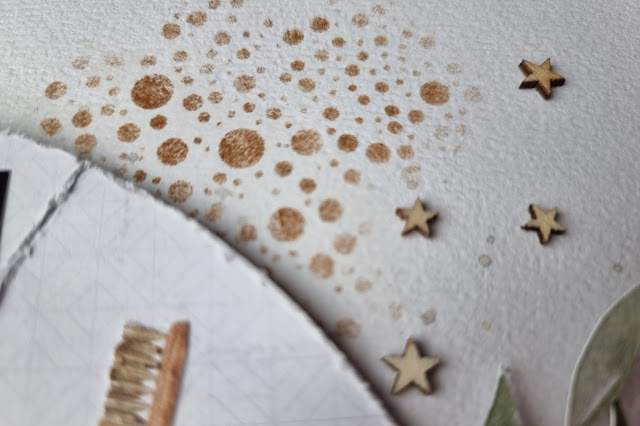
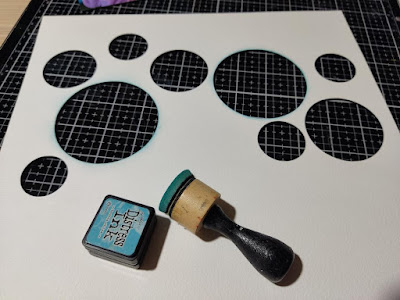
Before sticking the patterned paper squares down, I added some mixed media to my background. I used a Distress Ink Pad in 'Bundled Sage', applying the colour with a blending brush, and then added splatters in the same colour on top. I also added some silver splatters using a Distress Spray Stain in 'Brushed Pewter'.


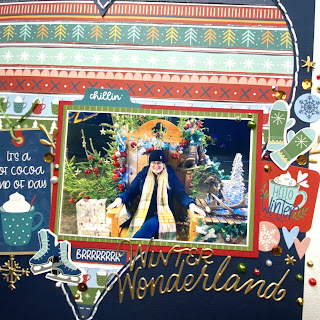
I selected two of the Foam Stickers for my title - 'Always Happy' and placed these centrally on the page underneath my photo. I think the foam stickers are one of my favourite products in the Simple Stories collections! 


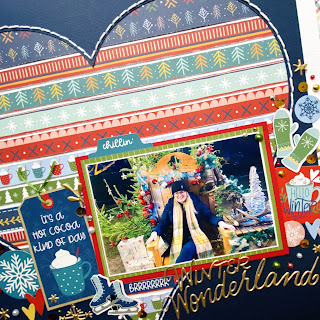
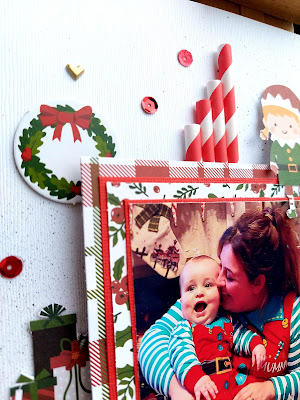
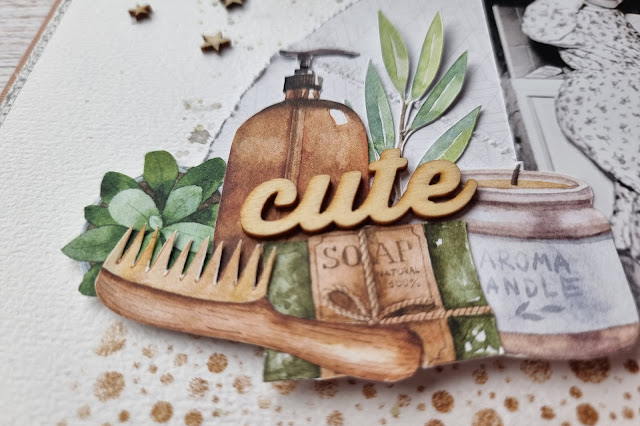
I selected some die cuts from the 'Bits & Pieces' and 'Floral Bits & Pieces' packs and clustered them on and around my patterned paper squares.


I also added a couple of die cut butterflies to the page, as well as some smaller butterflies which I fussy cut from the 4 x 6 Elements patterned paper. I positioned the butterflies so that they are cascading down the centre of my page, through my photo. 


I felt like the page needed some 'grounding' so I added a torn piece of the 'Cherish Today' paper at the bottom, with one of the stickers from the Combo Stickers sheet centrally and a heart die-cut either side. 


I then finished the page off with some metallic silver thread clusters. I adore the WRMK Metallic threads - they are perfect for creating thread clusters which hold their shape really well. They are currently out of stock on the website so be sure to make use of the 'notify me when back in stock' button if you'd like to get your hands on some! 


Thanks so much for reading - I hope this layout has given you some inspiration for using this beautiful collection. If you'd like to watch the layout come together, there is a video up on my YouTube channel, which you can find here.


Until next time, 

Take Care

Rebecca x

@preciouspagespapercraft


Monday 24 January 2022

'Hugs & Kisses', using Simple Stories Happy Hearts, by Meg

Hello everyone, I hope you are well and warm! Today I'm popping by really quickly to share a layout using the brand new Happy Hearts collection by Simple Stories. I absolutely adore this collection, it's just so cute and fun! After finishing this page, I went straight onto the website to order more! 

So my starting point with this page was pulling out a few papers I wanted to use and I got straight into inking a section of my white cardstock with a mini Tim Holtz Distress Ink - these ones here, using the Abandoned Coral colour. I swiped it straight over the page and then dabbed some white gesso on top to sort of make it a little softer in some parts. 

Next I picked out some photos (I just love these ones of my little baby girl - I took them at the beginning of the first lockdown!) and began arranging them on the page over my ink patch. I decided on making a bit of a trio and cut out this mint green cactus and the 'let's stick together!' from the 2x2 and 4x4 Elements paper. 

I fussy cut some love letters and typewriters from the Hello Love paper and arranged it around my cluster, along with a fussy cut love letter mail bag from the 2x2 and 4x4 Elements page. I really loved how that all tied together and went with the title 'Hugs & Kisses', which came from the Foam Stickers pack. 

I finished off my cluster with a fussy cut paper aeroplane from the 2x2 and 4x4 Elements page (with my journaling written around in a loop-the-loop behind it!), some sweet little flower stickers from the Combo Stickers and few more Foam Stickers. I also spattered a few darker coral watercolour paint drips. 

The Bazzill coral cardstock Arroyo coordinates so perfectly with this collection and my page, so I used a little behind one of my photos to mat it. I also layered my white cardstock page into some of the Bazzill Arroyo cardstock and then on top of a corner of the Wink Wink paper, distressing both of the edges and trimming it back into a 12x12 page with my guillotine. 

And there we have it! A sweet page full of kisses for my little girl. 

I can't wait to play with this collection some more! I hope you love it too and you have a lovely week. 

Bye bye for now, 

Meg x

Saturday 22 January 2022

Photoplay ~ Frostival #2

Hey, it’s Anna here. Just popping in to share my second layout this month using Photoplay Papers’ Frostival collection. I love this collection, it has all of your winter needs covered! I really like the colour scheme, which allows it to be used for other kinds of pages, compared to the traditional winter collections. 
My last layout focused on the ‘snowy’ elements to the collection. You can see it here
For this layout, I’ve gone with more of a Christmas/Winter Wonderland feel…


I used the outer heart shaped piece of navy cardstock that was leftover from my last layout. I trimmed it down by approximately 2cm to allow for a boarder. I then chose the ‘hot cocoa’ paper (as seen below) and trimmed each of the strips. I distressed the edges and inked them slightly. I then mounted them onto a sheet of white cardstock, (Coordinating cardstock shades can be found in the matchmaker pack) leaving a very small gap in between each strip. I adhered the navy heart cardstock on top and then hand stitched around the edge of the heart using white thread.


I mounted my photograph onto red cardstock from the matchmaker pack and the b side of ‘Warm & Cozy’. I then pulled out the ‘element stickers’ and chose a few pieces to use. I mounted the tag onto some Kraft cardstock and added some thread. I continued to add some stickers, forming a cluster around the photo.


I selected a title sticker from the Crate Paper Busy Sidewalks- Hustle & Bustle Phrase Stickers. I went for the phrase ‘winter wonderland’ and also added a few of the snowflakes.


To finish, I added some sequins and jems. To create a more natural look for these - I find it’s best to gently drop them onto the layout and adhere them roughly where they land. 


Thanks so much for looking! 
See you again soon with the absolutely gorgeous new Pebbles collection - Kid at Heart 

Anna
X

Friday 21 January 2022

The Littlest Elf ........ Christmas Magic * Echo Park*

Hello Again, 

It's Anita here again today and I have my 3rd layout to share using the Christmas Magic collection from Echo Park.

Christmas has been extra special for us this year with the arrival earlier in the year of our first Grandchild..... so Christmas Eve meant an extra pair of Christmas pyjamas! And what better than Elf ones. So we had Mummy Elf, Daddy Elf and Baby Elf.....such cuties!


I am very much a patterned paper girl normally.....but decided that I would try a white space layout this time for a change......geeeez they are SO much harder than I thought!! So I think I shall be back hitting the patterned paper for my layouts from now on!!
I based the layout on a sheet of Bazill Cardstock in the shade Avalanche   
and using a fleckle brush I splattered some black acrylic paint across it.

For the rest of the page I used:

Candy striped red and white straws

3 x 4 Journalling Cards

4 x 4 Journalling Cards 

Jen Hadfield Puffy Sticker Hearts

 Red Sequins

Lava Bazill Cardstock

 Chipboard Frames

I popped 4 layers of matting under the photo ...alternating patterned paper and layers of Lava cardstock.

4 Candy striped straws were cut in half and laid at staggered heights beneath the photo to add some dimension and I cut several elements out of the 2 sheets of patterned papers and these were layered behind and on top of the photo and other places on the layout.

I also used some chipboard elements in a few places.

I finished the page by scattering a few red sequins and some tiny gold puffy heart stickers in random places.


Well that's it now for me and my layouts using the Echo Park Christmas Magic Collection
I hope you have enjoyed seeing them in my posts.
Don't forget to pop over to the shop and see what lovely new goodies that have in regularly...and don't forget there is a fab SALE on full of fantastic bargain!!
 
Happy Crafting!
Warmest Wishes
Anita xx


Wednesday 19 January 2022

P13 There is No Planet B - Bedtime Wash & Brush Up

Hello. Karen here today with my first project using the There is No Planet B collection from P13. This is the first time I've used P13 products and I'm really impressed with the quality of the papers and the images are beautiful. This collection is focused on recycling, saving the planet, and making sound ecological choices but it could be used to scrapbook so many different things. For my layout today I have chosen to scrapbook a photo of a pre-bedtime routine from my childhood.


I used a sheet of  white Bazzill cardstock for my base. I trimmed 1cm off of two edges and then tore a small piece from the top and bottom edges. 


The edges were all distressed and the white cardstock was matted onto a a sheet of brown cardstock with pieces of paper #6 tucked underneath the torn sections so the pattern peeped out. Using white thread I machine stitched round the edges of the white cardstock using a straight stitch.


A semi-circle was cut from a piece of paper #4 and this was then sliced into wedges. The edges of the wedges were distressed and then the semi circle was reassembled on the layout with 3D foam underneath. Before attaching the semi-circle to the layout I smooshed some pale grey watercolour paint and splattered some grey and brown paint onto the layout, but this is very subtle in the finished layout.


My 3x4 black and white photo was placed on top of the semi-circle and I then got busy fussy cutting images from paper #7 and paper #3 . The fussy cut pieces were then arranged either side of the photo.


I also added a wood veneer word found in my stash on top of the images. The wood veneer was a perfect compliment to the colours of this collection.


The title was created using some puffy alpha stickers in a peach colour from Pinkfresh Studio and was placed below the photo cluster.


At this point I thought my layout was nearly finished but the white space looked .... well .... a little too white! So, I took some Walnut Stain distressed oxide ink and a bubble stencil from Paige Evans and added some stenciling.


Finally I added the date in the lower left corner of the layout using more of the puffy alpha stickers and also dotted a few wood veneer stars above the photo.

I was really pleased how this layout turned out. The colours are far more muted than I would usually choose, but they were perfect for the photo I used. 

Do pop over to the shop. You can see the full collection here

Take Care,
Karen x x

Monday 17 January 2022

Made Up With Love (A little extra - January Kit)


Lynn here today with a little extra layout using the Papermaze January kit. I have two more to share in a couple of weeks, but made this little extra as well. I couldn't resist scrapping these photos of my great niece, who had been having fun with some make up!

Please see THIS earlier post for details of the kit, now available from Papermaze.

I started with the sheet of white Bazzill and trimmed the sides to make the sheet 29.5 x 29.5cm, then I cut circles in various sizes across the top half of the page. I inked the inner edges of the circles with Distress Inks, in shades to match the make up.  I flicked Cotton Candy Spritz lightly over the page to give the cardstock a subtle shimmer.


I backed the two largest circles with the photos, then placed this cardstock centrally over the Guava Sensation Bazzill and glued it in place.


I inked the cut out circles and popped them back in place in the remaining empty circles.


I spelled out Scarlett's name in one of the circles, and then filled them all with embellishments from my stash. I used buttons, sequins, gems, pearls, and Nuvo Drops.


I cut a quote from the
Carta Bella - Gather At Home - 4 x 4 Journalling Cards paper, and trimmed it to make another circle, inked the edges and added it to the layout.


I cut three brushes and one tube from the P13 - Let Your Creativity Bloom - #06 paper. I arranged two brushes on the circle and one brush and the tube at the bottom right of the layout. I wrote the date onto the tube with a black marker.  


I will be back with two more layouts using this kit soon.
Thanks for looking
Lynn x

Friday 14 January 2022

Papermaze January Kit - Part 1

Lynn here today with the first Papermaze kit for the new year. January's kit is now available to buy from the shop or online. Vanessa has put together beautiful papers and embellishments, many on a home theme, but suitable for many different ideas. An exclusive knitwear stencil, which along with other items is great for scrapbooking crafty layouts.

Here are my first two layouts.

Here is what is in the kit:


Patterned Paper:
American Crafts - Vicki Boutin - Fernwood - Simple Pleasure, Wonderful things & Happiness Blooms
American Crafts - Paige Evans - Bungalow Lane - #16
Carta Bella - Gather At Home - 4 x 4 Journalling Cards
P13 - Let Your Creativity Bloom - #06
Bazzill Basics - White and Whirlpool


Reverse side of papers

Embellishments:
5 P13 Ephemera Tickets,  3 Prima leaves, 12 pearls, 6 Market Square Enamel Dots, Puffy stickers, Fernwood Epoxy Paper Clip, 3 lines of Pebbles 2nd Avenue Gold Thickers, exclusive stencil.


Bazzill Extra Pack - Guava Sensation, Pigment, Amber & Rain Forest


Snape in Winter - Making use of the knitwear print paper and the stencil, I have scrapped these photos of my daughter in her warm woolly scarf, on a cold winter day in Snape.


I cut off and saved the detail strip at the bottom of the sheet of Fernwood 'Happiness Blooms' paper. I cut away a piece 18cm wide x 24cm high, from the bottom of the page. A piece of Whirlpool Bazzill 20cm x 26cm, will cover the gap cut from the patterned paper later.

I used the stencil and applied Distress Oxide Ink
(Peeled Paint and Weathered Wood), with a blending tool as shown in the photos. After inking the edges of the Bazzill, I applied it to the patterned paper.

Cutting a strip of Rain Forest Bazzill 8 cm deep, I trimmed the long edge with a border punch. I arranged my four small photos along the strip and trimmed it, leaving it just a little longer than the photos. I stuck this about 6cm up from the base. I trimmed the strip with some bobble trim.

I glued the detail strip to the top of the page. Using Rain Forest Bazzil I die cut and embossed a seal using a Tim Holtz Sizzlix Switchlits. I added a white circle to the centre and placed it to the top left of the page with 3D foam. From the scraps of the other side of the patterned paper, I cut a few flowers, and placed some of these on and around the seal; I added the paperclip and two of the tickets from the kit.

A strip of ribbon was glued below the bobble trim, and two strips from the paper placed below the ribbon.

My title was made up from letters die cut from white card using a Sizzix BigzXL die and some old stickers from my stash. I outlined my letters with a black marker pen.


Family Time - A family gathering, little Scarlett with her aunt, uncle and great grandmother.


The base for this layout is the Pigment Bazzill. I used a Vicki Boutin Greenery Stencil and a selection of Distress Oxide Inks to create some fern leaf pattern in the centre of the card. I flicked some of the same oxide inks, watered down over the page. Once this was dry I flicked some Shimmerz Spritz (Cotton Candy) over the page.


From the #06 paper I cut two rings which I distressed and inked with Worn Lipstick Distress Ink. I also cut a 2.5cm strip from the same paper and mounted it onto a strip of Guava Sensation Bazzill. I arranged these on the page and tucked the photo in place.

From the 4" x 4" Journalling Card paper I fussy cut the wreath and applied this with 3D foam to the top right of the circles.  I arranged the Prima leaves along the right of the photo. 

Using Bazzill from the kit and other scraps from my stash I die cut pot plants using the Hanging Planters Sizzix Thinlits set. Two of these were hang from the circles using gold brads, and the third was place next to the photo. 


To create a little sparkle I added gems, sequins and pearls, together with some Nuvo crystal and glitter drops.

The title is made from the gold Thickers in the kit, and the date was cut with Tim Holtz Alphanumeric Tiny Type Sizzix Thinlits die set. 


I'll be back with more soon.
Thanks for looking
Lynn x