Monday 29 April 2019

Simple Stories Little Princess

Hello, Karen C here with my final project using the Simple Stories Little Princess collection.

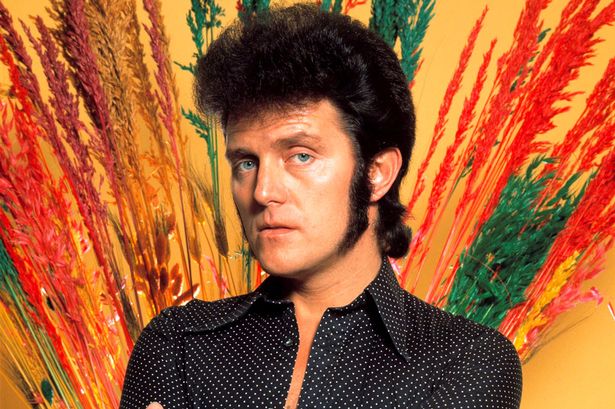
One of the 4x4 elements cards inspired me to create a tongue in cheek layout using a selfie taken in Snapchat.


I started by matting a 11.5x11 sheet of white Bazzill cardstock onto a 12x12 sheet of peach Bazzill cardstock and added a strip of the B side of the 4x4 elements paper on the right hand side.


I then painted a rough square in the centre of the white cardstock with some peach coloured acrylic paint and added some stars with white texture paste. Once dried, a strip of the 4x4 elements paper was stuck on top of the painted square. I machine stitched round all the edges using white thread.


My 5x7 photo was added to the layout and one of the 4x6 elements cards was cut in half and placed behind the photo.  A paper doilie and the 4x4 card, which had inspired my layout, were placed underneath the right edge of the photo having been matted on a piece of the Sparkle and Shine paper.


To embelish the layout I made some 3D stars from the Sparkle and Shine paper. Scoring and folding the paper stars and sticking them to the layout with 3D foam tabs give them their dimension.


The layout was completed with a scattering of sequins and a movie quote printed on the computer and cut into strips.

Thank you for dropping in today and I'll be back soon with another project.

Take Care
Karen x x

Saturday 27 April 2019

Answers and winner...

Thank you to everyone who entered our Easter Egg competition - from your comments, glam rocker Alvin Stardust caused the most problems, but we had lots of correct answers emailed to us :)  So, here are all the answers:

Day 1 - Sizzix Sloth Die

Day 2 - Stickles Glitter Glue Grapefruit

Day 3 - Photoplay Bunny Trail - Easter Parade

Day 4 - Crate Paper All Heart - Stardust

Day 5 - Tonic Nuvo Glitter Drops - Gold Coast

Day 6 - Reminisce Great Britain - Tower Bridge

Day 7 - That Special Touch Mask - Downtown

And so onto our winners!  The first name drawn at random out of the hat, winning a £30 gift voucher, is ELIZABETH EVANS!!  Congratulations Elizabeth - we hope you enjoy spending your winnings :)  And the two runners up, who get £10 gift vouchers are Sandra Daly, and Janina Beckett.  Well done ladies, drop us an email and we will get your vouchers sorted out for you.

Friday 26 April 2019

Its a planner thing...

I love making list and planning my week. And it had been a while since I had bought an actual planner to use.
But on a trip to see Vanessa at Papermaze I spied this planner on the shelves and saw that it was a non dated one...so I bought it!

I knew that I wanted it to be more of memory planner instead of an actual planner. It turned out to be fun to make. It gave me  some creative time but didn't take as long as a normal 12 by 12 page would.

The paper range I decided to use with this was the Schimelle Head in the clouds line.


I have had surgery on my writing hand and I have fluid in between the bones so writing is fairly hard for me, so typing out my daily to do's and a short summary of a few events was my way forward.


I chose to select two points of my week to document more fully, with a photo and some text. I added these using a hole punch on some card and was really easy to do!


I have always found die cuts hard to use...no idea why it has always been that way. But the die cuts on this the planner was brilliant! I now have a use for the several few ( ummm.... several hundred if Im honest) die cuts that I have been collecting over the last few years. I am also planning different things and ways that I can use the planner for weekly and  monthly. Im thinking a photo a day for one of the monthly spreads!


I think the 6 by 6 pads would work really well with this planner as the patterns are smaller and you would be able to see more of the gorgeous pattern. Also...I bought some of these thinner washi tapes to use with it.....I now need more of these as they are just the perfect size!


Do you decorate your planner or do you just use it for writing in?

Wednesday 24 April 2019

Pebbles ~ Chasing Adventures #1

Hi all, it's Anna back with you today, I hope you are well and have enjoyed a lovely Easter break and the wonderful weather!
For todays post and the month of May, I will be working with the Chasing Adventures collection by Pebbles. Take a look at the whole collection here
Here is the selection of products that I will be working with... all of which can be found in the shop.


My first layout is below...


I used a piece of 12x12 bazzill cardstock as my base, I then cut the 'Asian Garden' patterned paper in half diagonally. I trimmed it by appox 1cm each side to allow for a white boarder to show.  


I cut a yellow doilie in half and tucked them under the edges of the patterned paper.


I cut out several of the elements from the patterned paper, including florals from 'fiesta flowers', suitcases from 'ready set go' and some of the journal card elements.


I used the fabulous 'Adventure foam phrase stickers' for my title, which I mounted onto some white cardstock to make them stand out more. Finally I added some Doodlebug shape sprinkles and some rhinestones.


Thanks for looking!
I'll be back in May with this collection again, See you soon.
Anna
X

Monday 22 April 2019

April Papermaze Kit - Part 2

Hello, Hope you had a good Easter.
It's Lynn here, back with the second set of layouts made using the April Papermaze kit.


Before we start making the layouts, here is a reminder of the kit details:


Patterned Papers:
Pink Paislee - Paige Evans - Whimsical #18
Vicki Boutin - Field Notes - Simple Things
Photo Play - Wild Love - Thief of Hearts
Echo Park - I Love Crafting - Inspiring Words
Kaisercraft - Blessed - Beaming and Gratitude
Bazzill Cardstock - Bazzill White and Tropical


Reverse side of papers
Embellishments
2 doilies, 2 wooden hearts, 4 pegs, strip of pearls, mini washi tape, 50cm twine, 2 concertina flowers, 5 small flowers, 30cm scallop ribbon, 1 heart charm, exclusive Papermaze chipboard words and hearts.


Extra Bazzill
 Extra Bazzill Cardstock Pack: Admiral, Bazzill Orange, Fussy and Rain.

Three Tot Rocker
This layout was made to show a photo of my three when they were two, playing on a new toy they were given for the garden. Something a little different from my normal style and colour choice. This page was inspired by the work of
Flore Thannberger, but due to the changes made a different colour scheme has a very different feel.


I started with a sheet of Bazzill White cardstock and some inks and stains. I used Distress Paint in Candied Apple, painted onto some bubble wrap and dabbed onto the cardstock in places. Then with Candied Apple Distress Stain I created some splats randomly placed over the card. With stamps and Black Archival Ink I stamped numbers and faded dots (Tim Holtz Perspective stamp set).

I mounted my photos onto white cardstock left over from the previous layout and set aside.
The next step was to create the red scribble effect circle. I have dies that create this design but they are small, and I wanted my circle to fill this layout, I could do this on the Cricut, but decided to try without. I drew some rings in various sizes onto scrap paper and cut them out. Then I overlapped them and held the result in place with a little tape. I used this as a template, laying it over the red side of the Field Notes, Simple Things paper. Once I had drawn around the shape, I carefully cut it out, using a craft knife for the more fiddly parts.


I place this over the Bazzill, and stitched it in place with black machine stitching. I added the photos as I went along so some of the stitching was behind the photos and some was over the photos.

The Title was created on some more white scrap card with PaperArtsy JOFY21 letter stamps. I used Archival Ink for stamping and a selection of Distress Inks as paint to fill in the colour.

Finally I added a selection of black enamel dots from my stash. 


Create

For my second layout I chose to use the crafty paper from Echo Park's - I Heart Crafting paper, to showcase a selection of photos of my new crafting space.


I chose the Admiral cardstock for the background to create a dark backdrop to make the bold colours of the papers stand out. Then with the sheet of I Heart Crafting - Inspiring Words paper, I selected parts from both sides of the sheet.

I cut the image and words 'I Heart Crafting' from the manufacturer's strip and set this aside. I also cut one full strip of loopy words from the scrip side of the paper, this is about 1.5cm wide. Then from the coloured stripe side of the paper I cut as many coloured strips of about 1.5cm in width across the whole sheet.

I sorted these strips so I had one of each colour to use horizontally and another to use vertically. I took one strip of each colour and attached them vertically to the cardstock with just a small amount of adhesive at the top, they start about 0.5cm down from the top of the page and about 1 cm in from the left side. They are about 0.5cm apart. I trimmed the ends of these strips so the first one was the longest and then each one (left to right) was about 1cm shorter than the one before.

Then I stuck the word strip horizontally across the strips about 1cm from the top and 0.5cm in from the left. I used adhesive along the length of this strip.

I continued to work to work down the page horizontally with each coloured strip, in the same colour order as before. I wove these strips under and over the vertical strips, basket weave fashion. I cut each strip about 0.5cm shorter than the one before it. I ended with the 'I Heart 

Crafting' strip.

My photos were then arranged over the top of the paper weaving and overlapping one another. I mounted each photo with white card to help the stand out from all the colour on the page.

For my title I used the Papermaze exclusive chipboard 'Create' word, leaving this white for more impact.

Thanks for looking, and I will be back with two more layouts from this kit very soon.
Lynn x

Sunday 21 April 2019

Happy Easter!

It's time for the final clue in this year's Easter Egg hunt :)  Hopefully after finding today's hidden egg, you will have 7 answers, which you then need to email me - vanessa@papermaze.co.uk.  All I need is the product name and manufacturer of each egg. Closing date for entries is 9pm Wednesday 24th April.  A winner plus runners up will be drawn at random then :)

So, onto the final clue:

What was the first US hit for singer Petula Clark?

Happy hunting - and good luck!

Saturday 20 April 2019

The penultimate clue...

We are onto the penultimate clue in this week's Easter Egg Hunt - there's a £30 voucher up for grabs for one lucky winner!  Make sure you come back tomorrow to find out how to enter!
Onto today's clue:

Which London landmark was officailly opened on 30th June 1894?

Happy hunting!

Friday 19 April 2019

Good Friday clue

I hope you're all having a lovely Good Friday today, and are having the same glorious weather that we are in sunny Suffolk! 
You should have 4 answers so far, but if not, there's still time to go back and work them out - details of how to enter will come with Sunday's clue.  Onto today's clue:

What is Australia's 6th largest city?

Remember to come back tomorrow for the penultimate clue - happy hunting!

Thursday 18 April 2019

Halfway!

We're halfway through our Easter Egg Hunt clues today, and so it's time for a picture clue!

What was the stage surname of this glam rocker:


Happy hunting! 

April Papermaze Kit

Hi, How are you getting on with hunting for Easter eggs?

Lynn here today with the new Papermaze Kit for April, and very bright and colourful it is too! There are many hearts in the paper designs and embellishments. This kit is amazing value for money, and with the additional purchase of some Bazzill White, I achieved a total of six layouts this month.


Here are the first two layouts I made using the kit.


Before we start making the layouts, here are the kit details:


Patterned Papers:
Pink Paislee - Paige Evans - Whimsical #18
Vicki Boutin - Field Notes - Simple Things
Photo Play - Wild Love - Thief of Hearts
Echo Park - I Love Crafting - Inspiring Words
Kaisercraft - Blessed - Beaming and Gratitude
Bazzill Cardstock - Bazzill White and Tropical


Reverse side of papers
Embellishments
2 doilies, 2 wooden hearts, 4 pegs, strip of pearls, mini washi tape, 50cm twine, 2 concertina flowers, 5 small flowers, 30cm scallop ribbon, 1 heart charm, exclusive Papermaze chipboard words and hearts.


Extra Bazzill
 Extra Bazzill Cardstock Pack: Admiral, Bazzill Orange, Fussy and Rain.

Live Your Dream With Passion
My first layout shows my daughter and her fiancé on holiday in Amsterdam last summer. My inspiration for this layout started off with a page by Sandra Wallace.


With Beaming paper gut the 12" x 12" sheet to leave a border for the layout of 1". I used this (black and white) hearts uppermost, setting aside the rest for later.

Take the sheet of Tropical Bazzill and trim to 11" x 11", I splattered a little black ink over this card. Then I inked the edges heavily with Worn Lipstick Distress Oxide Ink giving a chalky finish around the page.

Back to the Beaming paper and 2 banners, the larger one with the blue side up is 3" x 7", and the smaller one with hearts side is 2.5" x 5". I inked the edges of these, but not so heavily. They were then layered up behind where my photo will be, with the doily (pale side up), between the photo and the banners. This can all be stuck in place before embellishing.

For embellishments I took a selection of items from the kit to decorate around the photo - the two accordion flowers, four of the Prima flowers, the Papermaze exclusive 'Love' chipboard, 1 wooden heart, and the charm. To this I added some leaf fronds punched and inked (Martha Stewart punch) and a tiny ribbon bow. 

In the bottom right corner of the layout I used a Tim Holtz Stamper's Anonymous, quote stamp "Live your dream with passion" and black Archival Ink Pad. Then I added one punched leaf frond and one more Prima flower.

Finally I scattered some pink dew drops onto the Bazzill. These were left over from an earlier kit.

Tip -  I keep the leftovers from each kit in a small bag on my craft table when making these layouts and dip into them when I need some additional embellishments.

One is Fun

This next layout shows my great niece at a photo shoot to celebrate her first birthday.


All the edges inked on this page with Worn Lipstick Distress Ink.

This time I worked with both sides of the Photo Play, Wild Love paper. Using the hearts and arrows side, I created a wide border for the page by gutting the paper to leave a frame 1" deep all round.

I cut the Bazzill White card to 10.5" x 10.5" and gutted this in the same way.  Then I cut the Pussy Bazzill to measure 10" x 10".  These were all layered up centrally on top of each other and stuck in place.

I cut a heart freehand from a scrap of paper, and used that as a template to cut the pink side of the Wild Love paper. I stuck this to the centre of the page leaving the left side free so I could tuck in the washi tape. Then with the washi tape from the kit, I cut strips of varying length and added them to the left side of the page with different sized gaps between them. Then I finished sticking the heart in place.

With the second wooden heart from the kit, and the Papermaze exclusive chipboard hearts, I set to with my Distress Paints! I used Worn Lipstick, Picket Fence and Broken China to paint the wooden heart and Broken china for the other hearts. These were left to dry, then I added Glossy Accents to the pink centre of the wooden heart.

I took three very similar photos and attached them in a staggered fashion, you can see the edges of the bottom two, under the top one. I trimmed the bottom of the photos with some rose ribbon left over from last month's kit, which is available in the shop to buy from the roll - (please ask).

My title was cut using two different Sizzix dies - 'Fun' and '1' were cut from the scraps of Tropical Bazzill from the first layout using a Tim Holtz Bigz Die - Block Tall Alpha. 'Is' was cut using a scrap strip of the Bazzill White card using Tim Holtz Thinlits Cutout Script Alpha.


Thanks for looking, and I will be back with more from this kit soon.
In the mean time keep an eye out for those eggs and good luck.
Lynn x

Wednesday 17 April 2019

Today's Clue

Hi everyone!
We're back with another clue in our Easter Egg Hunt :)  Hopefully you are finding them hidden within our site without too much problem!  Anyway, onto today's clue:

Fred Astaire and Judy Garland sang 'We're A Couple of Swells' in which musical film?

Happy hunting!

Tuesday 16 April 2019

Clue 2

Welcome back to Day 2 of our Easter Egg Hunt!  Hopefully you all managed to find the first egg hidden within the Papermaze site, so we'll get along with today's clue and you can get searching!

What fruit has varieties including Duncan and Star Ruby?

Come back tomorrow for the next clue and in the meantime - happy hunting!!


Monday 15 April 2019

It's time for our Easter Egg Hunt!

The week leading up to Easter is traditionally the time of year that we have our Easter Egg Hunt on the blog - and this year is no different!!  Every day from now until Easter Day we'll hide an egg on our website - and all you have to do is find it!


As there are thousands of products to look through, you might need a bit of help, so each day there will be a clue on the blog. Your job is to work out the answer and find the egg on the website :) Make a note of the manufacturer and product, then once you have all seven answers you can email them to me (details on Sunday). And, and always, there is a prize to be had. This year we'll be giving away a £30 gift voucher to one lucky person (whose name will be drawn at random) - and we'll also be giving away two £10 vouchers to two runners up!

So let's get started with your first clue:


In the Ice Age films, the character Sid is what kind of creature?


Once you've worked out the answer, pop over to the shop to find the egg and keep a note of it.  And remember to come back tomorrow to find the next egg!

Happy hunting :)

Friday 12 April 2019

April Cropping

Our April crop is tomorrow, a week early due to Easter next weekend!  Our crop kit is bright and colourful, using papers from Pink Paislee, and distress inks... 


As usual, there will be yummy homemade cakes, punches & dies to use and a discount in the shop!  Drop us a line if you'd like to join us :)

Wednesday 10 April 2019

Simple Vintage Traveler Mini Book

Hi, Lisa here with a Mini Book today.


I love making mini books.
It's my favourite form of memory keeping.
Today I'm using the new Simple Stories collection called 'Simple Vintage Traveler'. You can view the whole range here.
 And I also have a YouTube video if you wanted to watch me create this book here.

 
Now, I do love colour and this collection is a little muted, so I decided to add my own pops of colour. I took my watercolours and painted a whole page of paper and left to dry whilst I created the mini book.
Then I cut out lots of hearts from the watercolour paper and dotted throughout the book.
 
 
Using the 12x12 papers, I fold them over & trimmed a few of them in to 2-3 pieces and these became my pages. Then I added the photos, then I went around and added the die cuts and the stickers from the 12x12 sticker sheet to embellish.  
 
 
I also added envelopes so I can add some memorabilia.
 
 
I also added some small tags so I could add extra journaling.
 
 
The Die Cut papers are great to cut up and add to pages like this here. And don't the pink hearts make a difference? They really brighten up the pages : )
 
 
I added a glassine envelope here and clipped in a leaflet from a place we visited.
 
 
The one thing that I really like when I make a mini book is creating lots of layers and levels of pages. Nothing is uniformed and there's so much to look at . I love this! 
 
 
I also added a few gold paperclips. Another way to add new textures and colour. 
 
 
And here's the back page. I'm so happy with how this has turned out. I hope it inspires you.
 
I'm so glad I picked this collection now despite it not catching my eye on first glance. I just love the contrasts that I've created. 
 
 
Thank you so much.
Lisa x


Monday 8 April 2019

Little Birdhouse .... Prima Midight Garden pt3

Hello Again

It's Anita here and today I have a post to share using my few left over scraps of Prima's gorgeous Midnight Garden Collection. You can see my previous posts using it HERE and HERE.


I wasn't actually sure what I was going to do for this post, so I hunted around the house looking for inspiration. I found the wooden birdhouse blank in my craft room that I have had for a few years and had not got round to decorating, so I grabbed that and then also found the glass candle stick sitting in a cupboard with some vases ( I never did like that candle stick!!)


 I painted the candlestick with white acrylic paint, giving it 2 coats, allowing it to dry fully inbetween coats.
Then, using a pure bristle shaving brush I very gently swiped the candlestick using some copper paint to create soft highlights and enhance the shaping of the glass.


The copper captures the light beautifully, but also softens the starkness of the white and gives it a slightly more vintage or shabby look.


Using the scraps I had left of  Old Map and Midnight Garden sheets, I covered the roof and the house completely and then gently soft brushed copper paint around all of the edges.
The inside of the house was stuffed with natural coloured sisal fibre and I used some vanilla coloured cotton lace trim and some pearly trim to decorate the edges of the birdhouse around the base rim.


I added some tulle trim near the top of the candlestick and then finished off the whole thing by adding a mix of Prima and Petaloo blossoms and leaves, some of which I had softly swiped with copper paint. 


I am actually really happy with how this came out in the end and hope that maybe it might inspire you a little to use up your scraps and alter something maybe that you didn't like and give it a new lease of life!!


Thank you for looking and don't forget there lots and lots of gorgeous products over in the SHOP, with needful New Products  .

Happy Crafting
Anita xx