Thursday 30 December 2021

Christmas Magic

Hi Everyone

 It's Anita here today with my last layout for December.....where HAS this year gone? So much time spent in Lockdown/restrictions or isolation I suppose....here is to hoping for 2022 being much kinder to us all!

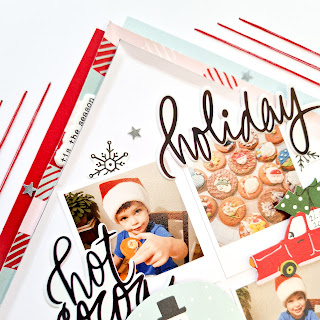
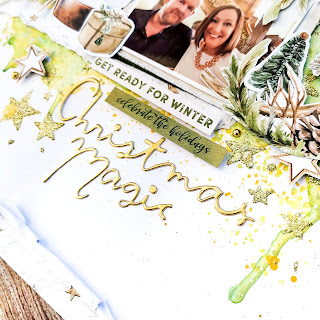
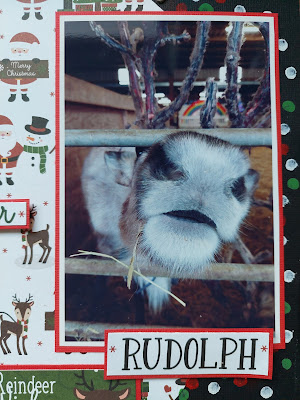
Once again I am using Christmas Magic by Echo Park, such a fun collection with lots of cute characters and co-ordinating embellishments and stencils to compliment the papers.


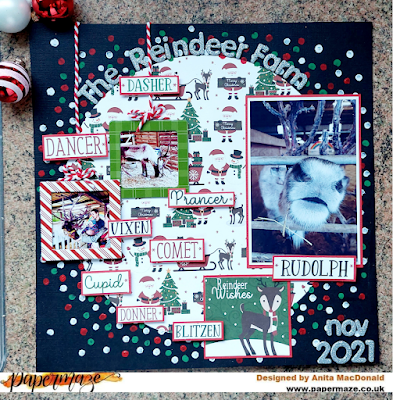
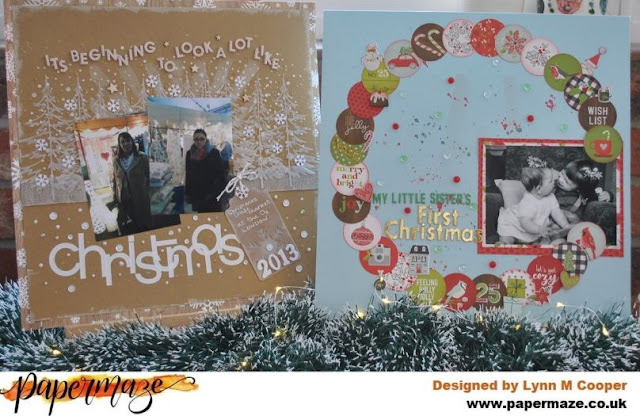
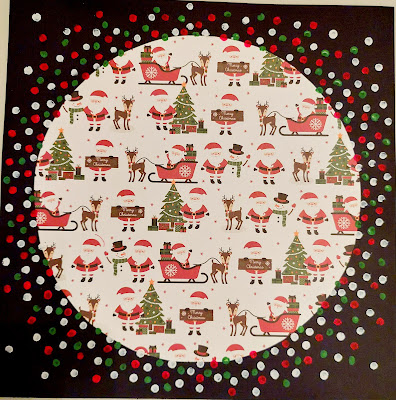
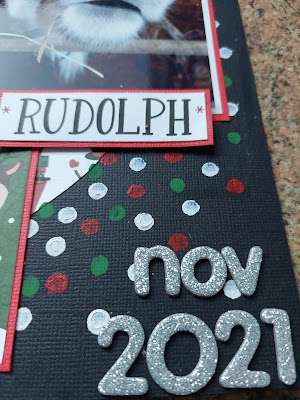
Starting with a sheet of Raven Cardstock, I took a sheet of North Pole Nights and drew round a dinner plate to create the size circle I wanted for the centre.
I am not very good at all at leaving white space on a page ( I am a chuck it all on kinda girl!!) and the more I looked at the empty black around the edges the more I wanted to do something to it!!


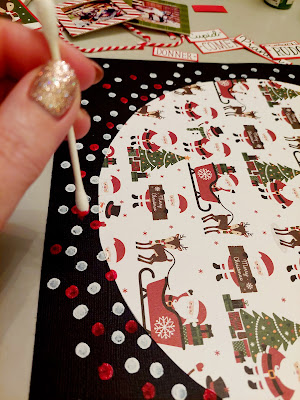
So using a cotton bud and some white, red and green acrylic paint I dabbed dots randomly all around the outside of the circle, with some just over lapping the circle. I was pleased with the result as it was almost like confetti sprinkled on


When we visited the reindeer farm we found the reindeer to be very friendly....and VERY nosey!! I think the fact that we had bags of food for them had a lot to do with it!! Even though the antlers look really tatty they were lovely and soft and this particular fella was very friendly...and hungry!


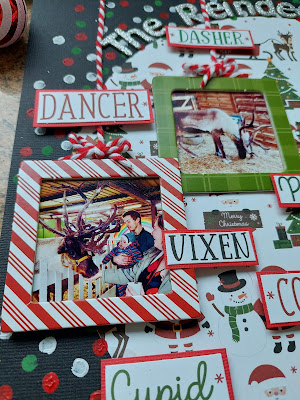
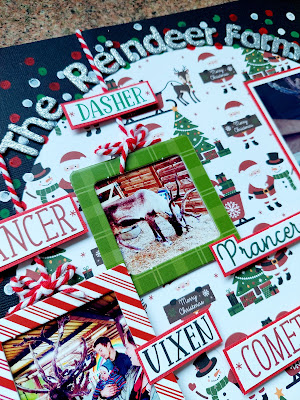
I used a couple more of the chipboard frames from the pack and popped them on a couple of small photos. Using some red and white Bakers Twine I turned them into hanging decorations and placed at different heights.
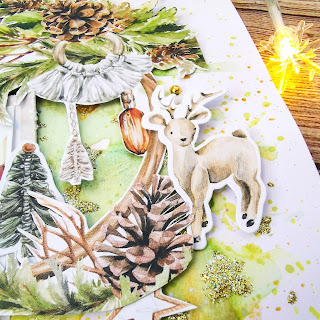
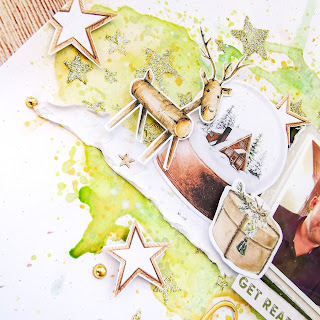
From a sheet of 3 x 4 journalling cards and a sheet of 6 x 4 Journalling cards I cut out some panels, one was the little reindeer panel and the other included all the reindeer names which I cut up into singles. 


I matted them all and the main photograph with some Lava cardstock and raised each of the names up on foam pads to add a little dimension.


A good rummage in my craft room through my packs of various alphabets turned out some silver glittery chipboard letters, perfect for my title and this finished the page.


I hope you have liked seeing what I created with this collection. I am sure that lots of you have some super new Christmas photos to scrap now, so why not pop along to the SHOP and have a look at the amazing variety of Christmas Ranges that are available.
Happy New Year to you all....see you on the other side!
Warmest Wishes Anita xx


Monday 27 December 2021

December Joy - Simple Stories - Simple Vintage Rustic Christmas

Hi everybody, Rebecca with you today. I hope you all had a fantastic Christmas and are enjoying some down-time before New Year. I'm popping by to share another festive layout with you which I've created using the Simple Vintage Rustic Christmas collection from Simple Stories. You can find the full collection here.


I started my layout with a sheet of the Season's Best patterned paper - I scored the entire sheet horizontally every 1cm. I then folded the paper along the score lines, alternating the direction of the folds to give a concertina effect. Once this was done, I pinched the top and bottom together to form a bow shape and secured it by wrapping some thread around it. I adhered this to a sheet of green bazzill cardstock (colour shade 'Pear') from the Matchmaker Pack, using my hot glue gun. 


I made myself an origami bow from the Peace on Earth patterned paper and stuck it over the thread where I'd pinched the paper folds together. If you'd like to make an origami bow, it was actually really simple - you can find the tutorial I used here.


I added a layer of the Peach on Earth paper behind my photo and slotted this in above my origami bow, raising the top half up with craft foam. This gave me two natural areas to embellish either side of my photo. I added some Christmas trees, fir tree sprigs and a poinsettia from the Woodland Bits & Pieces pack, and then built upon these clusters adding some more trees, a tag with some ribbon through the top and a wreath from the Bits & Pieces pack.


I added some more die cuts underneath my origami bow to help balance the page, and then built my title over on the right hand side. I used the word 'December' from the 'Foam Stickers' and the word 'Joy' from the Combo Stickers.


I finished my layout off with some paint splatters. I used metallic gold acrylic paint, and watered-down white gesso.


Thanks so much for reading. I hope you've enjoyed this layout and it's given you some inspiration. If you'd like to watch the layout come together, there is a process video up on my YouTube channel here.


That's me officially done for 2021! I'll be back in 2022, and I'm excited to be working with the gorgeous Simple Vintage Weathered Garden collection from Simple Stories. Wishing you all a fabulous, and safe New Years.


See you next year!

Rebecca x

@preciouspagespapercraft


Wednesday 22 December 2021

'Hot Cocoa and Cookies' Holly Days Simple Stories by Meg

Hello everybody! It's the 22nd already - how did that happen?! And if you're anything like me, you still need to do your gift buying and wrapping but have been busy scrapping instead ha ha!

Here's my latest page, create using Simple Stories' Holly Days. This is a wonderfully festive collection and even a small amount as shown here can make your page feel warm and Christmassy! 

I started by picking out my photos and I wanted to use these three of my son decorating Christmas biscuits - they went really well with the Vicki Boutin Warm Wishes Puffy Phrase Sticker sentiments 'Hot Cocoa' and 'Cookies'. I used these puffy stickers on my last Holly Days page and I really love how they look together! I adhered my little photos to white cardstock to make them look like mini Polaroids and decided I wanted them to be a square formation in the centre of my page. 

I had some fussy cut elements from the Tags paper that I played with to decide which piece would be the final 'square' in my grid and chose the little snowman in his snowglobe, but Santa was a close second!

I cut out a square of white cardstock and folded the edges up to create a sort of diamond shaped 'tray' which I really liked the look of. I cut a second slightly larger square of the patterned paper Let's Get Cozy to layer behind, plus a square of blue Bazzill Jetstream cardstock and red Bazzill Cherry Splash cardstock in the same size. I offset these behind to create a blue side and a red side! 

After sticking these bits down and using foam to pop the little snowman up, I started embellishing around my photos. I used the fussy cut little car and Merry Christmas banner from the Tags paper, the 'Holiday', 'Hot Cocoa' and 'Cookies' sentiments from the Vicki Boutin Warm Wishes Puffy Stickers, some fussy cut snowflakes from the other side of the Let's Get Cozy paper, some red thread to handstitch some large lines around the edge of my centre diamond and I scattered a few little mirrored stars around to finish. My journaling is tucked in there too, on the diagonal. 

And that's it! My second page using Holly Days. I hope you like it and I'll leave you now to your festivities! Thank you so much for popping by and I hope you have a very Merry Christmas! 

Meg x 

Monday 20 December 2021

P13 Cosy Winter - The Greatest Gift Is You

Hi everyone,

Hope you're all enjoying the festive season and managing to create some great stories for scrapping.

I have chosen to document a story from the start of this month, when we put up our tree. It's a family tradition to take photos next to the tree every year and it's one of my favourite moments.

For this page, I'm using the beautiful P13 Cosy Winter collection - a really stunning vintage style collection with soft muted tones.


I was drawn to Kraft for my background and used a sheet from the Premium Kraft Cardstock Pack. 

To create my background, I used a dry brush and Iced Spruce Distress Oxide to create the triangle shape. It made a kind of foggy effect on the page which I absolutely love! It's been hard to capture on camera but it looks a bit dreamy - something I will definitely do again.

I then took some Distress Oxide in Old Paper and brushed it through a lined stencil like this one.  

My final layer of mixed media used some Cosmic Shimmer Sparkle Texture Paste in Icicle Blue (it looks white) through a small snowflake stencil.


I backed my photo with layers of white tissue paper, Paper 2 and Paper 3, distressing the edges for texture. I also added a Joyful sticker from the Sticker Sheet.


Next, I fussy cut the chair, branch and tree from Paper 7 and added some white thread across my page, using the fussy cut pieces to hold this in place.

To the thread, I added some tags from the Decorative Tags 2 Pack and a stocking that I fussy cut from Paper 7, before sticking the ends of the thread in place with tape on the back of the page.


I added a few extra fussy cut gifts from Paper 3 and Paper 7 to create a cluster around the bottom of my photos before adding my title using white puffy thickers from my stash.


To finish the page, I added some iridescent sequins and some Nuvo Glitter Drops in Silver Crystals.

And that was the page complete!

I love how this page turned out. The effect of the distress oxides on the Kraft cardstock is really pretty and I hope I have inspired you with the layouts I have made with this collection.

I wish you all a very happy and safe festive season.

See you in 2022!!

Claire xx


Saturday 18 December 2021

Papermaze December Kit - Part 2

Lynn here today with the second pair of layouts made with the seasonal December Papermaze Kit

Before we take a look at how I made the layouts, here is a peek as what you will find in the December Kit. For full details of the content please see the first December Kit post - HERE.


It's Beginning to Look a Lot Like Christmas - Catherine and I were given tickets to go to a Christmas craft fair at the O2 in London, we had a great day out together.


For this page I chose to stick to white and kraft for the colour scheme. I trimmed the Dark Kraft Bazzill down to 29cm x 29cm. I inked the edges of this (and other items) with Picket Fence Distress Ink.


I made a narrow 1 cm frame with the 6 x 4 Journalling Cards paper (B snowflake side), This left me all the images on the A side to use at a later stage. The Dark Kraft was placed over the frame. 

With Distress Texture Paste and a 6" x 6" Carta Bella Snow Much Fun stencil, I created some 'snow' on the top half of the paper. Once this was dry, I used a Tim Holtz Layering Stencil THS003 and Picket Fence Distress Ink to create light rays over the falling snow.


I wrapped a piece of fawn jute ribbon across the centre of the layout, and created a forest of fir trees using Sizzix Thinlits Woodlands set, and white vellum.


I mounted the two photos in the centre. I used the Kraft snowflake tag from the kit to add some journalling with a Uni-ball Signo Broad white pen. I backed the snowflake cutout with vellum and found a snowflake eyelet from my stash for the hole at the top. Baker's twine was threaded through the top and tied around the ribbon. The year was added with white, foam, glitter numbers. 


My title was created with Happy Life foam letter stickers and some old white letter stickers from my stash. 

I embellished the layout by punching a few white snowflakes, together with sequins, gems, pearls and Nuvo Crystal and Glitter Drops.


My Little sister's First Christmas - An old photo transferred from a Black and White slide. My sister and me Christmas 1962.


The base for this layout is the Jetstream Bazzill. I flicked some Festive Berries and Forest Moss Distress Ink onto the page and allowed it to dry.

Then I drew a large circle onto the card with pencil. I cut all the circle images from the Merry, Merry, Merry paper using a 1 1/2" circle punch.
I fussy cut the images from a few of the circles. I inked the edges of the circles with Distress Ink.


I mounted the photo onto two mats cut from the scraps of Wonder and Joy paper. This was glued into place to one side of the circle.


I covered the rest of the drawn circle, by overlapping the punched circles. I attached some of the cutout images with 3D foam in place around the circle, together the puffy stickers from the kit.


For the title I chose Pinkfresh Studio Mini Puffy Alpha Stickers, and some gold chipboard stickers from my stash. 


To embellish this layout I used Nuvo Glitter Drops and a selection of red, clear and green dew drops. 


That's all for today, I made two more layouts with this kit, so I'll be back with them soon.
Thanks for looking.
Lynn x

Friday 17 December 2021

Carta Bella Happy Christmas - Ho Ho Ho

Hello, Karen here again with another layout using Carta Bella's Happy Christmas collection. This layout which was inspired by a layout by Suzanna Lee, uses a very simple loose grid design which is great for scrapbooking multiple photos. 

I started by creating my own Ho Ho Ho cut file and cut this from a sheet of white cardstock. The sheet of cardstock was then trimmed down slightly and stuck onto a sheet of red cardstock leaving a narrow border. Using white thread I then machine stitched round the edges.

I created shaker pockets from the Os in the The Ho Ho Ho words using some acetate and silver sequins.  

The words were then stuck back into the apertures using foam squares underneath to raise them slightly and add dimension. They were also slightly offset to give the impression of a shadow.

I layered some of the 3x4 journalling cards and Gift Tags behind my three photos, threaded the tags with some red bakers twine and then placed them on the layout with 3D foam underneath.

Various bits and pieces were used to embellish the photos. I used some pieces from the sheet of chipboard phrases and also some wood veneer Christmas Trees. I used some stars punched from silver glitter card too to pick up the silver in the shaker pockets.

Finally I added the date, cut from some of the red paper from the collection, in the top corner.

I hope you have a very Merry Christmas, a Happy New Year and find time for a little bit of crafting. I'll be back again soon with another layout but in the meantime Take Care

Karen x x

Tuesday 14 December 2021

Christmas is in the Air....... Echo Park Christmas Magic

 Hello Again Everyone

Anita back with you today and here is my first Christmas offering using the fab Christmas Magic Collection from Echo Park.

I thought this was perfect for scrapping some photos from our recent trip to a reindeer park and Oakley's first time meeting Santa. We wondered what he would make of the big guy in red....and he loved him!


A sheet of Capers Bazzill Cardstock backed the layout and I trimmed 1cm of the top and side of a sheet of Stuffing Stockings This left a nice frame of the cardstock showing around the edge of the layout.

The stockings were really lovely, but I just felt they over powered the page a little. 

So I used some white acrylic to brush across a large area of the layout and whilst it was still drying, sprinkled a coupe of different colours of ultra fine glitter across it....afterall, if you can't have sparkles at Christmas then when can you??

I rummaged through my alphabet sticker stash and found some really old stickers that I liked for the title.....Its nice to mix the fonts up sometimes.


I cut a few elements out of the sheets of Journalling Cards  and  3 x 4 journalling cards and these were used around the page in various places. I raised some of them up on foam pads to give some definition.


The Chipboard Frames were fab and I used the 2 largest ones to frame a photo and also to make a shaker box. The back of the box was a panel cut from the sheet of 6 x 4 Journalling Cards


Some of the little panels on the sheet of 3 x 4 Journalling Cards were perfect for my page. One was used for journalling a teeny bit and was tucked partially under the shaker box, the other one made a cute little frame for a small photo I printed out and popped on it.

I purchased some Christmas Lights Trim last year with the intention of using on a page, then took a break from scrapping, but i knew it would be great for this page. So I wrapped some round the large photograph and frame and also strung them across the top of the page ( I have ALWAYS loved lumpy embellishments!

In the chipboard frame pack, there are also a few little sayings and pictures ....so I picked out the Ho Ho Ho and the little present pile to finish the page off.

So that's my first page using this lovely collection...I hope you have enjoyed seeing it and maybe it's made you feel you might like some of the papers yourself to scrap your new photos from this years Festive Season. See you again Soon.

Have a fabulous lead up to Chrsitmas xx

Warmest wishes

Anita xx


Monday 13 December 2021

P13 Cosy Winter - Christmas Magic

Hi everyone,

Claire here sharing my first December layout with you. This month, I am using the beautiful P13 Cosy Winter collection - you can find it in the store here.

There's a lot to be said for this gorgeous collection. It's very rustic, with a vintage vibe that uses simple muted colours to create a very magical feel to your festive projects.


I opted for the green and gold tones to document a story from last Christmas. We managed to get away for a long weekend to a country house after months in lockdown.

I started with a piece of white cardstock from the Matchmaker pack and prepped it with gesso as I planned to add quite a lot of water to my layout.

I sprayed gold ink first, before adding Bundled Sage and Peeled Paint Distress Oxides and layering extra splatters in each colour. I left the page to dry and placed it under a heavy box overnight to help flatten the cardstock. The next morning, I added an extra layer of mixed media using Cosmic Shimmer Sparkle Texture Paste through a star stencil.

I cut a circular wreath from Paper 4 and used this as the basis for my design, alongside a torn strip of Paper 3 to act as a holder for my photo.


I embellished the wreath with some of the beautiful Ephemera pieces and cut some extra stars from Paper 2, raising these on foam pads for extra dimension.  I also cut this cute little log deer from Paper 7 to add to my embellishment clusters.

For a bit of extra sparkle, I added some Gold Pinkfresh Studio Jewels and used a gold puffy title from last years Crate Paper Hey Santa collection - these are still in stock and a must have for your festive scrapping! 

I chose two stickers from the Sticker Sheet to complement the colour scheme and join the title to the photo and main design.


As a final touch, I created a ruffled edge at the bottom of the page, with a little bit more of the starry Paper 3 poking out.

I am loving this collection and I'm so excited to share some more pages with you next week.

In the meantime, enjoy the festivities and i'll see you soon.

Claire

xxx