Tuesday 30 October 2012

6 by 6 paper pads... day 4.

During this week I have had a few people email and  ask how I buy my paper pads, how I decide which 12 by 12 papers to buy.

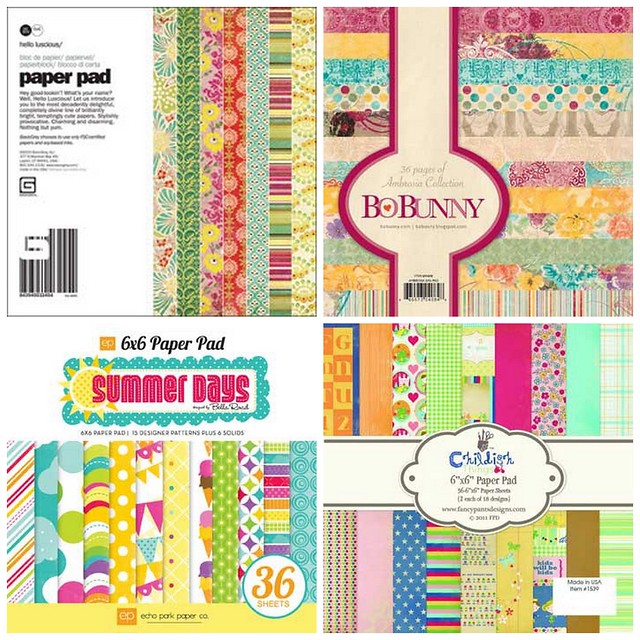
I have been buying these for a few months now and have worked out a system which I am happy to share with you.

When I find a line that I like...I buy the Paper pad...as I said the other day, I like to buy the whole line...so that way I can get the whole thing without spending a fortune. This works brilliantly with companies like American Crafts...they always have lots of single sheets , which i always want them all....so the pad is a fantastic option....and leaves me money to buy the gorgeous embellishments they sell to match.


Then I move onto the 12 by 12 sheets...and I select which ones I am going to get. The way I scrap this makes it very easy.

I tend to use neutrals for the base of my page, and for long sheets across the middle ( knowing how you scrapbook helps alot....go though your pages to get a feel for what you use)
...so i get cardstock and neutrals sheets for the back.To be honest I think I may have more than enough of these already...but no one knows that lol!!! and I am a sucker for a ledger sheet of paper!

Using the new Amy tangerine  as an example...after the pad I would buy these sheets for backgrounds...
this one I would choose for the cream ledger paper side...

and this one...as i love the plain pattern but also love the little embellishment on the top!


So I would buy a few of the sheets that I would use as a base page. So instead of spending alot of money on all the sheets...i get the whole line.....very sadly this is just a revelation that has occurred to me.

After using them for a while I also realised that i prefer the small patterns...it seems to suit my type of scrapbooking. The other thing that it has made me do is think about the design on my page....without the comfort of that large sheet to just cut up, I have had to think out the box...and this had made some definite changes to my scrapbooking and I have come up with some ideas that I would not have thought of originally.

If you are like me...you piece your pages together, you love punches and love your die cut machines...the pads are perfect for you.

 But for today I have one final project for you....( some very old photos of me as a little girl)


The one thing I found was.... that the really cute paper that has the little girls on it....much easier to use when it is smaller!!!!


Today we also have a page by our newest team member....Tracee......
**********************************************************************************

Hi everyone!!!!
I used another sketch from page drafts for this page.


My Mind's Eye's 6 x 6 pads are ideal for creating embellishments.

 One of the papers in the My Mind's Eye  6 x 6 pad has an elements page. I cut them out and because they are in a smaller print, you can add more of them to the page without it looking too overcrowded. The 6 x 6 pads are ideal for cutting shapes like banners. Because the print is smaller,  you can retain more of the pattern on your small shaped pieces.

It might seem that 6 x 6 sheets could be too small for working on a 12 x 12 background page. To solve this dilemma,  I cut one sheet of 6 x 6 into 4 pieces and left an even gap in between each one.


 I used a vertical paper arrangement to cover the space,


 giving the impression that the paper is bigger than 6 x 6.
The paper pad comes with two sheets of each paper. One of the patterns has a doily cluster that I wanted to use twice, but they had the banners at the bottom of the doily, pointing to the left. I wanted to use this doily cluster on the opposite side of my page, but I had the problem of the banners pointing to the left. To solve this problem, I cut the banners off, rotated the doily  so that the part I had cut off could be tucked behind the photo mat, and then I reattached the banners.


Before I glued all my papers and embellishments down I inked them all with a black ink pad to give them a little more definition.


********************************************************************************

So there we have it....5 projects using  6 by 6 paper pads...I fell in love with the pads a few months ago...so thankyou for letting me share my love of them with you....If you have any ideas for using these pads share with us!!!!


So..lets move onto the giveaway.....We are planning a few more of these focus week long blog posts...so leave a comment below about what you would like to see more about and you can win this little lot..... some 6 by 6 papers, matching buttons and flowers and the latest issue of Scrap 365 magazine.


We cannot wait to hear what you think!!!!!!


Saturday 27 October 2012

6 by 6 paper pads...day three


One of my favorite things that I like to make people are frames. I make these alot as they are perfect for that birthday present for the person who you have no idea what to buy!!!! I have plenty of those in my family lol!!!


But sometimes sending a big frame through the post poses lots of problems....glass breaking being one of the major ones. So I tend to use these....picture frame inserts...

I adore these...for two reasons..1. they are really cheap..the one I used on this project cost me 80p!!!!! 2. They are bare and ready to be painted...so you can change them to any colour that you fancy, with just a bit of paint or some inks!
They have them smaller than the one I used here, so a good idea would be to use them on the front of a card.. a perfect frame..... ! and it makes it a lot sturdier if you plan on sending it though the post.
Anyway...the 6 by 6 paper pads are perfect for this...as we found out the other day , the smaller size prints are perfect for that smaller project.
 I use my punches a lot on my pages, cards or altered items ...and the smaller patterns on the smaller papers are just perfect for this.
Especially when using the really small punches. But as I said the other day...no one wants to cut up a huge 12 by 12 piece of paper just for one small butterfly!!! If you have a sheet of the 12 by 12 and a small 6 by 6..have a try with your favorite punch and see which one you prefer?
 
Come back next week for a last look at 6 by 6 papers...I have an 8 1/2 by 11 page for you and a summery of the week.

Thursday 25 October 2012

A 6 by 6 paper pad page...day 2

After grabbing some of the 6 by 6 paper pads from the shop....( I picked this one...Crate Paper ) I sat down to make a page that is just made out of 6 by 6 papers....

Here is what I did........


and some close ups...


Instead of using a long 12 by 12 strip of paper across the top...I cut up three different sheets , layered them and added them across the top.


The smaller scale flowers in the pad were perfect to use as embellishments across the page....

Instead of using one long sheet of paper to ground my photos across the page, I added different strips of paper.

Using the 6 by 6 paper pads work perfectly with my style of scrapbooking. I tend to piece my pages together almost like a puzzles....so I really enjoy using the smaller pieces .

Pop back next time for a pretty frame I made using the 6 by 6 pads.

Wednesday 24 October 2012

6 by 6 paper pad week.

One of the recent additions that seem to be making a big noise in the scrapbooking industry is the 6 by 6 paper pads. This week on the blog we are going to be looking into them, finding out the pros and cons of these and how we can use them, not just on our cards, tags and mini albums , but on our scrapbooking pages as well.

Lots of people shy away from them because of their size when making a scrapbooking page, but there are ways and means around this, and we will look into those problems this week.


Papermaze has lots of paper pads, Vanessa always buys them if they come with a line that she has purchased for the shop. You can find them here.... Most of the large scrapbooking companies make these, sometimes they are double sided, sometimes not. Sometimes they have all the papers in the entire collection sometimes they don’t. If you are in any doubt about what they contain and you cannot get the relevant information from the internet, then please do not hesitate to phone the shop to ask. There is always someone there who can check the paper pads for you.

So…hands up how many of you have some 6 by 6 pads in your stash?
Hands up how many of you save them just for card making?
How many of you have them and don’t use them for scrapbooking?
And how many of you have them and don’t use them at all! Lol…….
I have to say I have some…( I refuse to say how many I have on the grounds that it may incriminate myself lol) And up until about 3 months ago they sat there and I didn’t use them. But then as they started to get more popular I realised that I have to figure out ways to use them.

Why buy them? Well they are a really good idea…really they are. Even for a scrapbooker.


1.      They are a really good way to by a whole collection cheaply. As I said before, most of the companies out there include their entire collection in their paper pads. So instead of having to pick and choose the papers you want depending on cost…. You can have the entire line.

2.      I don’t like cutting up an entire sheet of gorgeous 12 by 12 paper just for a square to use in my die cutting machine or for a punch…. so the paper pads are perfect for this or for a small part of the design on my page. I know I am not the only one who thinks like this. If you buy a paper pad there is usually more than one of each design in the pad…so you can cut up one small sheet and still have another one or possibly two left intact! Trust me…it works, I now cut up paper without a care in the world…( us scrapbookers are weird and wonderful! huh.)
They are easy to store...I put mine in a basket...so that is the easy part...but...what do you do with all the paper scraps? ...i cut down an envelope to the right size and adhere these to the back of the pads...when I get a bit of scrap...I pop it into the envelope and keep it safe...
8
           They all have smaller patterns in. If you compare them to the 12 by 12 pieces of paper that are part of the same collection they are the same just scaled down…this works really well when using punches and die cut machines.


Over the next week we will be looking at these pads....I have put together a few projects for you..to show you a few different ways to use these in your crafting!

I grabbed the same paper so we could compare the difference….. here is what I made….. I left these really plain so you could see the difference.

This one was with the smaller size 6 by 6 card...


and this one was made with the same papers but in the 12 by 12 size....


here they are side by side...what can you see?


The first thing that strikes me is that the green in the smaller 6 by 6 size is much  richer in colour. And the pattern looks better smaller and more in scale with the project.

The other thing that i noticed was that the pattern paper underneath the blue banner doesn't show up as much...
 this paper...


.the problem with using 12 by 12 papers on something smaller the gaps between the flowers is bigger...so then you only see bits of the flowers through the blue banners.

so....for smaller things like cards etc....the smaller the pattern the better....and much better when only using smaller parts of it....even on a scrapbooking page...

Personally...when I see them together...I much prefer the card made by the 6 by 6 paper pad.

Over the next few days I am going to show you some projects that I made using the 6 by 6 paper pads and try and explain how they work for me and my style of scrapbooking.

Tune in for the next post when I make a page with some 12 by 12 paper pads.


Monday 22 October 2012

Prima 'Romance Novel'

Hi, its Lou here today to introduce you to some of the new Prima papers we have. Those of you who are familiar with my own scrapping style will know that I really am a Prima sort of girl, and I always love their products. So here I have not only used Prima, but I have also had a go at creating in the style of one of my fave Prima designers, Finnabair. This is quite dark, and fairly grungy for me, but the Prima papers came together so well...


...layers, layers and more layers!

I used Prima papers, wooden embelishments and their Notecards. They can all be found online here

 The metal bits and pieces I got from hardware and homeware stores and cheap pound shops...things like bobbins can picked up in packs of three really cheaply!


To colour coordinate all the flowers, I used mists, both Glimmer Mists and Cosmic Shimmers...the range we have can be found here 

I hope you enjoyed my alternative style today, and I hope i've inspired you to have a go at something a bit grungy :-)

Friday 19 October 2012

October's crop


It's that time of the month again when we gather at Otley Village Hall and spend the day crafting, chatting - and eating cake!  Lou has designed this month's kit for us - it features paint and distressing techniques and a chance to make those gorgeous flowers!  If you're local to us and would like to come along to one of our crops, just send us an email for more information!   It's a great way to meet like-minded people :)


And if you're looking for something to give you a bit of inspiration, remember to check out Tracee's sketch below!

Thursday 18 October 2012

Sketch Time


Hi
Tracee here with my first post as a DT member (I love how that sounds lol)
I love to work with sketches and was delighted to be asked if I wanted to share some with you all
There are lots of sketch sites on the web and I frequent quite a few of them, today’s sketch is from a new (to me) site I found called www.pagedrafts.com and I like the lots of small picture sketches there
When using a sketch you don’t have to use all of it. Sometimes I use just the photo placement or sometimes it is just the placement of the pattern paper. I usually look at each section as an element for instance if the sketch shows circles you can adapt it to be stars square’s, flowers whatever fits your papers and picture

This was the sketch I chose to work with as I wanted to scrap these fun pictures of my youngest daughter and my Granddaughter when they found some blackberries at the end of our garden.

I started by roughly tearing my paper into strips using longer strips on one side adding strips of tape too, I tucked the pictures into the torn strips and then joined the 2 with the large gate sticker from Echo Park This N That Graceful range which you can find in the shop here (will list all supplies at the end). I like to add as many little embellishments as I can so I added some machine stitching, brads and more stickers from the sticker sheets. I usually prefer hidden journaling and so tucked a Journaling card down in behind the photo to write my story on. After stitching across the letter stickers I used the stray ends to tie the sign to the gate sticker so that it hangs across the gate.

A couple of close ups

My layered cluster and a close up of the cotton tied onto the gate, isn't that bumble bee sticker from the EP element sticker sheet so very cute!

You don't have to be to precise when tearing, as you can see I just tore randomly the width of the strip I wanted.


Thanks for popping by, we'd love to see your creations if you decide to use the sketch
Tracee 

Supplies list:

Monday 15 October 2012

October Kit - Scraps


Hello,

What do you do with the leftovers of your stash?
After playing with the October Kit, I had some lovely leftovers that I didn't want to waste.
I always like to try and make some cards in this situation. It's a good way to keep a little stock going.


I used some of the leftover patterned papers, some stickers and a pretty doilie, some pretty pearls and some stickles for a little sparkle.

 Enjoy playing with your leftovers xxx

Thursday 11 October 2012

October Kit - Forever

Hi, It's Lisa again with another layout using the October Kit.


I wanted to create a colourful background first. I've used a couple of Masks.
This one by Crafters Workshop. Blazonry.
And this by Tando Creative. Sequin Waste.

I've mixed my mists up a little and then once dry I've applied the JBS Acrylic paints with a palette knife.


I then had a very bright background to start working on. I used some of the patterned papers, some of the Simple Stories Stickers, a long pin and a little twine.

I do really enjoy making my own backgrounds. It can totally transform how your papers and supplies look.
Thanks for stopping by today x

Tuesday 9 October 2012

Morning everyone.....today I wanted to introduce you to our newest design team Member....


Hi
My Name is Tracee Provis and I live in Bristol, UK with my super supportive hubby, our 2 youngest children & our very spoiled doggies. I have an  8 year old Granddaughter called Star, who features on lots of my pages. My family & dogs are a constant source of inspiration and you will often find me behind the lens of a camera capturing moments and then turning them into a memory that might otherwise be forgotten in time. I have always loved to craft in some form or another and  find that making stuff keeps me sane, after discovering Scrapbooking in 2005 I have never looked back, and you can find me most days at some point in my scrap room.
Online scrapbooking opened a whole new world to me and I love to join in chatter and browse blogs of fellow scrappers.
Paper serves as my muse and I love gaining inspiration from all the products around me, there is so much to love!
I also love photography, sewing, reading and I love listening to music while I scrap.
I am so happy to be here at papermaze, and look forward to working with these talented ladies.
 Here are a few examples of my work...