Monday, 27 January 2014

Handmade Cupcake Gift Box

Hi All, I hope you are keeping warm and dry in this chilly weather. Today I would like to share with you a little gift box I have made, perfect for giving to any age...everyone loves cake eh?!?

The lid was constructed from plain cardstock in a sponge colour. I made a simple cone by cutting a slit from the edge to the centre of  a circle of cardstock and overlapping the two straight edges. Inside both the lid and the casing I adhered a plain strip of cardstock, curled round to fit the curved shapes. The casing insert sat inside with just a bit of glue, but the tube I added to the underneath of the lid needed to be snipped to fit the cone shape, and was glued on more securely.

 
For the decorating (The fun bit!) I used the new Bo Bunny Head Over Heels papers along with a few other items from the online shop, such as lace, dew drops, glitter and a doily.

 
For the cupcake casing, I cut out a semicircle strip that was 3" wide and concertina folded it to create a  circle that was wider at the top than the bottom.
 
The topping was decorated by layering punched hearts, and then drizzling some PVA glue from the top. For the sparkle I sprinkled some glitter over the wet glue.
 
 
I finished decorating the cake with a piece from the cut-outs sheet, stamped with my own sentiment. I added lots of clear dew drops around for extra sparkle!
 
Of course, these Bo Bunny Papers are supposed to be in aid of Valentines Day coming up next month, but I think a project like this could be given at any time of year!
 
We would love to see your take on either alternative gift packaging, or projects using the new collections online. Drop me an email at louizabelle@hotmail.co.uk if you have a go at either of these :-)

Monday, 20 January 2014

A Simple Mini Book with Simple Stories

I have a simple mini book to share with you today that I made for my Dad's 60th birthday.


I like to keep my Mini Books simple purely as this is the only way that I know I will actually finish them.
I started with these 12x12 papers from the Simple Stories - Daily Grind collection.
I am so drawn to these happy colours.


A much as I love the month sides, I wanted to use the other sides.
I cut them in to 4x6 cards and stuck them back to back giving me 6 pages to work with.

I used the matching sticker sheets to embellish.


And these Chipboard Stickers too which I just love.
 
 
The papers are wonderful and make making a mini book very easy.  
 
 
Just a few stickers here and there were added.


I used the chipboard stickers on the front and back pages and punched a hole in each page to add a book ring to hold the album together.
 
 
I'm really pleased with how the album came out.
I think this paper collection has to be one of my favourites right now.
 
Thanks.
Lisa x

Friday, 17 January 2014

January Crop

We're cropping again tomorrow at Otley Village Hall, and this month's kit involves stamping, inking and punching!  I've used some gorgeous soft-coloured papers from Prima and Amy Tangerine, and the photo was taken on holiday in Dungeness!


If you'd like to join us we're there from 10am until 5pm and, as usual, there will be refreshments and homemade cakes, all for £4.  We'll open the shop and as it's January sale time, there'll be 20% off everything :) 

Monday, 13 January 2014

Thrifty Flowers...

In recent times, we are seeing more and more crafters hand making their own embellishments in order to reduce their crafty spending. So in keeping with this, and to give you a helping hand, I am going to show you a simple way of creating blooms very quickly, and resulting in pretty, fairly realistic looking flowers that could be bought ready made for many £'s!  
 
All you will need is:
some patterned paper (scraps will be perfect)
A flower punch (see our collection of handheld punches HERE)
or a flower die (THIS is a fabulous set to use)
Inkpad in a darker shade to the paper
Cotton/thread
Wet Glue, preferably Hot Glue for speedy adhering.
 
First you need to take your chosen flower punch or die, and cut out four of the same shape.
Ink the tips of the petals in a darker shade.
 
 
Now pinch the tip of each petal. The more creases you get in the petals, the more realistic it will look!

 
With one layer as your base, 'screw up' a 6" length of thread and glue it roughly into the centre.

 
Repeat this building up to three layers...

 
The last flower shape, you want to turn over and pull up the petals so that the colour on the outside matches the top colour of the other petals.

 
Glue this centre piece on top of the other three petals and VOILA!!

 
The thread gives it a slightly 'wispy' look.
You can see below how changing your flower punch or die can totally alter the final result.

 
We would love to see your projects using this handmade flower technique. If you do make something, please do send a photo in to me at louizabelle@hotmail.co.uk and you never know, we just might share some on the blog here :-)
 
Lastly, please don't forget we still have 20% off almost everything in the shop, both online and in our Otley shop, so guilt free shopping can be had!!
 
Workshops, Crops, Kits and Gift Vouchers are excluded from the sale. 

Friday, 10 January 2014

Documented by Websters Pages

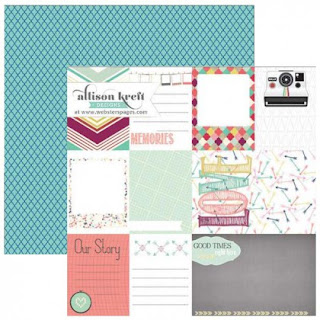
Tracee with you today with my first layout of 2014. This month I got to play with some of the great Websters Pages Documented collection designed by Alison Kreft. The colours are slightly muted but also have a great fresh feel to them.


  I started with a white cardstock background, coloured some texture paste, and used this polka dot mask by That Special Touch around the page.
I cut up the  Remember When sheet and used some of the pieces to mat my picture and as part of my title.
http://www.papermaze.co.uk/product/recorded-by-alison-kreft/websters-pages-recorded-remember-when

I used some pink cardstock and cut the title on my cameo to which I then added white glitter and they are quite sparkly.

(which is hard to see in the photograph)
The 12 x 12 Sticker sheet has 2 different alphas and lots of stickers that are great for tucking in here and there, as I did along the top and bottom borders.
Finally I added a few simple embellishments, how adorable are the "tweets" & Speech bubbles wood veneers by Studio Calico? and great value for money as the packs are stuffed full.
All supplies for this layout can be found in the SHOP along with all your scrapbooking needs

Wednesday, 8 January 2014

Simply tags

Hi there, Carol with you today sharing with you this simple tag:-


The fabulous creative expressions clear texture paste* was added to the tag using a stencil, once dry I then used distress inks to colour the unpasted (if thats a word!!) parts….. I then took a flower and a part of a frame from some art parts kits and coloured these using the same distress inks, over the top I stamped a texture stamp with black versafine ink.  Taking the matching colours of stains I coloured a piece of vintage ribbon and added to the top along with a pin and tassel…

The clear paste has thrown back the light on this photo I will try and get a better one tomorrow…

TFL

*the texture paste doesn't appear to be on the website, but, if you contact the shop its also available in gold, white and a bronzy colour and don't forget there is 20% off at the moment on all orders!

Tuesday, 7 January 2014

Christmas Moments

Did you take many photos over Christmas?
Between us in our family we took quite a few, what with cameras, phones, instagram.... we managed to capture quite a few 'moments' : )

One moment in particular that I wanted to remember was over Christmas dinner when Hollie gave out all the fake tashes. This whole moustache trend really isn't my thing at all, but Hollie likes it and infact I have to say, they did provide me with some of my favourite Christmas photos.

Using some October Afternoon - Make it Merry with some Simple Stories - Daily Grind, I teamed up the papers to document the silly lunch.


The two paper collections actually compliment each other really well, don't you think?
 
I used some of the Simple Stories Cardstock Stickers to embellish along with some of the Chipboard Stickers too. They help make the page so much fun.

 
A couple of bits to finish. Some Thickers, Twine, a Pin and I journaled on some embellishment packaging. 
 
 
A little mist and a few sequins and the LO is finished.


I do love this silly photo and I'm so pleased to be able to add it to the back of my 2013 album.

 
Don't forget to get your Christmas stories documented too.
 
Lisa x