
I am here with a second for you today.
Today we will be getting a little messy with out masks.
We are using this 6x6 Crafters Workshop Mask. Mini Vine.
Remember, we have 25% off all masks & stencils this weekend.

I started off in the same way as I did yesterday. I gathered and collected. I'd decided on my colour combo already and set off on my search to find things that matched. Again as yesterday I used the American Crafts - Dear Lizzy - Polka Dot Party paper, stickers and this time I did use the Thickers to match too.
Back to the mask.
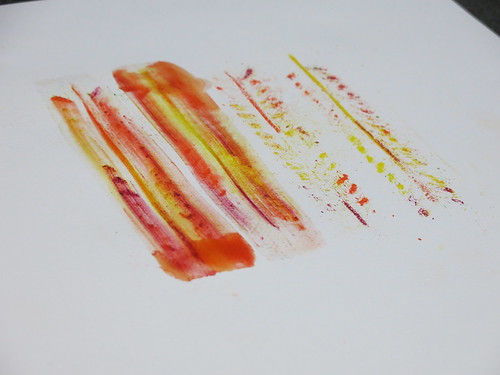
You need a base that can take a little water. Some paperstock is a little thin and you'll find that it ends up wharping, so make sure you use a good cardstock. I like Bazzill for this.Lay your mask in place and rub over using Inktense blocks. These are my favourite for this but you could try watercolour pencils too.

I warn you, it does get a little messy with the inktense blocks. They are like chalks and you end up with dust and powder everywhere. Once you remove your mask you are left with this.

At this point I like to give my hands a good wash otherwise you end up getting the coloured dust everywhere. I also like to have a clean rubber to hand to rub away an excess marks that I don't want on my cardstock.
Now taking a decent sized wide and flat paint brush, I load it up with water and brush down the pattern. I stop at the end of each line. Load up with clean water and brush up in the other direction, stopping at the top again. The water will form a small puddle at the end of the line where you stop, that's good. Don't try to dry it up. You can now see why you need decent cardstock to work on.
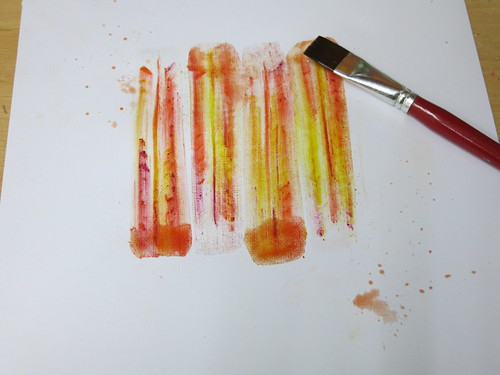
Once I finished, as my paint brush was wet, I flicked it and let it drip down on to my page. I now leave it to dry.
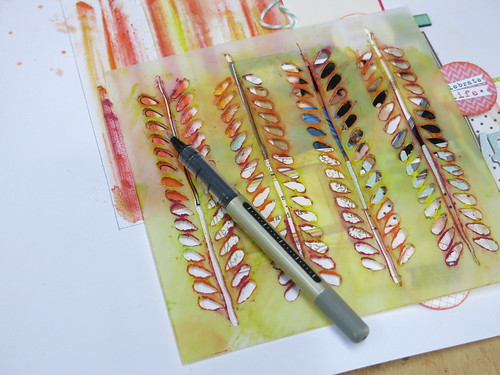
I've started to work on the photo and the layers. It's now time to work on the next part with the mask. As the card is dry, I lay the same mask back on the page and take a black journal pen and use the mask as a stencil for doodling. As the mask is chalky from before, either clean it off before doing this or like me, just wipe the photo after and use the rubber to rub out any unwanted smears.
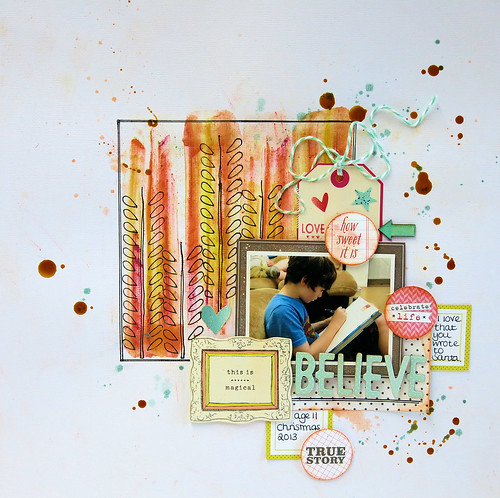
The LO can now be finished.
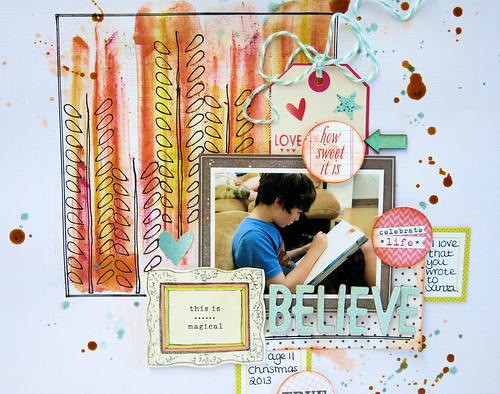
I added some of the Elle's Studio Tidbits to the LO. I inked around the edges of these.
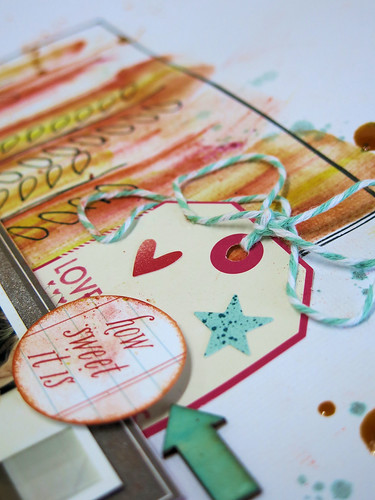
The orange drops are Tattered Angels Glimmer Glam.
I've dipped a long, thin paint brush in to the pot and let it drop. You get nice big drops by doing this and not the little splatters you get from flicking. It feels slightly more controlled too. It looks wet on the photo, that's how it looks when it dries.
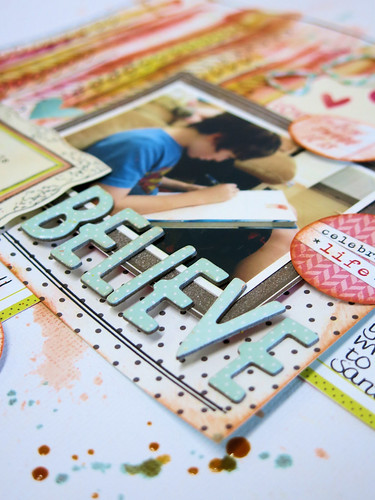
And lastly a close up of the mask work.

Thanks for joining me today. I hope you have enjoyed these techniques. Please come back and visit me here tomorrow where I will have a third LO to share with you and more mask & stencil techniques.
Lisa xx
3 comments:
This is so awesome Lisa, love the vibrant colours and the use of the stencil with pen! Great details too. xx
Never done this technique with a mask before... I'll have to have a try this weekend! :)
Loving that technique and the resulting layout is gorgeous :)
Post a Comment