Wednesday, 25 February 2015

Mothers Day

Hi, Carol with you today - Mothers Day is fast approaching so I thought I'd use up the rest of my Graphics 45 Time to Flourish paper and make a card with matching tag as my project today:-


so, starting with the card…


I used a pre-scored white card and covered it with Graphics 45 Time to Flourish - July paper, using bazzil cardstock in deep orange and cream to match my patterned paper, I cut strips to go down the side and then rectangles to mat and layer to the side….each layer was stamped with a script stamp and edged with distress ink.  Happy Mothers Day was then stamped with versafine black ink I die cut a scroll and added some stickles and bling to add some sparkle.  A flower, some wooden leaves, edged with distress ink in pine needles and a bit of bling finished off the card.


The tag was made in the same way, just down sizing the strip down the size and the rectangles for "Mum" to be added.


Thank You for looking today.

Saturday, 21 February 2015

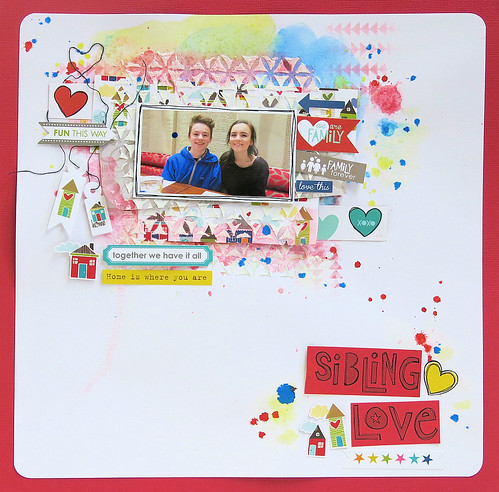
Sharing a Little Family Love

If you love bright colours and fun designs then you need to check out the 'Family Forever' collection from Bella BLVD.

It's Lisa here with you today playing with bright happy colours to brighten up the wet and cold February days.

Here is my LO.


I started off by adding some watercolours to my LO. If you don't have water colours you can use watercolour pencils or watered down acrylics or sometimes I take a little pot of water and dip my paintbrush in to a mist and then in the water to use on a LO. You get that same watered down colour wash effect.


Once dry I added some of the fun Bella BLVD papers over the painted area.
I then took a 6x6 mask and laid over the top. My favourite kind for this are the Crafters Workshop stencils. They are good and sturdy and don't move when you scrape a thick medium over the top. This means you get the full pattern of the mask come through. It's good to build up a nice collection of masks so you don't get bored of using the same ones over and over. I used this one here. Kaleidoscope.
I took a thick moulding paste and a palette knife (an old credit card will also work) and scraped the thick medium across, revealing the wonderful pattern when removed.
This takes a little while to dry.

 
When the paste is dry, it's time to have some fun with the Bella BLVD stickers.
I also cut up some of this cute heart paper - Language of Love.
Before you start cutting out the hearts though take a look at all the words on the reverse.
I used these for my title, so make sure you don't want to use any of the words before you start hacking away.
Did you spot the 'Family Forever' tag on the photo above?
That's actually the name of the collection that's printed along the bottom of all of these papers. The bit you would usually cut off and bin. These are often fun to use, so have a look before you throw away.

Talking about titles, here is mine.
I wanted the wording to stand out a little more so I went over in a black journal pen.


The papers are so beautifully designed that I find myself with a lot of fussy cutting when it comes to Bella BLVD. I enjoy this and find it really therapeutic. Add a little foam sticky pad and you have a set of embellishments.


Aren't those little houses adorable?

I hope you enjoyed my little step by step today.
This was such a fun LO to make.
Thank you.
Lisa x


Friday, 20 February 2015

Me

for this layout I have used the beautiful Marion Smith papers from the collection posh, with a dusty attic chipboard trellis piece.
I have  cut the papers to create layers underneath the photo, and fussy cut some of the bracket shapes and clocks. The dusty attic chipboard measured 6x6inches so this was cut to make a long strip and tucked under the photo. I then added some punched out leaves, made rolled flowers,and stamped flowers from the patterned papers. Added my Me title and then cut a banner from some project life cards and stamped creative, loving, happy.

Friday, 13 February 2015

What do you do when you go to a secret wedding?

You make a secret mini book of course : )

It was a real honour to attend a beautiful wedding in Orlando, Florida last year.
As a special gift I made the couple a mini book to remember their special day by.


I used the Simple Stories - Hugs & Kisses collection for this book.
It's perfect for Valentines projects, sweet family projects, weddings ...anything where you want to show a little love or even romance. It's spot on!!

I took some pieces of 12x12 white cardstock for my book, working out how many photos I had so how many pages I would need. They were simply folded and using a long stapler and coloured staples, joined together along the centre.

I like to follow a theme when making a mini book. It speeds up the process so much and it all coordinates and looks really good as everything matches.


I took some pieces of water colour paper and some watercolour paints and washed the paper over with pinks and blues. Once dry they were torn in to 2 and cut down to fit on each page. This was my base throughout.


I used the Simple Stories papers to decorate the cover. The continuous theme throughout was a 6x6 Crafters Workshop Stencil with some ink in a couple of places on each page. This is a very good mask to use. It's suitable for many kinds of projects.

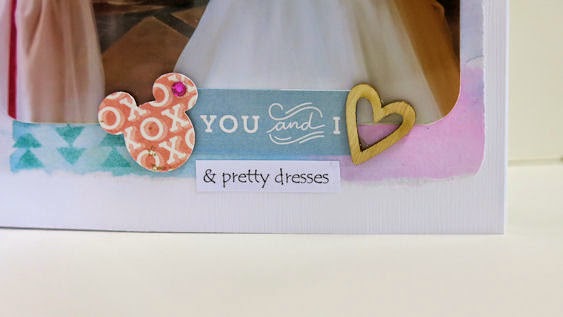
I also used a little washi tape, a mickey punch on the Simple Stories papers and these cute Freckled Fawn Wood Chips. I love these packs. These little packs are so worth just having them sit in a pretty dish on your desk. When you are scrapbooking, you can just add them to your projects. I love them!!
I also added some twine tied along the spine of my book.


I'll share some of the secret book with you now.


I love the sticker sheets that match the Simple Stories Hugs & Kisses collection.
Too cute!!


I used the negative of my punch here.


And it's always nice to add a little bling.


There it is, my secret book.

I have quite a lot of this pretty Simple Stories papers left. I think I might make some cards with them today. I will share with you next time : )

Have a lovely weekend.
Lisa xx


Monday, 9 February 2015

GET READY FOR VALENTINES

Hi, Carol with you today, with a gift box idea for your Valentine…

I started off by taking a couple of small circular boxes…I painted each one with acrylic paint making sure I kept the paint thick enough to coat but not too thick that it soaked the box..

I then cut two hearts out of mountboard and then another couple of hearts out of the gorgeous new carta bella "words of love" papers which is now in store… I then adhered the two together.


Using a red distress ink I edged the hearts and then doodled around the edges using a black pen.  I then stamped the work "love" on a piece of cardstock, edged it with red ink and then matted and layered onto red and then black cardstock…. I then added book text and washi tape, flowers, a die cut scroll and bling to finish off my "red" box.


Pop some tissue paper inside and its all ready for your valentine gift...


I also made a  "masculine" box, (once I started on this box I changed my mind about the cut heart so…) once again I cut a heart die shape from mount board and then painted the same colour as the box - I then added some washi tape  and a piece of inked carta bella "words of love"  paper along with a small piece of maya road red netting…. I also added three Tando creative stars which had been painted, doodled and then given a coat of crackle glaze..


Once again I added some tissue paper….


…and here are my two boxes...


TFL

Wednesday, 4 February 2015

You & Me

Hello,
I'd like to share my 'YOU & ME' LO with you today please.

I got sent some of the very lovely Bo Bunny Altitude papers last month.
They may look very wintery and we are not snow loving people at all. But even still I've managed to create 3 LO's with them.
So it just goes to show, they are very easy to use and you despite them feeling slightly themed, don't be put off. They are very user friendly.

So my LO today using these papers is this one here.


 The base paper was so pretty, although not heavily patterned which suits me perfectly.
I used one of the 'Stencil Girl' 6x6 masks first.
These masks are amazing quality. They are so good to use.


Once dry I was able to layer up with a little doilee, some of the Bo Bunny Papers and stickers. I also got sent this wooden tag with 'Me' cut out. It was this tag that inspired my title. I used a Tim Holtz stain on the wooden tag (they coat so well) and then added the Bo Bunny alpha stickers to it.


Quite a simple LO that came together very easily. 


Lisa x