Showing posts with label Lisa Saunders. Show all posts

Sunday, 14 June 2015

Did someone say 'Summer Vibes'???

I can not get enough of this new collection from Simple Stories 'Summer Vibes'.

It's got everything that you want from a Summer collection. 
Using some of the papers and the stickers I made this LO here.

 
The yellows really call out Summer to me. There are so many gorgeous papers in this collection and they just work so well together when you want to layer up like I have done here.


I find that by teaming up the colours in your photos with your papers really works. These photos are just perfect. 

 
The stickers are so fun from this collection and really add the finishing touches to scrapbooking pages.  I love doodling around the edges to really help them stand out.


I have so many more ideas of what I want to make with these papers and stickers. I think this has to be one of my favourite collections.
 
Lisa x


Sunday, 7 June 2015

Sunshine, Scrapping & Some Handy Tips

Hello!!

It's Lisa here today with Sunshine, Scrapping and some handy tips as the title says.

I've been making the most out of my Belle BLVD - Simply Spring collection.
It's bright, colourful and very happy. Despite the name Spring, to me it shouts Summer!!
Sometimes with the slightly themed collections, you have to make them work to your projects.
This one is Spring/Easter themed, but this can easily be over looked.
Here is my LO today.


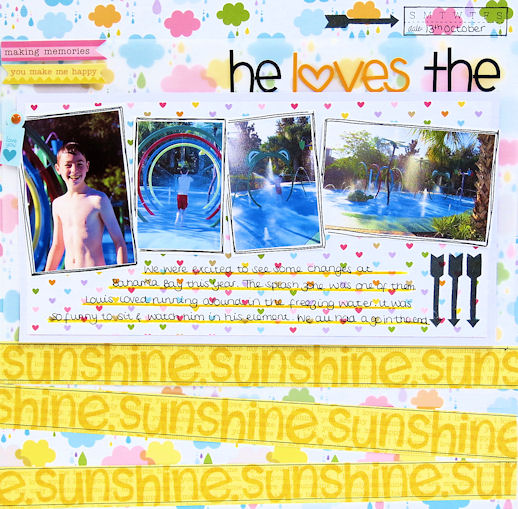
 I just love clouds. I have a bit of a thing for them when it comes to scrapping. I'm working my way through scrapping our 2014 Florida photos and I'm thankful to say, we have no rainy photos. I still wanted to use this paper though. It's so pretty!!
I had a think and then thought it would make a perfect background to our splashy pool photos.

The paper is pretty busy though so I decided to lay a piece of clear vellum over the top of part of the paper to tone it down a little. This worked a treat as you can still see the pretty pattern through.

 
I also wanted to use the 'Sunshine' paper. I cut the word 'sun' out for a previous LO in the same scrapbook album so I wanted to try something different this time and this is what I came up with.
I cut the paper in to strips and stuck it down at angles. It also broke up the business of the cloud paper.
 
 
Adding a title I reached for my trusted Doodlebug alphabet stickers. I always keep a stock of these in a variety of colours. They are probably my favourite stickers of all time. They just go with everything and I love that they come in so many colours. Today I found that I was missing some letters that I needed (don't you just hate it when that happens?!) so I broke the black title up and used the orange stickers too and then realised that I needed 2 black 'e's and only had one. So I took a fresh new white set and coloured one in black. Problem solved!!
 
 
I love the Kaisercraft stamp set that I recently bought for my Project Life and Planner projects so I decided to use it on this LO too. A little tip. If your stamps don't print bold enough, colour them in.
 
 
I also wanted to help my journaling stand out a little and as I was planning to journal on the cute matching heart paper, I decided to add some bold journaling lines. I took a matching coloured pencil and ruler and everything fitted so well. 
 
 
I had a few of the coordinating Bella BLVD stickers left and wanted to bring them to life a little. 3d foam tape helped and I grabbed one of the My Minds Eye - Enamel Dots. Always handy to have to hand these little things.
 
So there you have it, a very non Spring/Easter like LO.


Thanks for joining me today.
Enjoy the sunshine.
Lisa xx


Monday, 18 May 2015

Fun in the Sushine

Yes, it's almost that time of year where we can start having fun in the sunshine again.
Sunshine really does lift my mood. Maybe that's why I like creating bright, colourful and happy pages the best.

This is one that I've made to share with you today using Bella BLVD - Simply Spring

 
I thought it would be fun to add a textured edge to my border so I used a piece of 12x12 Dotted Swiss. I cut my white 12x12 down slightly so that it fitted well in the centre.

 
I've taken a Tim Holtz Stencil and a yellow pastel to make the sunshine on the page. One thing I like about using pastels, is that you can take a normal rubber to rub away any excess.
 
 
Don't let seasonal patterns put you off when choosing your pretty papers. My page has nothing to do with Easter and yet I've still managed to use it and have fun with it.


I've used a coordinating piece of paper - Sunshine - for the title. I do love a little fussy cutting.
 
 
My black pen is often my best friend when I'm scrapping. I love to outline and add borders. I've also added some journaling, but did write this out in pencil first.
 
 
A little more fussy cutting from the patterned papers. Popping a little 3d foam tape, really makes the flowers pop.
 
 
Finally I used the arrows from this stamp set here to add a little interest to the LO. These sets are such great value. I also took a few teeny buttons to add to the centre of the flowers, a few matching stickers from the same Bella BLVD collection and then some splashes of ink for that final bit of colour.  
 
Thanks for stopping by today.
Lisa x


Wednesday, 6 May 2015

Say Cheese Frame

Hi, It's Lisa here today with a little upcycled project to share.

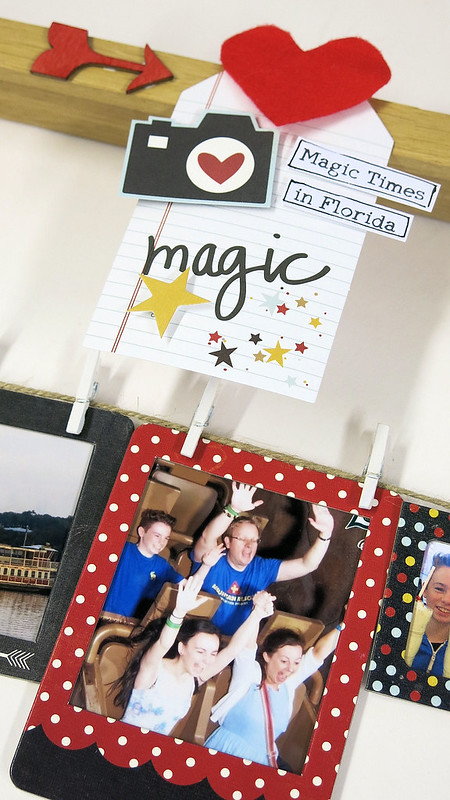
I've been keeping hold of these Simple Stories - Say Cheese 11 chipboard frames. I knew I wanted to do something with them but I wasn't quite sure what.

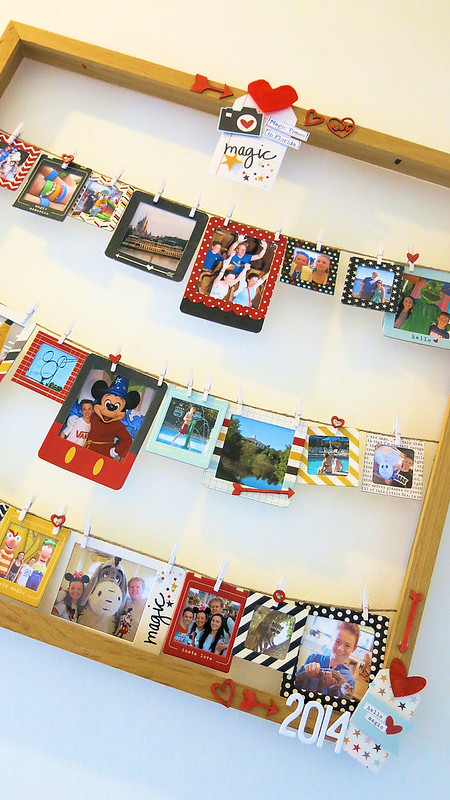
We were decorating my studio recently and I found an old wooden Ikea frame. I was going to freecycle it and then I had an idea. I took out the glass and the backing and turned it in to a photo display.


It was so easy.
 
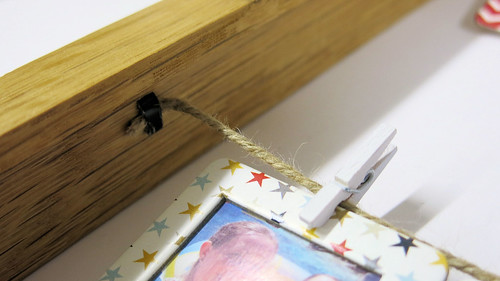
Once the glass and backing were out, I took some string and attached 3 pieces across the back by placing the metal tacks at the back that usually hold the backing in place. No tools needed! I just used a pair or scissors to bend the tacks over.
 
 
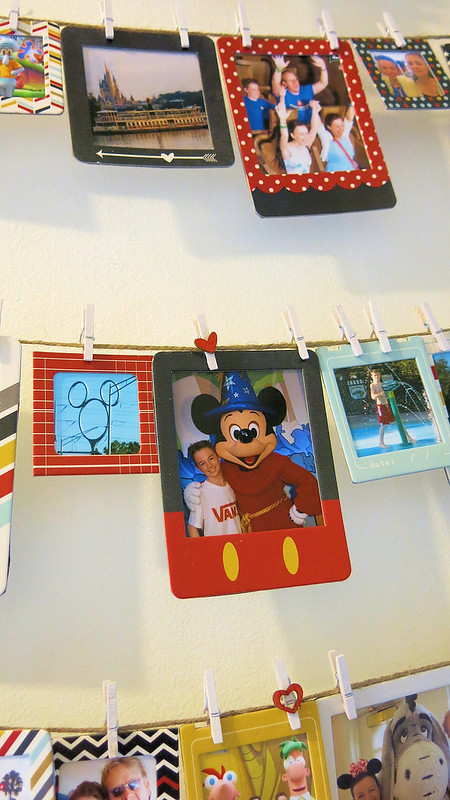
Once the string was tightly in place I added my photos to the frames. I printed off the photos and stuck the frames on top and then cut around the frame.  I then pegged the photos on to the strings.
 
 
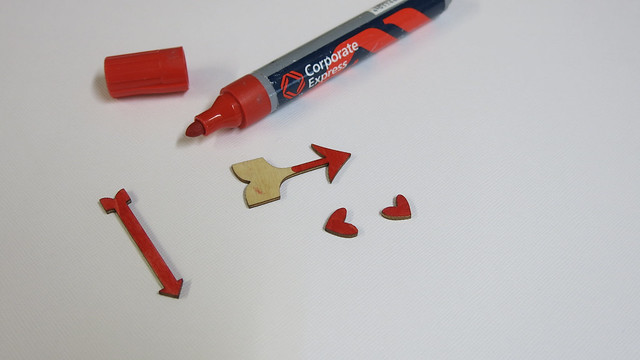
I wanted to turn them red so took a red marker pen and coloured them.
 
 
I added the chipboard pieces to the pegs and the frame.
 
 
I took some of the Simple Stories matching tags and decorated the frame a little too.
 
 
I'm so pleased with this project.


 I'm happy that I kept hold of those chipboard frames now : )
 
Lisa x 


Friday, 10 April 2015

Do you have a Happy Place?

Today I am scrapping my happy place.
Disney.
This is where I'm at my happiest.
I feel carefree and like a child again.

The Say Cheese 11 collection - Simple Stories (as I've mentioned here before) is my favourite.
But don't be put off if you aren't a Disney fan.
My LO today isn't a full on 'in your face Disney' page. You could also scrap about your happy place.

Here is mine.


 I took this elements paper here and cut a few of the pieces out using a corner punch on the corners.
I've layered them to create a base for my happy photo : )


I also used a small circle punch on one of the pieces.
If you don't own a small circle punch by the way, I recommend them. I use mine all the time to add little accents to my pages. It's a great way to use up your paper scraps.

I also used the Wood Veneers from the same 'Say Cheese 11' collection here.
I love adding wood veneers to my pages. They add such good depth.


I coated mine with a Tim Holtz Distress Stain. You just wipe the sponge over the wood and it dries really fast. And then I added some Stickles over the top for some sparkle.
I added a few stars and hearts from the same wood veneer pack and repeated the same technique.


I printed my journaling on the printer and cut into strips.

That's it!!


So, why don't you have a go at scrapping your happy place.
Is it a holiday destination, your garden, your craft room????

Lisa xx

Monday, 23 March 2015

Are you planning a trip?

For me, part of the pleasure of a trip, is the whole planning.
I love keeping a notebook and making lists.
I love saving money and I love the whole research of a trip.


We are planning a big family holiday to Florida in 2017.
This weekend we had our first family meeting to discuss dates and the essentials.
Half of the family have never been to the US, so it's totally new to them.


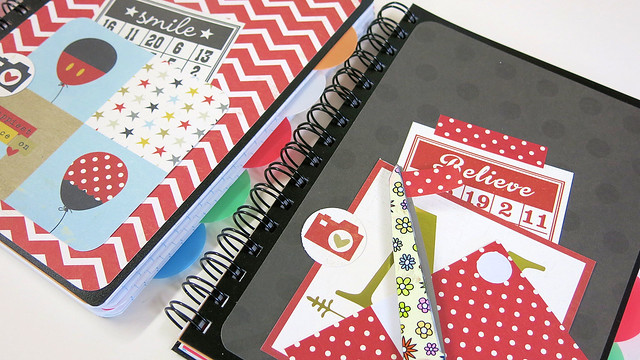
I thought it would be fun to put some holiday planning packs together.
The 'Say Cheese' collections from Simples Stories were perfect for my fun projects.
'Say Cheese' was released last year.  And 'Say Cheese 11' is the new release.
These are probably my favourite scrapbooking collections ever!!


Anyway, back to my holiday packs.


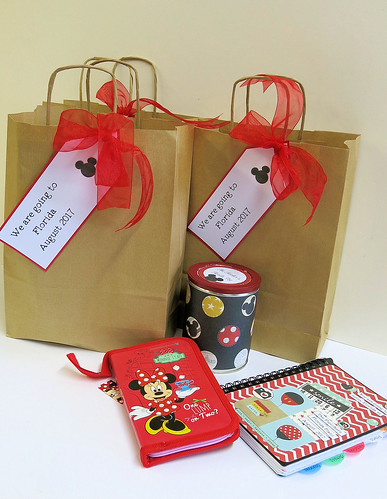
I added a tag to a large kraft bag and inside I added a Minnie Mouse Pencil Case full of stationery, a money saving pot, a planner journal along with the Virgin Holiday brochure and an info pack that I put together myself of everything you need to know going to Orlando as I get asked so often by people now. I was really pleased with these packs.

I made the money saving pots first. We like to save all our loose change. It's surprising how it amounts up. They started off as Costa Coffee pots.


I used the Say Cheese papers to wrap around the tins and stuck in place with double sided sticky.
I then decorated with a personalised sticker on the lid and some glitter.


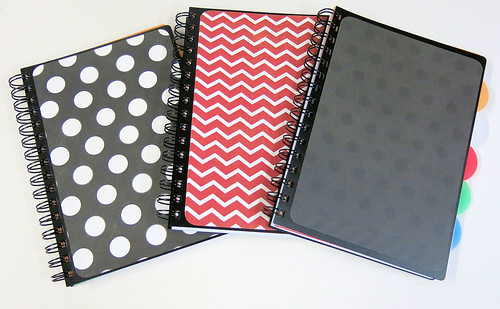
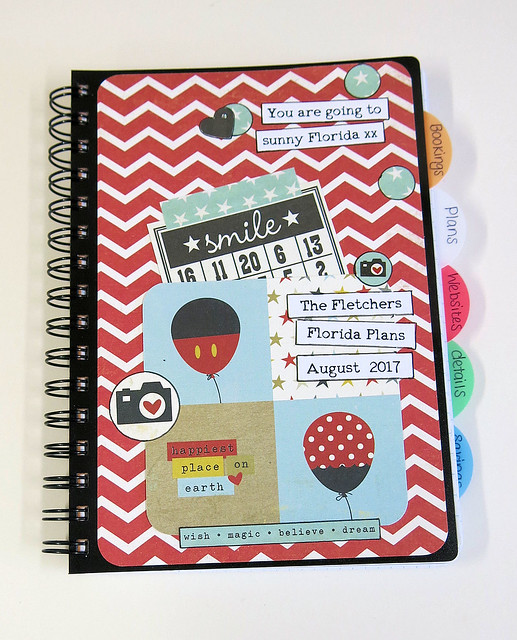
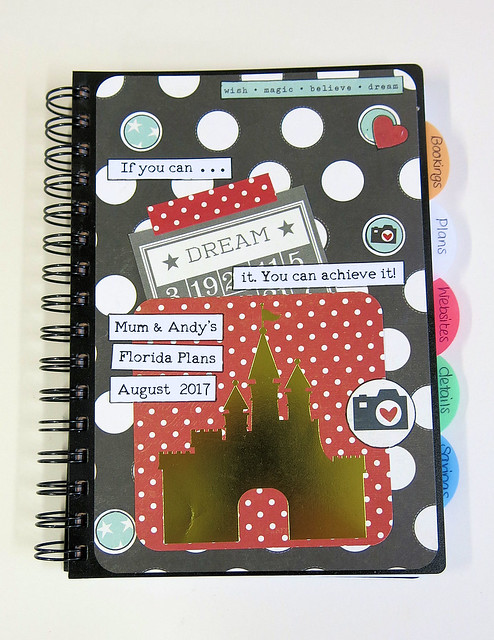
Now the journals started off as cheap note books.


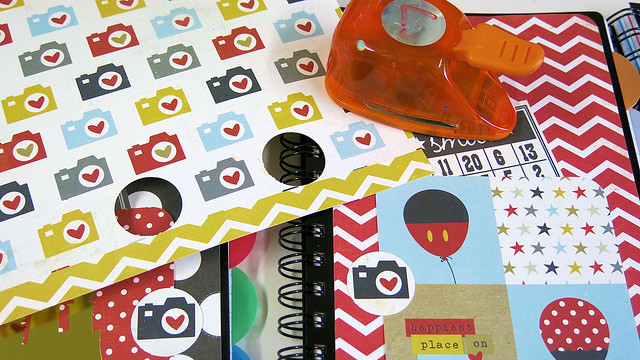
I measured up the 'Say Cheese' papers, cut to size, rounded off the corners and stuck in place with double sided sticky.


I used this piece of 'Say Cheese 11' paper for the design on the front.


Simple Stories have the coolest packs of Washi Tape to match. I love that it comes in packs so that you get a variety of designs. Such a great idea.


And this paper here works great with a circle punch. It makes the perfect embellishments.


I printed off strips of words on my printer.


And I find that outlining everything with a black pen makes such a difference.


My finished books.


I'm really pleased with how they turned out.
These papers and matching bits and pieces are so much fun.


Thanks for joining me today.
Lisa x


Tuesday, 3 March 2015

Lots of Photos, Chevrons & Stars

That just about sums this LO up today.

Hi, it's Lisa here.
I've been creating with the Bo Bunny Altitude papers.
The colours are so inviting. And it just goes to show that Winter themed papers, don't have to just be used on Winter LO's. It was about 30c on this day that I scrapped about.
The blues, greens and a tiny touch of purple.
It's a great colour combo.

 I used the Altitude Flurry paper to get me started.
I slotted 3 pieces of this cut up to go behind my photos.
The Cold Snap paper is great fun to cut up and use as chevrons on a LO.
See what I mean. You can point them to where the action is happening on a LO.
I also added a few little wooden stars to my page.
I love these wooden embellishments.
Studio Calico do some great packs here. You really get a lot for your money and they go along way too. In this pack of stars there are 232, all different sizes and just £3.99 per pack. There are lots of other different shapes too.
I like to use the Tim Holtz Stains to add a touch of colour to them.
I hope you like my LO today.
Thanks for stopping by. xx