
It's crop day again tomorrow in Otley, and this month we are going to do some layering with Distress Oxide inks.

There will be cakes, biscuits and drinks
available, with discount in the shop.
You are welcome to come along and join us, just drop us an email!


I have been asked to do a quick tutorial on how the flowers were made, for those who couldn't be at the crop. So thought I would add it here.
You will need:
A Craft sheet
A selection of Distress Oxide Ink Pads
Watercolour paper or other white card
heat gun
Water in a mister


Then spray the ink with some water.

Now swipe or dab the watercolour paper onto the ink.
The colours need to mix a little in some areas to give both the true colours as well as mixed colours, but not so they create mud! Swipe the paper through the colour and dry with the heat gun. go back in again with what is left on the craft may if you like what you see, if it's just muddy ink then clean it up before the next layer.

Now add more colour and dry again, I decided on this piece I needed more yellow and red here.

As long as you dry between each layer the colours will stay true and each layer will not mix with the one before. As you can see in the photo above, the blue bits have remained blue over the red and yellow and not mixed. They have only mixed where they make contact when on the craft sheet before touching the paper.
For my third layer I wanted a bit more of all three colours.

I felt three layers was enough for this piece, but just keep going until you have the intensity you require, and are happy with the result.

Add additional interest by misting or dripping water onto the paper...

...and drying yet again.


You are welcome to come along and join us, just drop us an email!

You will need:
A Craft sheet
A selection of Distress Oxide Ink Pads
Watercolour paper or other white card
heat gun
Water in a mister

Distress Oxide Ink is
a fusion of die and pigment ink, which can be used by itself or mixed with
other products. The ink is reactive with water and the resulting oxidization
process produces a chalky effect - it feels and looks chalky but will not rub
off the surface as chalk would. The more water added to the ink the more the
dye seeps out.
First step is to add some ink directly onto the craft sheet.
First step is to add some ink directly onto the craft sheet.

Then spray the ink with some water.

Now swipe or dab the watercolour paper onto the ink.
The colours need to mix a little in some areas to give both the true colours as well as mixed colours, but not so they create mud! Swipe the paper through the colour and dry with the heat gun. go back in again with what is left on the craft may if you like what you see, if it's just muddy ink then clean it up before the next layer.

Now add more colour and dry again, I decided on this piece I needed more yellow and red here.

As long as you dry between each layer the colours will stay true and each layer will not mix with the one before. As you can see in the photo above, the blue bits have remained blue over the red and yellow and not mixed. They have only mixed where they make contact when on the craft sheet before touching the paper.
For my third layer I wanted a bit more of all three colours.

I felt three layers was enough for this piece, but just keep going until you have the intensity you require, and are happy with the result.

Add additional interest by misting or dripping water onto the paper...

...and drying yet again.

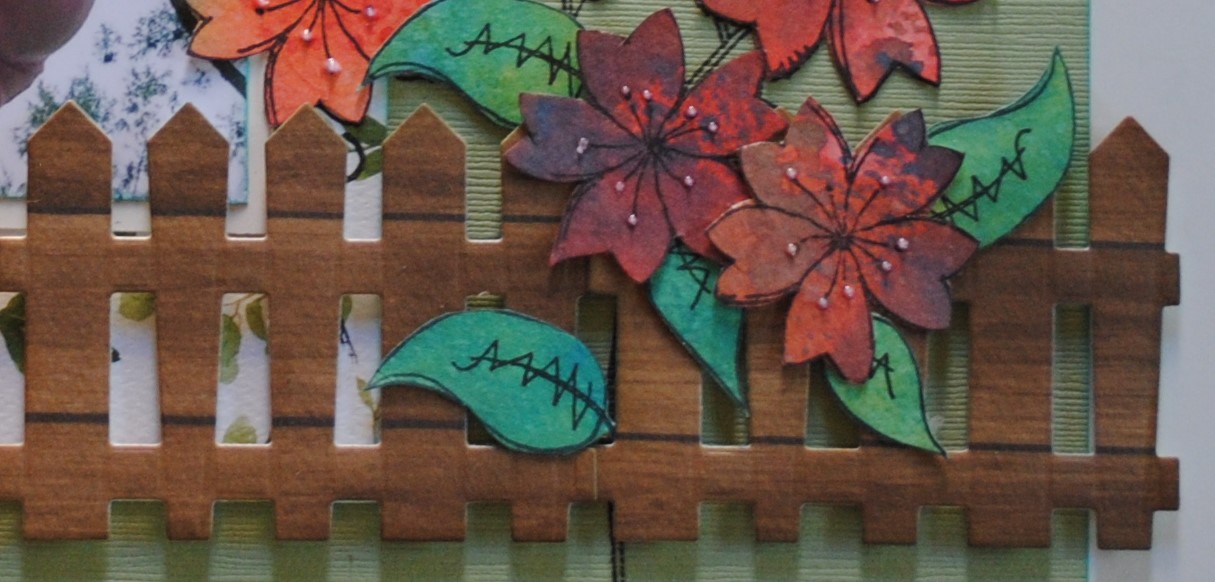
With some alcohol based, black ink (e.g. Archival or Versafine), and a floral stamp (JOFY from PaperArtsy), stamp your images onto the paper.

Stamp the flower stems onto the layout. Cut the main images from the coloured paper and stick them over the images on the layout, some can be stuck down flat, other raised up
on foam DST. Stick some above and others below the fence.

I used Nuvo Crystal Drops Gloss – Sweet Lilac to add detail.

I hope this has been useful and you have fun giving it a go.
Thanks for looking.
Lynn x
Thanks for looking.
Lynn x
1 comment:
Such a lovely lovely page Lynn, those Oxide flowers are so effective xx
Post a Comment