Showing posts with label corrugated card. Show all posts

Wednesday, 2 July 2025

June Papermaze Kit - Part 2

Lynn here today, sharing my next two creations using the delightful Papermaze kit for the month of June!  The kit is comprised of six double-sided patterned papers, two sheets Bazzill Basics cardstock and a whole bunch of co-ordinating embellishments. There is also a pack of four extra Bazzill Basics matching available to purchase to compliment the kit. Two  new layouts featuring baby Florence. this time I added some non-traditional elements to the layouts, in the form of cake toppers and playing cards.


Patterned Papers:
49 and Market - Vicki Boutin - The Flower Emporium - Starters Paper 3 & Starters Paper 9
Echo Park - Firefly - Bright Floral & Shining Daisies
Simple Stories - Sunny Days - Happy Days & Soak It Up!


The photo below shows both sides of the papers:


Embellishments:
Pretty Little Studio - Love is Kind - Friends Forever Die Cut Titles
Pinkfresh - Chrysanthemum - Chipboard Flair
Rosie's Studio - Keeping Cool - Puffy Stickers & Frames
Cocoa Vanilla - Storyteller - Wood Button
Doodlebug Designs - puffy hearts - Bumblebee
Washi Tape


Bazzill Basics Cardstock - Coconut Swirl, Patch (included in Kit), Petunia, Powder Blue, Tangelo & Yukon Gold (in Extra pack).

Happy Beeday - A few days after Florence's first birthday, she came to stay and we celebrated with a cake. 

The background for this layout is the Powder Blue Bazzill from the kit. Distress Oxide Inks (Faded Jeans, Wild Honey & Mustard Seed), were stencilled using a Vicki Boutin honeycomb stencil from her 'Art for Everyone' set. I sprinkled a little water over this to oxidise the inks. 


I cut a selection of 1.24" hexagons using a Memory Box die set. I used both sides of Bright Floral & Shining Daisies for the hexagons, I inked the edges and arranged them over the layout. 


I cut a piece of Soak It Up! 3.25" x 9", with the orange side up, and mounted my three small photos onto this. My photos were placed to the right side of the page, just over half way down.


For the title I used the cake topper I had for the cake, I also used bees from some cupcake toppers.

From the kit, I used the Rosie's Studio - Keeping Cool - Puffy Stickers and the Cocoa Vanilla - Storyteller - Wood Button


My journalling was added directly to the Bazzill with a fine black marker pen. The date was added using Doodlebug Designs Sunshine Alphabet Stickers - Bumblebee.


Daddy's Girl - Happy Families - Florence went to visit Daddy at work at the Butcher's in Blackheath. 


For this layout I used both sheets of 49 and Market - Vicki Boutin - The Flower Emporium - Starters Paper 3 & Starters Paper 9. I started by using the #3 paper as the base, and I cut apart #9 paper into the seperate sections to be used as photo mats and a journalling spot.


I trimmed my photos to fit within two pieces selected and cut from #9 paper, I rounded the corners using a punch, and inked the edges with Distress Ink. I also chose the postcard piece and treated this as before. I used some bronze alphabet stickers for a sub-title and added journalling to the postcard.


I cut my title using a Sizzix Bigz XL Alphabet die and some fine corrugated cardboard. I inked the edges and fronts of the letters. 


I found a children's 'Happy Families' card game, and selected the butcher family, I arranged these down the right side of the layout, together with some smaller traditional playing cards for the back view. 


Once all arranged, I stuck the pieces in place and added a date to the little banner flag on one of the photo mats, using a Sizzix Alphanumeric Tiny Type upper and lower die set. 


That's all for the June kit, I'll be back with the July kit soon. 
Thanks for looking.
Lynn x

Friday, 16 July 2021

Papermaze July Kit - Part 1

Lynn here today with the beautiful July Kit and my first pair of layouts for this month. The pretty kit has a selection of dreamy, watercolour effect papers, which are great for feminine, romantic, family history (and many more) layouts. The kit is now available in the shop or online.

For today's layouts I have chosen floral papers and embellishments.

Before looking at how they are made, here are the details of the kit:

Patterned paper:
P13 - When We First Met collection - #03 & # 06
Prima - Watercolour Floral collection - Dreamy Florals & In the Water Garden (both foiled)
American Crafts - Maggie Holmes' Garden Party collection - Blossom in Blue
Pinkfresh Studio - Keeping it Real collection - Deep Breath
Bazzill Bazics Cardstock - Avalanche & Boysenberry Delight

Reverse side of papers:

Embellishments:

Sheet of 49 & Market rubons, 12" washi tape, 2 Prima Waltercolour Floral flowers (1 glittery), 6 wooden hearts, 1 star, 7 pieces Prima Watercolour Floral ephemera, 5 silver heart stickers, a pinch of sequins

Extra Bazzill Basics Cardstock pack:

Romance, Wildberry Pie, Aqua, Heidi

Roses Around The Door - The photo for this layout shows the progress of the climbing roses around the arbour in front of our door, after three years.


The base for this page is the Aqua Bazzill. The papers were distressed and inked with Iced Spruce Distress Ink.


With the sheet of 'Dreamy Florals' paper, I picked a few of the images I wanted to use and cut them out. Then preserving a few more images for later use, I backed my photo with the remains of this paper. With a circle template, the photo and images arranged in place, I outlined, with pencil the space where I wanted the stencil to show.

The photo and images were set aside. With the Tim Holtz, Layering Stencil - Scribbles (I think this looks like roses.) and texture paste mixed with Distress Stain - Worn Lipstick; I worked this through the stencil to fill the space marked out. I altered the strength of the stain to vary the colour of the 'roses'. I also made two small areas of stencilling on the edges of the cardstock - I set this aside to dry.


Once I had adhered the images and photo in place, I added a selection of paper roses from my stash (in shades of pink and cream). I worked around the stenciled area, between the images. A few roses were also added to the areas of stencilling on the edges of the cardstock.

I scattered a few roses among the images too. The title was made with some scraps of Pinkini Bazzill from a previous kit and some Sizzix alphabet dies. Finally I added the date with some alphabet stickers.


Christine - Another black and white negative found among my Dad's collection - this time his cousin Christine. Another relative found to add to my family scrapbook album.

I started by making a 2.5cm frame with the Boysenberry Bazzill. Over this I placed the P13 - #03 paper, which I trimmed by 0.5cm on all four sides. I cut four notches into the edges of this
paper and trimmed behind these with a little lace. I distressed the edges of all the papers and card. 

With Distress Oxide Inks in Dusty Concord and Faded Jeans, I brushed some colour onto the background, then splattered it with water, and black ink.

The photo was mounted onto scrap white card, then onto Boysenberry Bazzill. I placed this where it was to go and arranged some burlap, corrugated card and cheesecloth under the photo. Once arranged it was all stuck in place.


Then came the embellishments - I created two large clusters and one smaller cluster of flowers by using a selection of the following:
Fussy cut rose clusters from P13 - #06, inked and raised on 3D foam pads
Two Prima paper roses from the kit
Additional paper flowers from my stash
Silver stamen
Rose ribbon
Owl Charm and purple Baker's Twine
Sizzix Thinlits - Tim Holtz Wildflowers set and Boysneberry Bazzill and scraps of P13 - #06 - all inked with the Distress Oxide Inks.


Finally I added the title - 'Christine' with some alphabet stickers.

That's all for today, back with more from this kit soon.
Thanks for looking
Lynn x

Friday, 7 February 2020

Papermaze January Kit - Part 2

Hello, Lynn here today with the second pair of layouts made with the first Monthly Papermaze Kit for the year 2020. This delightful kit has some beautiful soft natural colours and contains six double-sided papers, two sheets of Bazzill and a bag of gorgeous embellishments to compliment them. There is also a pack of four extra sheets of Bazzill available, picked to go with the kit at a discounted price. 


 Here is a reminder of what is in January's kit:


Patterned Paper

Carta Bella - Home Again collection - Leaves, Magnolias, and Tags
Kaisercraft - Ladylike collection - Jessica
Simple Stories - Winter Farmhouse collection - Falling Snow
Photoplay - For the Love of Winter collection - Through the Woods
Bazzill Basics - Natural & Lagoon

Extra Bazzill Pack - Honeycomb, Stonehenge, Aqua and Birchtone Dark

Embellishments - 2"x 12" corrugated card, 2 mini frames, 2 decorative pins, 18" brown mesh, Sn@p! Studio Alpha Stickers, acetate, strip of pearls, 3 wooden hearts, 2 bark butterflies, 3 white paper blossoms, 2 aqua paper roses, 2 tags

Washington Monument
- this layout shows Catherine and me by the Washington Monument, or first stop on a cold, sunny December day spent exploring the amazing memorials in Washington DC.


The basis for this layout is the sheet of Natural Bazzill. I used a selection of Layering stencils (Arrows, Rays and Traveller), and Distress Inks to create a background on the Bazzill, then I diluted some Distress Ink with water on my craft mat and flicked this over the card from a paint brush. I inked around the edges of the Bazzill.


I cut some layers from the scraps of paper left over from the previous layouts. I used 'Falling Snow' and 'Through the Woods'. I mounted the large photo onto the 'Through the Woods' paper. The smaller photo was placed at an angle through one of the mini frames, and placed to the left of the larger photo. 


From the wooden side of the 'Through the Woods' paper I made two paper rosettes using the Sizzix Thinlits die set. I made a tag with a scrap of Bazzill and added my journalling.

The title was cut from Bazzill with a Die-Namics Alphabet die set.

To embellish I used one of the wooden hearts from the kit, filling the hole with some Nuvo Crystal Drops (Emerald City).


Finally I scattered some Card Candi and bronze nail heads over the page.


Explore -  For the final layout I found this photo of our young cat exploring the tree was perfect for this Carta Bella 'Magnolias' paper. 


Starting off with the Lagoon Bazzill I gutted before, I glued this to a scrap piece of 12" x 12" paper to make a base for the page. Then I trimmed the 'Magnolias' paper to 11" x 11" distressing and inking the edges, I made some tears in places. I folded this paper over at the top corners and placed it over the Bazzill frame. I added a couple of pieces of frayed linen under under the Bazzill too. I placed the remainder of the mesh across the Jessica paper.


I trimmed and inked the corrugated card strip to fit the paper and laid it in place running down the right side of the paper.  I cut and distressed the Honeycomb Bazzill to 8.5" x 8.5". Over this I attached a piece of 'Jessica' paper (lacy side) trimmed to 8" x 8", distressed and inked (I also folded down the top right corner of this paper). I cut a piece of doily from the paper and tucked this under the Honeycomb Bazzill. I placed the acrylic doily and a couple of pieces of frayed linen under the the Bazzill. I placed the remainder of the mesh across the Jessica paper. 


From the green side of the 'Jessica' paper I tore some pieces to tuck under the folded areas and some of the torn places. I mounted my photo onto a scrap of 'Into the Woods' paper and some Birchtone Dark Bazzill. Once all the paper, card and photo were stuck in place I started embellishing the layout. I inked the two little tags from the kit, removing the string supplied, I replaced it with brown jute twine, which I tied into a small bow. The tags were tucked under the folded corners.

I used the paper flowers from the kit and added a few more adding the pearls, butterfly pins and wooden hearts to embellish the page.

Finally I made a title using Sizzix Thinlits Shadow Script #3 set and Bazzill scraps.


That's all for the January kit, back soon with the February kit.
Thanks for looking
Lynn x

Wednesday, 12 December 2018

December Papermaze Kit

I can't believe it's time for the last Papermaze kit of 2018, but here it is! Another well co-ordinated collection of papers, cardstock and embellishments ready for us to make Christmas layouts. Much of the content could also be used for non-Christmas layouts too.

For this first post I have created two layouts to share, one with my daughter and her fiance when they became engaged last year on Christmas eve and the second with George choosing a Christmas tree the year before.


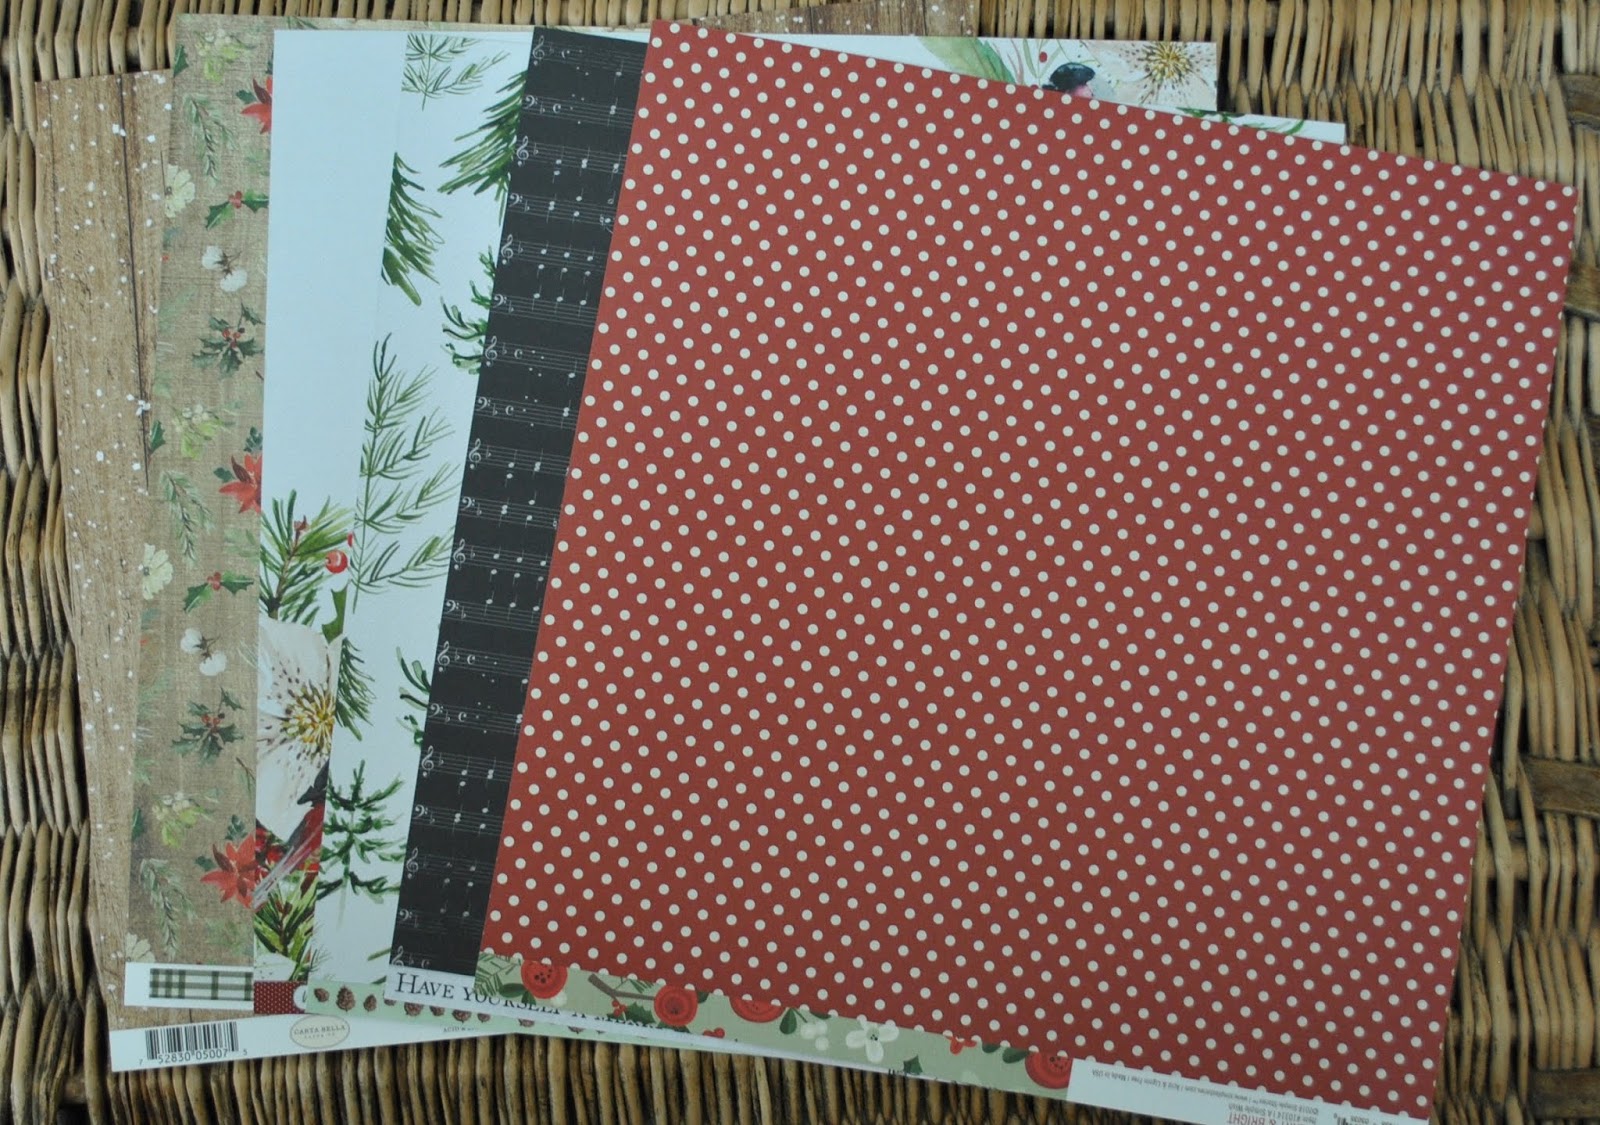
Before telling you how I made these layouts, here are the details of the kit.


The December Kit
Double-sided Patterned Papers:
Carta Bella - Christmas collection - Merry Snowflakes & Winter Floral
Kaisercraft - Peace & Joy collection - Rejoicing & Elation
Kaisercraft - Christmas Edition collection - Snowcapped
Simple Stories - Merry & Bright collection - A Simple Wish
Bazzill Basics - Kraft & Natural

The reverse side of the papers

Extra Bazzill Basics Pack - Rain Forest, Watermelon, Cajun & Raven


Embellishments:


2 Jolee's Boutique word stickers, 5 heart buttons, 3 Tim Holtz beaded berries, 4 Tim Holtz Christmas Quote Chips, 1 frame, 18" black lace, A5 sheet corrugated card, strip of pearls, 6 strips of word stickers, 2 red flowers, 2 exclusive chipboard stems.

Christmas Eve Engagement


For this layout I wanted to create a wreath to 'hang' on the wooden panels. So I worked with two sheets of patterned paper -
Merry Snowflakes and Rejoicing.

Cut the photo into a circle (mine was about 19cm in diameter), then cut a circle from the centre of the Merry Snowflakes paper, a little smaller than the photo. With the wooden panel side up mount the photo over the hole. Keep the circle cut from the paper for the next layout.

Take the Rejoicing paper and fussy cut the bird, the bird house and white flower from one side then turn and cut lots of red poinsettia and the leaves from the other side. (Also cut out the holly and set this aside for another layout - to come on the next post). Arrange these paper elements all around the photo, curl the leaves and petals with the blade of your scissors. Use double-sided 3D foam pads to give dimension to the wreath. Add a gem to the centre of each flower - I found some golden ones in my stash.

Add the Papermaze exclusive chipboard stems, I broke a piece off one of the stems then tucked them all in among the leaves and flowers. I added a dot of Glossy Accents to each bud. Add quote chips and word sticker strips to the bottom of the photo.


I cut my title from Gold miri card using an alphabet die set from Die-namics. The date was added with some old sticker dies from my stash.

Oh Christmas Tree


My first job was to gut the Rainforest Bazzill, making a frame of 1". I stuck this to a sheet of scrap cardstock to make a stronger base for the layout.

All the edges were inked with either Gathered Twigs and Forest Moss Distress Ink.

Then checking to make sure the trees are running in the right direction, I cut two pieces from the Elation paper, they were both 11" wide and one measured 2" deep and the other 5" deep. After rounding the corners at the top of the 2" piece and the bottom of the 5" piece, I added them to the top and bottom of the layout leaving a dark green border of 0.5" showing.

To fill the gap and make a contrasting band across the page - I cut a piece of Cajun Bazzill 11" x 4.5", and a piece of the plaid side of Winter Floral paper 10.7" x 4.3". I stuck the paper centrally over the card, then put it into place between the strips of Elation paper.

I mounted my photo onto some white paper and then positioned to the right of the layout (The white surround helps to lift the photo from the surrounding papers). From the Rainforest Bazzill I cut six trees (two of each) using the Tim Holtz Sizzix Woodlands Thinlits die set. I used the sheet of corrugated card in the kit to die cut three deer using the Sizzix Woodland Deer Thinlits die set. I mounted these onto the layout with double-sided 3D foam pads.

Selecting one of the quote chips I stuck it to the bottom right of the page, I added a date with some stickers from my stash. For my title I die cut letters from the circular scrap of wood panel paper from the first layout. I also used some old glitter Thicker alphabet stickers from my stash.


I have more layouts to share with you very soon.
Thanks for looking.
Lynn x