Showing posts with label Distress Stain. Show all posts

Monday, 1 December 2025

November Papermaze Kit - Part 2

Hi - Lynn here today, with the second pair of layouts I have made for the design team, using this month's Papermaze kit . the kit is packed with the a beautiful selection of autumn-coloured papers and embellishments. I loved working with the November kit and have created these two  layouts for my second post - I made a halloween and a heritage layout this time.


Before looking at how the layouts were made, here is what you will find in the kit.


Patterned Papers:
Carta Bella - Honeybee Collection - Bees and Flowers & Honeycomb Clusters
Carta Bella - It's Autumn collection - Fall Flowers
Simple Stories - Simple Vintage Autumn Breeze collection - Welcome Fall & Falling Leaves
Photoplay - Autumn Junque collection - Harvest


Embellishments:
Pretty Little Studio gingersnap die-cut leaves
Pretty Little Studio gingersnap cozy weather banners
Pretty Little Studio gingersnap I heart fall stickers
Little birdie flower
Pinkfresh Studio garden bouquet enamel dots
49 and Market Vicki Boutin Curiosities in Willow Grove chipboard bits 
1m hemptique yarn.


Bazzill Basics Cardstock - Yukon Gold, Pinecone (included in kit), Twill, Ruby Slipper, Aspen & Pumpkin Patch.

Picking Pumpkins - My great nieces went to Tulley's Pumpkin Festival with their family and friends this autumn.


For the background I used the sheet of Twill Bazzill, and flicked some watered-down Distress Ink in Carved Pumpkin, Rusty Hinge and Ground Espresso. I set this aside to dry while I did some die cutting.


I cut a pile of leaves using the Pumpkin Patch Bazzill using the Tim Holtz Sizzix Thinlits Skeleton Leaves die set. This is a very versatile die set, which I have used many times for cards and layouts.


I arranged these leaves over the left side of the Twill Bazzill. I saved a few for embellishing later.
With a Circles die set, I cut photos from the outing in various sizes. I also cut one circle in white card for journalling, and another slightly larger as a mount for the journalling spot (I used a scrap of
Falling Leaves paper).


The photos were arranged down the centre of the layout, together with the journalling spot. I added my journalling and a title to the white card circle. The word 'Picking' was created with Tangerine Doodlebug Designs Alphabet Soup letter stickers. For the word 'Pumpkins' I did some more die cutting, this time I used Spellbinders - Simple Stories - Say Cheese - Classic Pooh alphabet and numbers set, along with Yukon Gold & Pinecone Bazzill.


I tied the remains of the 
hemptique yarn into a bow and glued it under the title. The spare die cut leaves were arranged , tucked under the photos and white card. Finally, I scattered the Pretty Little Studio gingersnap I heart fall stickers, over the right side of the layout.


Charles and Aditha - A heritage layout using the Carta Bella papers from the kit. 


To start this layout, I worked out the size I wanted my finished hexagon to be, and cut the first one with 4.5" sides from the honeycomb side of the Honeycomb Clusters paper. I used the cells of the honeycomb print to work out the angles for cutting my shape. I distressed and inked the edges of this piece with Wild Honey Distress Ink. I attached this hexagon the black side of the Fall Flowers paper, and trimmed around the edges about 0.25" all round to make a border. The edges of this larger hexagon were treated in the same way as before.


I selected a sheet of cream cardstock from my stash and set about creating a multimedia backdrop For the large hexagon. Using the hexagon to work out where I wanted my stencilling etc. to show, I set about iusing a Vicki Boutin stencil and some Wild Honey Distress Oxide Ink, to create the honeycomb effect. I spritzed this with a little water and allowed the ink to oxidize and spread a little. This was left to dry, then I stamped some Distress Stain splodges in two colours - Walnut Stain and Forest Moss. Then the whole page was left to dry. 


The Large matted hexagon was applied to the centre of the cardstock. My photo was mounted onto a piece of the green side of Bees and Flowers paper, and set left of centre. 


The title was cut from my Tonic Studio Windsor Alphabet dies, and more of the Bees and Flowers paper. This was arranged to the right of the photo. 


I fussy cut some of the large flowers from the Bees and Flowers paper and some small flowers from the Fall Flowers paper, these were arranged in two clusters, some were glued down, others raised up with 3D foam pads (top right and bottom left of the hexagon). I added plenty of leaves from the Bees and Flowers paper. I added a touch of sparkle with a little Nuvo Glitter drops to the bee wings.

Finally, I embellished the page with the 
Pinkfresh Studio garden bouquet enamel dots from the kit.

That's all for the November kit, I'll be back with the December kit and some Christmas layouts soon.
Thank you for looking.
Lynn x

Monday, 14 October 2024

October Papermaze Kit - Part 1

Look at this beautiful, crisp autumn themed kit from Papermaze for October. I have enjoyed making my design team layouts using this month's collection. Here are the first two pages using autumn themed photos.


Patterned Papers:
Carta Bella - Harvest collection - Fall Floral Bunches & Multi Journalling Cards
49 and Market - Academia collection - Great Job
Jen Hadfield - Groovy Darlin' collection - Mellow
Simple Stories - Cider & Donuts collection - Tag Elements
Graphic 45- Autumn Greetings collection - Fall Foliage

The photo below shows both sides of the papers:


Embellishments:
3" x 12" Jen Hadfield Groovy Darlin' acetate, 2 Echo Park Sweater Weather chipboard phrases, 1 Prima nature academia flower, 1 strip Doodlebug gold sprinkles, 4 Bare Basics labels, 2 lines of Rosie's Studio Wildwood chipboard and selection of 49 and Market perforated tickets (peach).


Bazzill Basics - CS White and Beeswax (included in kit). Rain Forest, Quartz, Mocha Divine and Tangelo (Extra Bazzill Match pack).


Autumn Wedding - This layout has been created for friends, following their wedding in Wales last November. It had been raining, but stopped during the ceremony, so they came out of the church to sunshine and a rainbow!


For the backdrop, I used the sheet of Mocha Divine Bazzill from the kit.  I cut the Peartree Cutfile from the Rain Forest Bazzill. Using Picket Fence Distress Ink and a Tim Holtz Layering Stencil - Festive THS029, I inked leaves and berries in a circle slightly larger than the cutfile, so I would see them popping out from under the finished wreath.


I backed the cutfile leaves using Bazzill from the kit and other scraps from my stash. I chose two tags from the Simple Stories Tag Elements, cut them out and punched a hole in the top of each one. They were threaded together with some seasonal ribbon, which I tied in a bow at the front. I attached this embellishment to the bottom right of the wreath. Then I mounted the wreath to the background with 3D foam pads.


I sprinkled some Distress Stain (Tarnished Brass) and Distress Paint (Picket Fence), over the page, and allowed this to dry.


The photos were added to the centre of the wreath.  


With embellishments from the kit, I added the Doodlebug gold sprinkles and the Prima flower.

Harvest Festival - The children ready to go to the Harvest Festival service at our church.


I gutted the B side of  Multi Journalling Cards paper to make a frame of 1". Over this I mounted a sheet of Cream Puff Bazzill, trimmed to 10.5" x 10.5" and inked with Rusty Hinge Distress Ink. I sprayed some Distress Inks (Fossilised Amber, Gathered Twigs and Rusty Hinge) over the cardstock.


I chose six tags from the Simple Stories Tag Elements paper, and punched holes in the tops. After inking the edges, I arranged them across the bottom of the layout and threaded them together with Beautiful Baker's Twine (cream and gold). I ran the length of burlap from the kit across the layout just under the top of the tags.


The photos were added, tucking them under the burlap strip. I cut the two tag tops from the manufacturer's strip, and punched holes, then tied more of the twine through each hole and tied them in a bow. I placed one of these above the left-hand photo and the other up-side-down from the top right. I added tickets and labels from the kit to these tag tops to create small clusters.


My title was created with a word I created on the Cricut and cut from Bazzill and gold Doodlebug Designs Alphabet Soup stickers.


I wrote the date on the label. Finally, I used a few spots of glue to hold the looped twine in place.


That's all for today, I'll be back with more from this kit soon.
Thanks for looking.
Lynn x

Monday, 16 August 2021

August Papermaze Kit

The bright and colourful kit for the month of August, is now available from Papermaze and I'm sharing my first two layouts with you today.


Before looking at how they were made, here are the details of what you will find in the August kit:
 

Patterned Papers:
American Crafts - Vicki Boutin's Color Study collection - Palette & Color Wheel
American Crafts - Paige Evans' Wonders collection - #8
Cocoa Vanilla - Sunkissed collection - Good Vibrations
Pinkfresh Studio - Happy Blooms collection - Embroidered
Simple Stories - Sunkissed collection - Sunny Days
Bazzill Basics cardstock - White & Kachina

Reverse side of papers:


Embellishments: 

12" washi tape, 2 foam glitter words, 2 CVS wood buttons, strip of puffy star stickers, 6 CVS Sunkissed floral ephemera pieces, strip multi-coloured jewels, shaped clip & Bella Blvd acrylic heart & 5 puffy star stickers

Bazzill Basics Cardstock Pack 


Grenadine, Wild Pansy, Classic Yellow & Admiral

My Commute - This layout shows my daughter walking from Royal Crescent to the Theatre in Bath - in the rain!

I started with the white Bazzill from the kit and with some inks, I dripped some of each colour from about 1/3 of the way up the page, allowing it to run down the the bottom of the page.  I also flicked some ink of each colour over the rest of the Bazzill.


While this was drying, I set about cutting out and dividing up the colour wheel on the Color Study paper. I inked the edges of these wedges, with a corresponding Distress Ink colour. Then I arranged them on the page.

A placed my photo in the centre of the layout, and then set about embellishing the page, matching my embellishments to each wedge of coloured paper. From the kit I used the coloured jewels and some of the glitter foam stars. From my own stash I found sequins, gems and pearls.

For the main title I used a Sizzix - Tim Holtz BIGZ XL Die - Society. I cut the letters twice, once from some scrap black Bazzill and a second time, from scraps of the patterned paper (the pink side). I placed the letters offsetting them to create a shadow.


With the Sizzix - Tim Holtz Thinlits die set - Alphanumeric Tiny Type Upper and more black Bazzill, I cut out the lettering for the date and place name. 


I finished off with dots of Nuvo Crystal and Glitter Drops around the page.

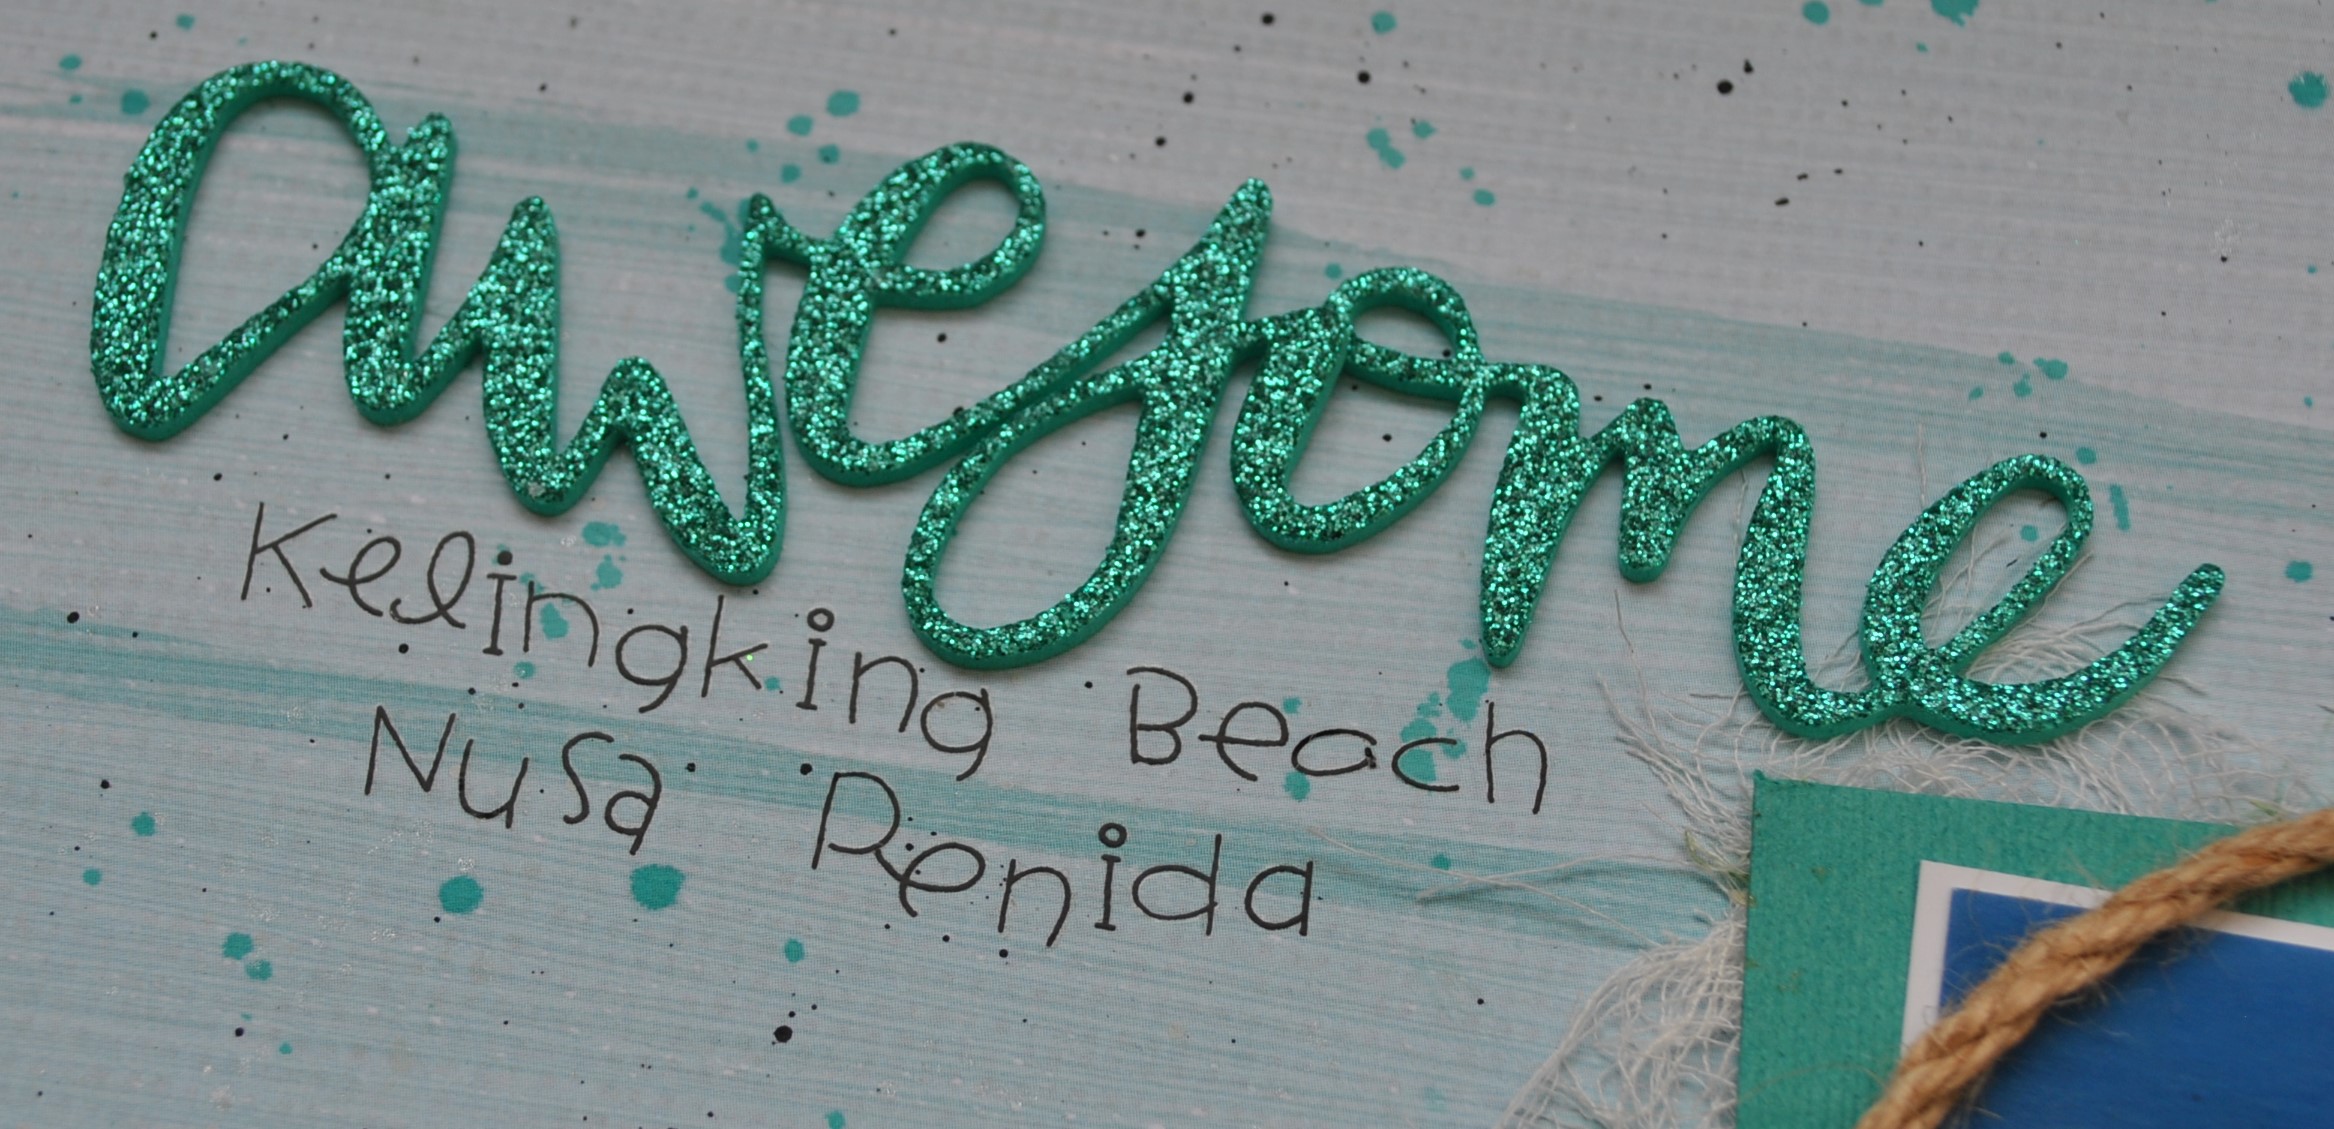
Awesome - This photo was taken of my daughter and her husband on their honeymoon in Bali, The beautiful scenery was ideal for this Vicki Boutin Color Study collection.

.


The 'Palette' paper was ideal and needed very little work to make a background for the layout. I flicked a little colour over the page. I used Distress Stain (Brushed Pewter and Peacock Feathers), and Distress Paint (Black Soot and Picket Fence).

I offset my photo onto a piece of the Kachina Bazzill and placed the photo and cardstock to the bottom right of the page. Before sticking these in place, I tucked a little cheesecloth underneath, so a little shows all the way around the arrangement.

With three short lengths of jute twine, I tied reef knots to rejoin them together and created a rough circle to place around the picture.


Then with a cake decorating mould and some Lite Fimo clay, I made a selection of shells and starfish. Once these were dry I painted them with Distress Inks. To highlight the detail I rubbed in metallic gilding wax. 


I placed the shells around the base of the photo, and added some prills into the crevices. 

My title is a glitter foam word from the kit, I added more detail using Doodlebug Designs - All Mixed Up - Beetle Black - Tiny Alpha Rubons. 

That's all for today, I will be back with more from this kit soon
Thanks for looking
Lynn x

Friday, 16 July 2021

Papermaze July Kit - Part 1

Lynn here today with the beautiful July Kit and my first pair of layouts for this month. The pretty kit has a selection of dreamy, watercolour effect papers, which are great for feminine, romantic, family history (and many more) layouts. The kit is now available in the shop or online.

For today's layouts I have chosen floral papers and embellishments.

Before looking at how they are made, here are the details of the kit:

Patterned paper:
P13 - When We First Met collection - #03 & # 06
Prima - Watercolour Floral collection - Dreamy Florals & In the Water Garden (both foiled)
American Crafts - Maggie Holmes' Garden Party collection - Blossom in Blue
Pinkfresh Studio - Keeping it Real collection - Deep Breath
Bazzill Bazics Cardstock - Avalanche & Boysenberry Delight

Reverse side of papers:

Embellishments:

Sheet of 49 & Market rubons, 12" washi tape, 2 Prima Waltercolour Floral flowers (1 glittery), 6 wooden hearts, 1 star, 7 pieces Prima Watercolour Floral ephemera, 5 silver heart stickers, a pinch of sequins

Extra Bazzill Basics Cardstock pack:

Romance, Wildberry Pie, Aqua, Heidi

Roses Around The Door - The photo for this layout shows the progress of the climbing roses around the arbour in front of our door, after three years.


The base for this page is the Aqua Bazzill. The papers were distressed and inked with Iced Spruce Distress Ink.


With the sheet of 'Dreamy Florals' paper, I picked a few of the images I wanted to use and cut them out. Then preserving a few more images for later use, I backed my photo with the remains of this paper. With a circle template, the photo and images arranged in place, I outlined, with pencil the space where I wanted the stencil to show.

The photo and images were set aside. With the Tim Holtz, Layering Stencil - Scribbles (I think this looks like roses.) and texture paste mixed with Distress Stain - Worn Lipstick; I worked this through the stencil to fill the space marked out. I altered the strength of the stain to vary the colour of the 'roses'. I also made two small areas of stencilling on the edges of the cardstock - I set this aside to dry.


Once I had adhered the images and photo in place, I added a selection of paper roses from my stash (in shades of pink and cream). I worked around the stenciled area, between the images. A few roses were also added to the areas of stencilling on the edges of the cardstock.

I scattered a few roses among the images too. The title was made with some scraps of Pinkini Bazzill from a previous kit and some Sizzix alphabet dies. Finally I added the date with some alphabet stickers.


Christine - Another black and white negative found among my Dad's collection - this time his cousin Christine. Another relative found to add to my family scrapbook album.

I started by making a 2.5cm frame with the Boysenberry Bazzill. Over this I placed the P13 - #03 paper, which I trimmed by 0.5cm on all four sides. I cut four notches into the edges of this
paper and trimmed behind these with a little lace. I distressed the edges of all the papers and card. 

With Distress Oxide Inks in Dusty Concord and Faded Jeans, I brushed some colour onto the background, then splattered it with water, and black ink.

The photo was mounted onto scrap white card, then onto Boysenberry Bazzill. I placed this where it was to go and arranged some burlap, corrugated card and cheesecloth under the photo. Once arranged it was all stuck in place.


Then came the embellishments - I created two large clusters and one smaller cluster of flowers by using a selection of the following:
Fussy cut rose clusters from P13 - #06, inked and raised on 3D foam pads
Two Prima paper roses from the kit
Additional paper flowers from my stash
Silver stamen
Rose ribbon
Owl Charm and purple Baker's Twine
Sizzix Thinlits - Tim Holtz Wildflowers set and Boysneberry Bazzill and scraps of P13 - #06 - all inked with the Distress Oxide Inks.


Finally I added the title - 'Christine' with some alphabet stickers.

That's all for today, back with more from this kit soon.
Thanks for looking
Lynn x