Showing posts with label photo collage. Show all posts

Friday, 13 February 2026

Simple Stories - Game Night - Twist & Shout

Hello, Karen here. I’m sharing my final layout today featuring the Simple Stories Game Night collection. This is a clean, simple layout that you can easily adapt for any theme or occasion.


I began the layout with a sheet of white cardstock. I trimmed this down slightly and then matted it onto a sheet of black cardstock leaving a narrow border around the edges. 

Next, I cut 5.25-inch squares from the It’s Your Turn and No Cheating! papers (two of each). I arranged them on the background, leaving a border between the pieces. For texture I used white thread to machine-stitch a straight border around the edges of each square.

I printed a photo collage of four photos, double matted it with white and black cardstock and placed it in the middle of the layout. In the middle of the collage I added some words cut from the Journal Elements paper which was also matted with black cardstock.

Strips of the No Cheating! paper were tucked underneath the matted photo collage.

An image from the 2X2/4X4 Elements sheet was added in the top right corner.

I cut a title from cardstock on the Silhouette and added this to the layout.

My journaling was printed, cut into strips, and layered onto the page. 

After adding the date to the bottom left, I used a circle punch on some coordinating cardstock to create some coloured dots, scattering them around to complete the layout.

Thank you for dropping by today and I hope I've inspired you.

Take Care,
Karen x x

Monday, 13 January 2025

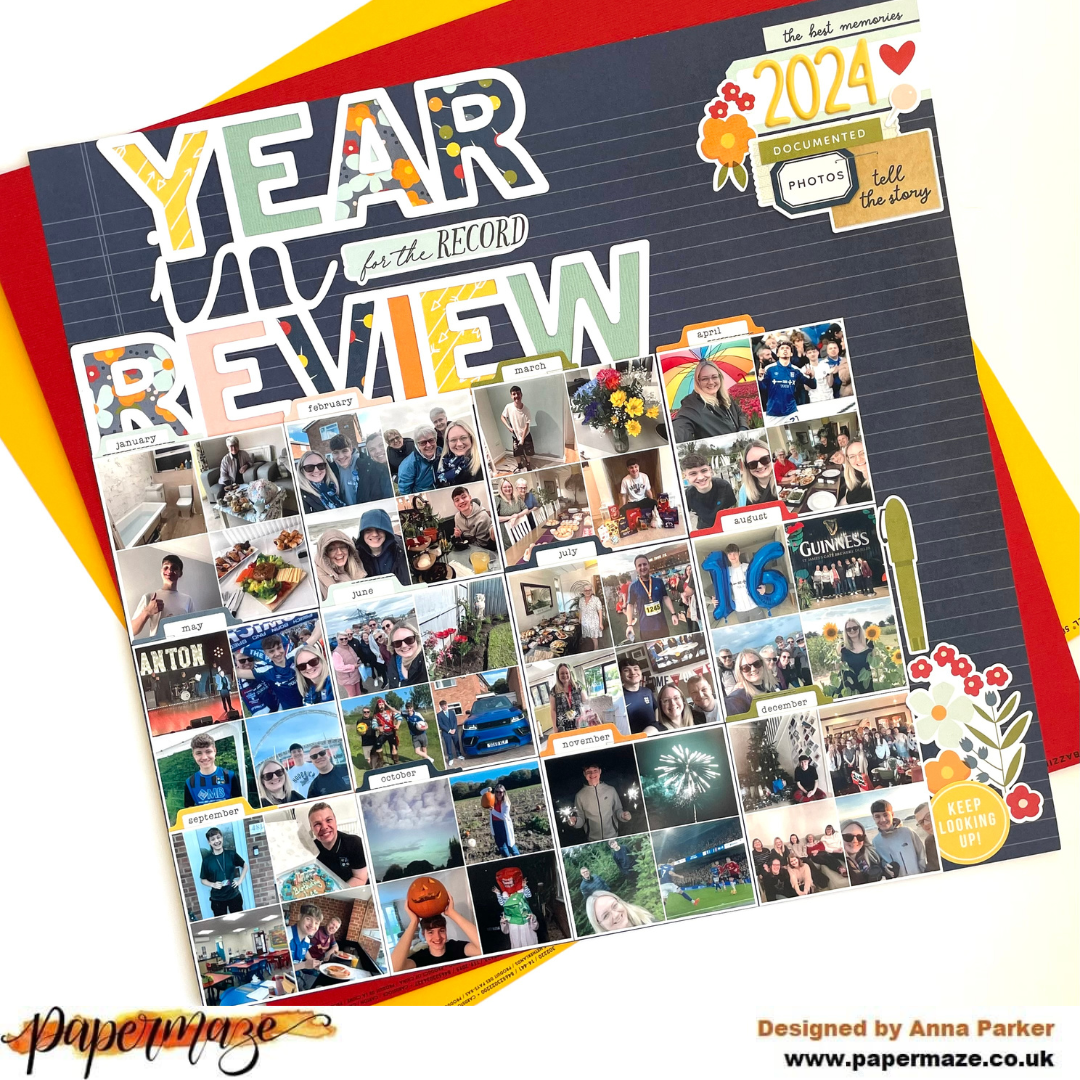
Simple Stories ~ For the Record 🗒️ #1

Hello everyone - it’s Anna back with you today. 
I am working with Simple Stories For the Record for my blog posts this month. You can find the whole collection in the shop here.

I love to create an end of year page for my albums each year to highlight some of the memorable moments of the year. So this is my version for the end of 2024…


I used an app on my phone to create a collage of photos, I did one collage for each month of the year. I then printed these out and adhered in month order on to ‘Keep Looking Up’. 


I used various patterned papers and some coordinating cardstock from the matchmaker pack to back a cutfile by Paige Evans. I then adhered this to the top left of my layout. 


In the top right corner I used Bella Blvd Luna Alpha stickers to add the year and then I clustered some cardstock stickers around it. 


I added the monthly tab stickers from the ‘Monthly Cardstock Stickers’ to each photo, just tucking them in. 
I added a cluster of cardstock stickers in the bottom right corner and that was my layout complete! 


Thanks so much for looking! See you later on in the month with a second layout using this collection. 

Anna

@acraftylifewithanna

Wednesday, 10 July 2024

American Crafts Paige Evans - Adventurous - Beautiful Place

Hello, Karen here. I'm really excited to be working this month with the new Paige Evans Adventurous Collection from American Crafts. I've been eagerly awaiting the arrival of this collection in the shop, and when the postman delivered my design team kit I wasn't disappointed! It is gorgeous. The collection is very vibrant and perfect for scrapbooking your travel and holiday memories but is equally great for general summer and everyday scrapbooking.

For my first layout I chose to scrapbook a photo collage using some photos from our summer holiday last year.


I started by layering onto a sheet of 12x12 white cardstock, squares of papers #18 & #19 with more white cardstock between. I used the B sides of the patterned papers but because I want to use the A sides on another project, I carefully gutted the papers before sticking  them down. Using white thread I machine stitched a straight stitch around the edges of the papers.

On top of the patterned papers I placed my square photo collage which I created on my phone in the Google Photos app.


Using one of Paige's older 'layered flowers' digital cut files and some scraps of paper, I created some three dimensional layered flowers to embellish the layout.


I used some white chalk ink to add some interest to the flowers and curled up the petals a little too.

The flowers were placed in the corners of the photo collage with some leaves from the Icon (Floral) Ephemera pack. I like the pop of turquoise the leaves give the layout.


Two tags from the Journalling Ephemera pack were strung with some twine and then added to the layout. I added journalling to one of the tags.


I stamped the date onto a tab and placed this at the top of the layout together with a word cut from paper #1. As the collection has gold foil accents, I matted the word onto some gold mirror card to echo the gold on the tag I had already added to the layout.


I used a word from the sheet of Phrase Thickers and the gold Mini Alphabet Thickers to cerate a title at the bottom of the page.


Finally I fussy cut two butterflies from paper #19, added them to the layout and hand stitched some butterfly trails with turquoise embroidery floss.

I hope you are as excited to use Paige's new collection as I am, and it is available in the shop now.

I'll be back again soon with another layout and until then, take care and enjoy the summer.

Karen x x

Monday, 24 June 2024

Pretty Little Studio - Good Vibrations - Gardeners World Live

Hello, Karen here with a multi-photo layout to share using the Good Vibrations collection from Pretty Little Studio 

I started with a sheet of black and white paper from the 12x12 paper pack and after trimming 1/4 inch from each edge I matted it onto a sheet of black 12x12 cardstock leaving a narrow border.

I then tore a couple of strips from a sheet of the Happiness paper and placed these at the top and bottom of the layout.

I printed three photo collages to just under 6x4 with 6 photos on each. The collages were then placed side by side across the centre of the layout. 

To create some embelishments, I fussy cut flowers from the Think Positive paper. In my stash I found some matching embroidery threads and using three strands of thread stitched onto the fussy cut flowers using a Lazy Daisy stitch. I love the texture this added to the flowers.

The stitched flowers were placed horizontally across the layout in roughly rainbow order and I added some 3D foam underneath each flower to add some extra dimension.

Below the flowers, the title was added using letters die cut from black cardstock.

On the computer I printed my journalling on white cardstock, put it into one of the frames from the Picture Day Frames Die-Cuts pack and tucked the framed journalling behind the photos at the top of the layout.

I matted one of the Seize the Day Die-Cuts with black cardstock and then placed this beside the journalling with 3D foam underneath.

I hope I have inspired you with this layout and will be back again soon with another project.

Take Care

Karen x x


Monday, 9 January 2023

Simple Stories Baking Spirits Bright - Walking with The Snowman

Hello, Karen here. Happy New Year! Today I have a final layout using the Simple Stories Baking Spirits Bright collection. My layout isn't about baking but instead records memories of a festive sculpture trail which came to our local town this past Christmas.

I have to admit that when I came to create this layout I didn't have a lot of my design team kit left so I have cheated and added a sheet of Simple Stories Sn@p Basics woodgrain paper from my stash. Sadly I don't think that paper is available in the shop now, but there are plenty of other woodgrain papers which would work just as well.

I started with a 12x12 sheet of Bazill Maraschino (red) cardstock and onto this I layered a sheet of 11.75x11.75 white cardstock and  a 10x10 sheet of the Simple Stories Sn@p Basics 'Birch' paper. I machine stitched around all the edges with white sewing thread to add some texture. 

A strip of the Sweet Holiday Wishes paper was then placed horizontally on the layout and also machine stitched.


So that I could include lots of photos on the layout, 12 photos were printed onto a 7x5 piece of photo paper using a collage app. The printed collage was then matted with a piece of the Merry & Bright paper and attached to the layout.


Using a free printable children's colouring page from the internet I created my own cut file of Raymond Briggs' The Snowman. The outline was cut from black cardstock and then backed with some white glitter cardstock and scraps of the Merry & Bright paper. The backed cut file was then tucked under the left edge of the photo collage.


One of the foam stickers from the Foam Sticker Sheet was used to embellish the Snowman's hat and the title was created with another foam sticker and some black cardstock stickers form my stash.


An image from some of the publicity material for the sculpture trail was printed onto some photo paper and, with the addition of some clear number stickers, was used as a sub-title.


Journalling strips printed on the computer were added.


Finally, a couple of foam stars from the stickers sheet were added to the bottom of the layout.


That's all from my today but I'll be back later in the month with another project.

Take Care, Karen x x