Showing posts with label travel layout. Show all posts

Wednesday, 10 September 2025

Photoplay - Lucky Cat - Time to Get Away

Hi Guys,

Claire here, and this month I'll be creating with the fabulous Lucky Cat collection from Photoplay.

Surprisingly, this is not a pet themed collection, but is Japanese and Asian inspired - perfect for scrapping those takeaway nights, meals out and far flung trips to the Far East! The possibilities are endless!

I've been lucky enough to travel to a few destinations across South East Asia and have so many photos, but I find them notoriously difficult to scrap as no typical collections really suit the photos or convey the feeling I'm looking for so I'm super excited to get some of these stories documented.

My first layout is bold and dramatic - capturing pictures from a photography night tour in Tokyo.


Because this took place late at night, I chose a piece of Premium Black cardstock for my base. I cut a strip of the Cherry Blossom paper about 2" wide, and layered smaller strips of the yellow and red card from the Matchmaker Pack underneath along with a small strip of black for extra depth.


Using the Red cardstock from the Matchmaker Pack, I cut a dragon from a design I found in my Cricut library.  I added extra light and shade to the dragon by brushing Black Soot Distress Oxide around some of the edges, and spritzed with gold ink for an extra bit of sparkle.


I cut the dragon in half and tucked it underneath the paper strips, and then added a row of Gold Nuvo Drops along the top of the paper strip to enhance the richness of the page.

I mounted my photos with the b side of the Lucky Cat paper and then embellished on either side using stickers from the Element Stickers.


Thank you for joining me on the blog today. I hope it's shown you can make an impactful, bold layout with just a few key pieces. 

Join me again on the 24th when I'll share my second layout with this collection, which is going to go from bold and dramatic to peaceful and serene.  I'll see you then!

Happy scrapping!

Claire xx
@scrappysoulmate 


Saturday, 6 September 2025

Simple Stories ~ Happy Travels 🧭 #1

Hi everyone, it’s Anna back with you today. 
This month I’m working with Simple Stories Happy Travels which you can find in the shop - here
This collection has been out for a couple of months now, but it’s still available in the shop and it is perfect to document your post summer holiday travels.  


To create this layout I gutted ‘Travel Buddies’ and trimmed down some white bazzill cardstock, leaving about an inch on each side. I adhered the cardstock to ‘Travel Buddies’ creating a border. 


I then printed my photos and mounted them onto coordinating cardstock in strips. 


I cut out some journaling elements from ‘Journal Elements’ and placed them alongside my photo strips to use as my journaling boxes. 


I added some element stickers around the layout, including the ‘Let’s go exploring’ title, at the top of one of my photo strips. 


I wanted to add in some extra detail to the top right of the layout. So I cut out a small section of paper from 3x4 journaling cards, along with a couple of element stickers. 


Thanks so much for looking! 
See you later in the month with another layout using this collection. 

Anna 

@acraftylifewithanna

Friday, 21 February 2025

Carta Bella - Paris - J'taime Paris

Hello

Claire here today with my second layout using the beautiful Paris collection from Carta Bella. You can check it out in the shop here

For this layout, I've decided to make a feature of the element stickers. This collection has so many fabulous Paris icons, particularly the major landmarks, and I wanted them to shine. 

So, I started with a piece of Premium White Cardstock and applied Tumbled Glass Distress Oxide with a brayer. To do this, I smushed the ink pad down on some plastic, spritzed with water, rolled my brayer through the ink and then applied to the page. I love the extra control the brayer gives and it also helps keeps any mess to a minimum.

I repeated this very lightly with Black Soot Distress Oxide, but less really is more here. 

There was no need to gesso the page as the brayer helps minimise pools of water so the paper doesn't warp. 

Next, I cut a circle from the Eiffel Tower paper to act as an anchor for my photos. I chose two of the same photo, one printed half an inch larger than the other and layered them up creating dimension and interest. 

Once these were adhered to the page it was time for the fun bit. The Element Stickers

These were so much fun to play with. I offset each one, layering some on top of the other with foam to create depth. 

I also pulled out the moped and tag sticker to go on the left of my photo to elongate the design. 

To build extra depth behind the landmark stickers, I fussy cut some buildings from the Paris Map paper and layered these behind the stickers. 

Finally, I die cut 6 stars from the Explore Paris and Paris Map paper using these to add an extra pop of colour. 

This was so fun to make! Hope it inspires you to get creative with stickers! 

See you next month. Until then, happy scrapping! 

Claire x

@scrappysoulmate 


Wednesday, 22 May 2024

Simple Stories - Pack Your Bags - Time to Go

Hello

Claire here with you today, sharing my second layout with the fabulous Pack Your Bags collection from Simple Stories. 

I adore scrapping travel photos and this collection is such a fun one to use. Loads of bright colours, fun patterns and fabulous phrases. 

For this layout, I've opted for a circular design which is one of my favourite 'go to' designs.


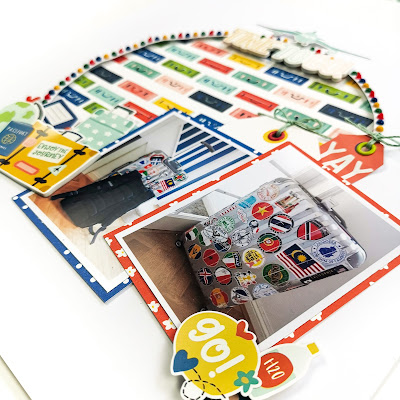
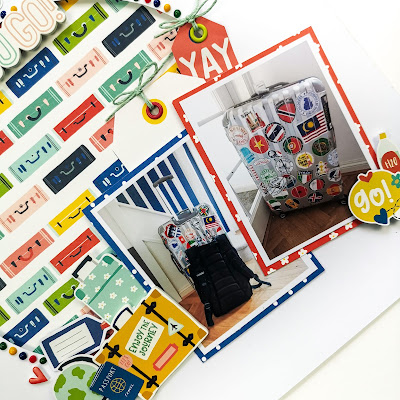
To create impact, I first drew a circle on a piece of plain white cardstock and cut out the centre using a craft knife. Adding depth, I backed the remaining frame in foam before adhering it to a piece of the Packed and Ready patterned paper which is full of colourful suitcases - the perfect match for my photographs!!

I mounted my two photos in the Let's Go Everywhere and Enjoying the View papers, picking contrasting red and blue patterns to help the photos pop.

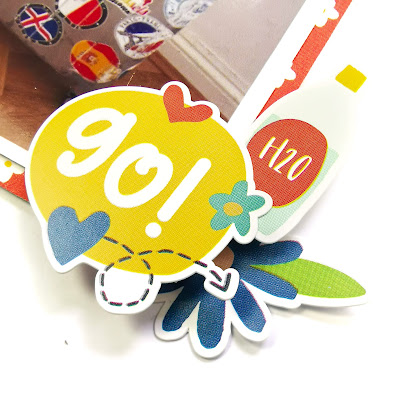
Once these were in place, I created small clusters on either side, using elements from the cardstock stickers, foam stickers and Bits & Pieces. I raised some on foam and adhered some flat to the page, building depth, dimension and interest that draws your eye across the page.


Under the photographs I popped two tags - one from the Bits & Pieces ephemera pack and the other fussy cut from the Tag Elements paper. I added eyelets in contrasting colours and twine, both from my stash. 


For my title, I opted for one of the foam stickers - I know I say it every time but these really are my favourite item in Simple Stories collections and these are no exception! 


The phrase 'Time To Go' is a match made in heaven for my photographs and sites nicely along the top curve of the aperture.  As a fun extra touch, I added a plane from the sticker sheet above it which brings the design together and creates a very small third cluster on the page. 

To finish the page and bring all the colours together, I added Novo Drops around the aperture and the page then felt complete! 

I hope you've enjoyed the pages I've made with this collection. They've certainly been fun to make! 

You can check out the collection in full here

Until next month, happy scrapping! 

Claire xx
@scrappysoulmate 


Monday, 6 May 2024

Simple Stories - Pack Your Bags - Explore

Hello,

Happy iNSD and Bank Holiday weekend! I hope you've all been having a blast and finding a bit of time to squeeze in some scrappy fun!

I've had the pleasure of creating with the new travel collection from Simple Stories called Pack Your Bags. I love to take hundreds of photos whilst travelling, so I was excited to get my hands on this collection and it did not disappoint.


The collection is full of bold bright colours, perfect for travel photos. To break up the colour I opted for a white cardstock background, using a sheet of Bazzill Classic Smooth White from the Matchmaker Pack. 

To add some interest to the background, I grabbed a stencil from an older Simple Stories collection called Going Places. I used distress oxides (Blueprint Sketch, Wild Honey, and Candied Apple) and a blending brush in colours to match my patterned papers.

Next, I cut 3 pieces of patterned paper (Enjoying the ViewSeeing the Sights and Lets Go Everywhere) roughly 4"x5", machine stitched around each piece and distressed the edges before raising on foam on my page. 

To bring in all the colours, I backed my photograph in the 4x6 Elements paper and then began to embellish! 

I created three small clusters using elements from the cardstock sticker sheet, ephemera bits and pieces, Foam Stickers and Journaling bits and pieces packs.  By mixing the colours and materials, laying some flat and raising some on foam, each cluster draws the eye into and across the layout, adding depth and interest. 


For my title, I used the Foam Stickers. These are just perfect! They're always my favourite element of a Simple Stories collection because they pull all the colours together. 


I hope you've enjoyed this colourful page. It was so much fun to make and I can't wait to share more with you later this month. 

You can shop the collection in full here.

Happy scrapping! 

Claire xx

@scrappysoulmate


Friday, 5 May 2023

49 & Market - Vintage Artistry Everywhere - I'd Go Anywhere & Everywhere With You

Hi everyone,

Claire here with you today, and this month I'm excited to be using the new Vintage Artistry Everywhere collection from 49 & Market. You can find it in the shop here.

This is a new brand to me and I'm impressed!

The papers are great quality, made with heavyweight cardstock that'll stand up to all sorts of memory keeping, and the different ephemera packs are full to bursting with so many options for embellishing your project.

For my first page, I was immediately drawn to the Ticket Montage paper.


Luckily, I had ordered 2 pieces and so I used both sides - it's my favourite paper in the collection and impossible to pick a side! :)

I used a cutfile to cut a map of the world and raised this on foam to lift it from that beautiful watercolour background paper. 


For the smaller countries, like the UK, I stuck them flat with a glue pen.


Once the map was in place, I positioned my photograph, creating layers by using frames from the Filmstrip Frames Pack. I offset the frames and stuck them to the back of my photo with double sided tape, before mounting the whole thing on foam.


To create some extra colour and separation, I added some rub on splatters from the 6x8 Album Rub On Set and 6x8 Rub On Set that can be seen poking out from underneath the photo. 


From the latter pack, I also added some post marks, scattered around the page.  Having not used rub on products for many many years, I was delighted to see how easily these transfer to the page. again, they're  great quality.

To embellish the photo cluster, I used a small sticker from the Wishing Bubbles and Baubles pack which says 'view' and is perfect for my photograph as we were stood on top of The Peak in Hong Kong to get a panoramic view of the city.


I also took some words and phrases from the Chipboard Word set to create a subtitle "Yes! Adventure" which I adhered directly to my photo.


To embellish the page, I used a selection of geo tags from the Chipboard Geo Frame Set.


I also scattered some of the smaller geo tags from the Wishing Bubbles & Baubles pack. Both of these geo tag sets come with a range of different colours in the pack so you can pick the one that best suits your layout.  


For my title, I just had to use the 12x12 Sentiment Rub Ons - they're awesome!! Application was really easy and simple. I aligned the rub on in a straight line across the bottom of the page, making sure it was straight before applying.  Again, it went on really easily, and the effect is simply beautiful - The perfect way to finish the layout.


I am absolutely loving this collection - the possibilities are endless and I can't wait to share another post with you later this month.


Take care,

Claire xx

@scrappysoulmate


Thursday, 9 June 2022

Bella Blvd ~ Time to Travel 🚐 #2

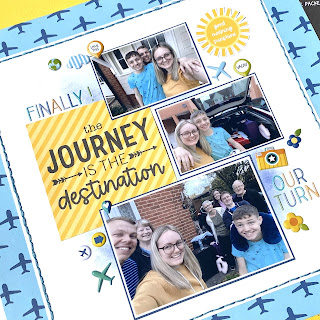
Hi, it’s Anna back on the blog today! I’m sharing my second layout using Bella Blvd Time to Travel. I’m documenting our recent holiday and travel day in particular! This page focuses on the first part of our journey and finally being able to go!

I began by adding some distress oxide (in the shade blueprint sketch) lightly to a sheet of white bazzill. I knew roughly where I wanted to place my photos, so I placed them on the cardstock to make sure the distress oxide would show. 

I then gutted a sheet of ‘In the Clouds’ and trimmed down my cardstock by about 3cm each side and adhered it to the in the clouds paper. I also hand stitched around the edge of the white cardstock.


I mounted my photographs onto some navy blue bazzill cardstock and also selected one of the cut apart phrases from ‘Daily details’ to accompany them.


I fussy cut the sunshine from the ‘daily details’ paper and completed my layout by adding some of the puffy stickers.


Thanks so much for looking! I’ve got one more layout to share with you before I move on to another collection! 

See you then! 
Anna
X