
Lynn here today with the first Papermaze kit for the new year. January's kit
is now available to buy from the shop or online. Vanessa has put
together beautiful papers and embellishments, many on a home theme, but
suitable for many different ideas. An exclusive knitwear stencil, which
along with other items is great for scrapbooking crafty layouts.
Here are my first two layouts.

Patterned Paper:
American Crafts - Vicki Boutin - Fernwood - Simple Pleasure, Wonderful things & Happiness Blooms
American Crafts - Paige Evans - Bungalow Lane - #16
Carta Bella - Gather At Home - 4 x 4 Journalling Cards
P13 - Let Your Creativity Bloom - #06
Bazzill Basics - White and Whirlpool
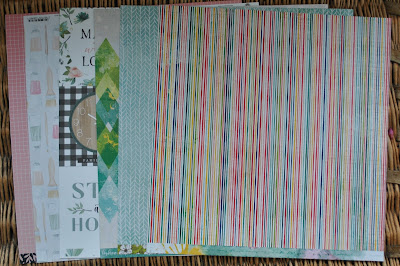
Reverse side of papers
Embellishments:
5 P13 Ephemera Tickets, 3 Prima leaves, 12 pearls, 6 Market Square Enamel Dots, Puffy stickers, Fernwood Epoxy Paper Clip, 3 lines of Pebbles 2nd Avenue Gold Thickers, exclusive stencil.

Bazzill Extra Pack - Guava Sensation, Pigment, Amber & Rain Forest

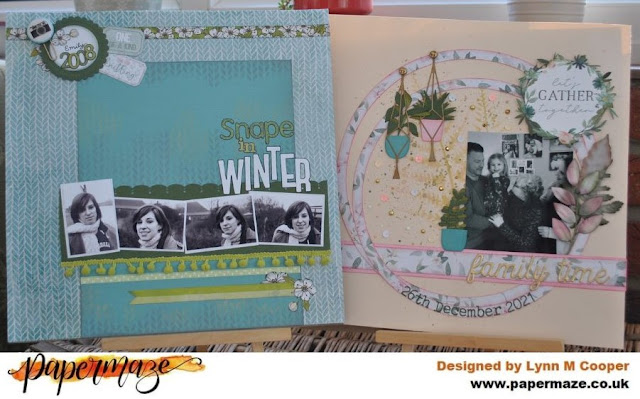
Snape in Winter
- Making use of the knitwear print paper and the stencil, I have
scrapped these photos of my daughter in her warm woolly scarf, on a cold
winter day in Snape.

I cut off and saved the detail strip at the bottom of the sheet of Fernwood 'Happiness Blooms' paper. I cut away a piece 18cm wide x 24cm high, from the bottom of the page. A piece of Whirlpool Bazzill 20cm x 26cm, will cover the gap cut from the patterned paper later.
I used the stencil and applied Distress Oxide Ink (Peeled Paint and Weathered Wood), with a blending tool as shown in the photos. After inking the edges of the Bazzill, I applied it to the patterned paper.

Cutting a strip of Rain Forest Bazzill 8 cm deep, I trimmed the long edge with a border punch. I arranged my four small photos along the strip and trimmed it, leaving it just a little longer than the photos. I stuck this about 6cm up from the base. I trimmed the strip with some bobble trim.

I
glued the detail strip to the top of the page. Using Rain Forest Bazzil
I die cut and embossed a seal using a Tim Holtz Sizzlix Switchlits. I
added a white circle to the centre and placed it to the top left of the
page with 3D foam. From the scraps of the other side of the patterned
paper, I cut a few flowers, and placed some of these on and around the
seal; I added the paperclip and two of the tickets from the kit.

A strip of ribbon was glued below the bobble trim, and two strips from the paper placed below the ribbon.
My
title was made up from letters die cut from white card using a Sizzix
BigzXL die and some old stickers from my stash. I outlined my letters
with a black marker pen.

Family Time - A family gathering, little Scarlett with her aunt, uncle and great grandmother.

The base for this layout is the Pigment Bazzill. I used a Vicki Boutin Greenery Stencil and a selection of Distress Oxide Inks to create some fern leaf pattern in the centre of the card. I flicked some of the same oxide inks, watered down over the page. Once this was dry I flicked some Shimmerz Spritz (Cotton Candy) over the page.

From the #06 paper I cut two rings which I distressed and inked with Worn Lipstick Distress Ink. I also cut a 2.5cm strip from the same paper and mounted it onto a strip of Guava Sensation Bazzill. I arranged these on the page and tucked the photo in place.
From the 4" x 4" Journalling Card paper I fussy cut the wreath and applied this with 3D foam to the top right of the circles. I arranged the Prima leaves along the right of the photo.

Using Bazzill from the kit and other scraps from my stash I die cut pot plants using the Hanging Planters Sizzix Thinlits set. Two of these were hang from the circles using gold brads, and the third was place next to the photo.

To create a little sparkle I added gems, sequins and pearls, together with some Nuvo crystal and glitter drops.
The title is made from the gold Thickers in the kit, and the date was cut with Tim Holtz Alphanumeric Tiny Type Sizzix Thinlits die set.

I'll be back with more soon.
Thanks for looking
Lynn x
No comments:
Post a Comment