Friday, 15 September 2023

September Papermaze Kit - Part 1

Hello, Lynn here today, with the autumnal Papermaze kit for September. A great kit of papers and embellishments collected together by Vanessa, ideal for the time of year.

Both the layouts are of my son, roughly 30 years apart! The first as a baby and the second as a PhD student.

Before looking at how the layouts are made, here are the details of what is in the kit.


Patterned Papers:
Simple Stories - Simple Vintage Essentials collection - Little Details & Vintage Tidbits
Simple Stories - Trail Mix collection - Campfire Stories
Mintay - Places We Go collection - #04 & #05
Shimelle - Maine Character Energy collection - Face the Sun
Bazzill Basics Cardstock - Pigment & Cinnamon Stick

Reverse side of papers

Embellishments: 3 Simple Stories Chipboard Metal Hardware pieces, Simple Stories Titles Foam Stickers, 5 pieces 49 and Market Acetate Leaves, 49 and Market Bits Essential Tickets,
2 Idea-ology Quote Chip Labels, 3 hardware brads, 1 word tag,1 prima paper flower, 1m grey twine, pinch sequins


Extra Bazzill Cardstock Pack - Stonehenge, Aqua, Beeswax & Rosewood

Happy Little Moment - Here I have scrapped a series of photos of my baby playing in the travel cot. It looks a bit like he is giving a sermon!


I trimmed all my photos and two pieces of Kraft Bazzill to measure 3.25" x 3.25". They were all mounted onto pieces of 'Trail Mix' paper, cut to 3.5" x 3.5". I used both sides of this paper for mounting the photos and two journalling blocks.


The nine blocks were arranged in three rows of three on the pigment Bazzill, then offset. I tore up the remains of the 'Trail Mix' paper and used both sides again in patches around the edges of the Bazzill. 


My title was created with the
Simple Stories Titles Foam Stickers from the kit over one of the journalling blocks.


On the other block I wrote some journalling, and a few details with Doodlebug Designs Alphabet Soup letter stickers in Mint.


Finally, I scattered the sequins from the kit across the layout.


A New Adventure - My son in the lab where he works at Loughborough University.


For this layout I used the paper called 'Little Details' for the background. I added more detail with some mixed media, using a selection of stamps, stencils and inks (Tim Holtz Stamps, Layering Stencils, Archival Ink and Distress Oxide Inks).


I made a small booklet by folding a 12" x 4" strip of 'Tidbits' paper, then adding the three brads from the kit along the spine. I placed a photo on the front and two more inside. The hardware brads were used on the spine of the booklet. 

I made a voltage metre with scraps of papers and card, using the Tim Holtz Bigz Sizzix die. 


For the title I used some of the titles foam stickers from the kit together with ek success - Sticks Scribble Alpha stickers from my stash.


Embellishments were some bits from the kit - a quote chip label, and a piece chipboard metal hardware. I added in some Idea-ology filmstrip ribbon and AC Thickers Storyteller phrase stickers.


That's all for today, back with more from this kit soon.
Thanks for looking.
Lynn x

Wednesday, 13 September 2023

September Crop!

 After a few very hot days, it's nice to be back to some normal temperatures - just in time for our September crop, which is this coming Saturday, the 16th.  

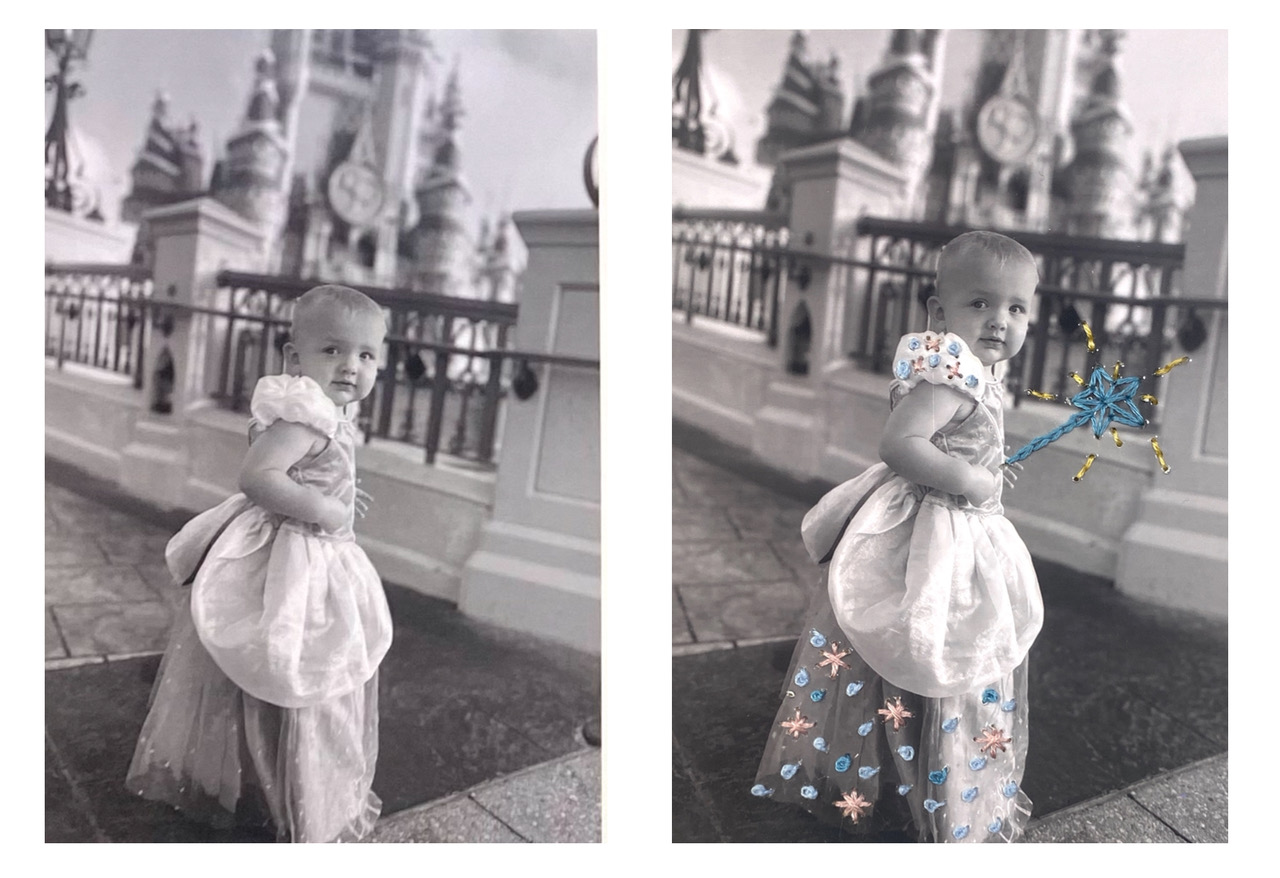
We have a beautiful crop kit designed by Lorraine, using the Gingham Garden collection from Crate Paper, and focusing on stitching on photos as a technique.  


There are options for different levels of stitching ability, too, as you can see from the photos below.


We are at Otley Village Hall from 10am until 4pm, with homemade cakes, tea & coffee, dies & punches to use - get in touch if you'd like to come along!


Monday, 11 September 2023

Pumpkins Please! Echo Park I Love Fall

Hello there I am back with an autumn project, even though summer is still hanging on here!  I have been using the beautiful autumnal Echo Park I Love Fall alongside some mini distress ink pads and a golden shimmer spray.


Firstly I had a chipboard cutout of a pumpkin in my stash that I covered with Coconut Swirl Bazzill paper to have a completely blank canvas.  I am sure you could use a cutting machine to cut out a large pumpkin shape and use several layers to create the same shape that I used.


I then used Mowed Lawn combined with Cracked Pistachio, Fesive Berries, Spiced Marmalade mixed with Mustard Seed and Dusty Concord Distress ink colours to create a blended background.  I didn't have any particular order in mind, I just wanted to create an autumnal colour pallette.  I then put droplets of the Shimmer Spray Vanilla Custard onto the background and sprinkled large droplets of water onto the distress inks.


I used two small leaf dies to cut out various leaves from Plump Pumpkins, Crisp Fall Air, Fall Is Here and Elements of Fall and layered them on top of each other to create two clusters either side of my photograph.  I felt it needed some glitter, I always need glitter, so I added a little dash of glue here and there to the leaves and sprinkled some larger glitter onto the leaves.  I finished the piece with a sticker from the Element Sticker sheet.


I am so pleased how this piece turned out and will be using it as some autumn decor in my house.  I hope you join me later this month for a 3d autumn project!

Friday, 8 September 2023

Sunkissed Memories - 49 and Market - Vintage Artistry Sunburst Collection

Hello all, it's Rebecca with you today sharing my first layout of the month... and what a scorcher it's turning out to be! The perfect weather to share a beachy layout created with 49 and Market's 'Vintage Artistry Sunburst' collection, which you can find in the shop here.


I've created a few layouts with this collection now, and I'm absolutely loving it. For today's layout, I decided to go for a more 'beachy' theme as my little boy is posing by the beach in the photos. I was feeling brave, so reached for a patterned paper for my background - something I almost never do! I loved that the 'Lost Island' paper was colourful, yet still subtle enough to work as a background.

I began by cutting some strips of patterned papers of varying lengths and widths, and layered them in the centre of my page. I then matted my photos onto yellow cardstock and placed them centrally on the strips, slightly overlapping to prevent the layout from becoming too 'blocky'.


For my title, I've selected a die cut from the Ephemera Bits. This pack of embellishments is amazing, and includes 123 die cut pieces. It will last forever! I placed the title overlapping the bottom of my photos.


Once these larger elements were in place, I moved on to embellishing. I started with a few rub ons from the 6x8 rub ons transfer set. I'm a sucker for palm trees on a beachy layout, so naturally reached for these! I added one either side of my photos.


I then added some floral die cuts from the Ephemera Bits and the Tropical Foliage Laser Cut Outs pack. This is another awesome pack of embellishments with 70 pieces in it. Behind these die cuts I've added some pink thread tangles to introduce a bit of texture to the page.


I finished the layout off with some more die cuts, building clusters around the bottom of my photos and above them. Using the die cuts, I've added some pops of black, which I think really creates some drama against all the bright colours. 


I hope you've enjoyed this layout, and the others I've created with this stunning collection. 

Thanks for reading. I'll be back later in the month working with a brand new collection.

Take care

Rebecca x

@preciouspagespapercraft


Thursday, 7 September 2023

American Crafts - Shimelle Main Character Energy #2 🌈

Hi everyone, 

It’s September already! This month I’m continuing to work with the bright and bold collection by Shimelle with American Crafts - Main Character Energy. You can find it in the shop here. 

For this layout, I just had to work with the ‘Ensemble Cast’ paper as I love creating grid layouts! So I created a multi photo page, cutting up the squares from the paper to use on my grid. 


I used 12 of the squares and kept some spaces blank, with just my white cardstock showing. I then chose to cover some of the squares as a mount for my photos and I kept some of them to show their sentiments. 


To fill in the gaps, I used some stickers from the cardstock stickers. As well as creating a title in one of the blank squares. I used these mini alpha stickers for this, other mini alphas can be seen here. 


I added a journalling spot and some extra details dotted around the layout using the cardstock stickers. 


Thanks so much for looking. 
See you soon with another layout using this collection. 

Anna
x 

@acraftylifewithanna 

Wednesday, 6 September 2023

Simple Stories - Trail Mix - Outdoors Adventure

Hi there,

I hope you've had a fabulous Summer Holiday, despite summer being somewhat lacking here!

Autumn has definitely arrived and I'm loving it! It's my favourite time of year, and this month i'll be documenting it using the Trail Mix collection from Simple Stories which you can find in the shop here.


I was surprised how versatile this collection is. It combines earthy tones like I've used here, with brighter more vibrant colours which I'll use in my next post. That gives it great range for scrapping brighter Spring/Summer adventures with those more woodland walks through Autumn to Winter. I do love a collection that has multiple uses!

As usual, I reached for a base of White Premium Cardstock, and some Distress Oxide Inks in shades that reflect this warmer tone palette. I used:

I applied them using a gel printing plate, creating circular prints going vertically down the page.


Once I had these in place, I knew I wanted to create a circular design, pulling all the different circular elements from the collection to build clusters around my photograph.

I first cut a range of circles in different sizes using dies, but you could use punches or an electronic cutting machine like Cricut or Silhouette to achieve the same result. I used the blue and green sheets from the Matchmaker Pack, along with the 3x4 Elements and 2x2/4x4 Elements papers.

I stuck some of these flat, but raised most on foam, gathering them in 3 main spots to create anchors for each cluster.


To each cluster I added some ephemera from the Bits & Pieces pack, alongside some stickers from the Sticker Book.

The Ephemera pack includes these cute little bugs which make a great addition to the page and really help to give it that outdoorsy feel.


Just above my photo, I wanted to create a larger cluster, so fussy cut this big compass from the 2x2/4x4 Elements Paper which really helps to balance the page as it's offset against a larger photo. This also acts a a subtitle for the layout.


Again, you'll see I couldn't help but add another one of those cute bugs to bring the page to life!

My title is made from a large statement piece from the Page Pieces pack. I love these packs. They contain 15 staple die cuts including ephemera and journaling pieces, that give you everything you need to create a beautiful layout, and they're great value for money!

I added the 'adventure' from the Bits & Pieces Ephemera Pack to help bring a bit of the darker brown to the bottom of the page.


I also added a small cluster of trees using the Bits & Pieces and Sticker Book to help incorporate the title a bit more, and bring the it into the design.


With a few extra splatters of Distress Oxide, the page was complete!

This was a very quick and easy page to put together, and I can't wait to come back later this month with another layout from this beautiful collection.

There's still plenty of this collection in stock, so check it out here.


Claire xx

@scrappysoulmate


Friday, 1 September 2023

August Papermaze Kit - Part 2

Hello, Lynn here today, with my second post showing layouts made with the Papermaze kit for the month of August. Full of tropical papers, card and embellishments.

Before looking at how the layout was made, here is what you will find in the kit.


Patterned Papers:
Prima Marketing Inc. - Postcards from Paradise collection - Floral Paradise & Tropical Vibes
Pinkfresh Studio - Sunshine on my Mind collection - Love This Day & Paradise Found
Pinkfresh Studio - Tourist Mode collection - Sightseeing
49 and Market - Spectrum Gardenia collection - Classics Pink Skies
Bazzill Basics - Avalanche & Aqua

Reverse side of papers

Embellishments: 10 Prima Ephemera Pieces, Prima Harmony Flower, 4 Prima Chipboard phrase stickers, 49 and Market Color Swatch Blossom Tickets Essential, enamel flamingo charm, 5 Doodlebug puffy heart stickers, Rosie's Studio Puffy Scatter Stickers, Pinch of Pinkfresh Studio Jewel Essentials, 2 Rosie's Studio chipboard frames.


Extra Bazzill Basics Pack: Pastel Blue, Watermelon Sensation, Ivy & Pinkini.

Flights of Fancy - This photo was taken at Henstead Exotic Garden in Suffolk where we help out. It shows Alan Titchmarsh visiting Andrew who created the garden for the Flights of Fancy
part of Britain's Best Garden series. His garden was a winner for 2015.


For this layout I started by fussy cutting all the leaves from the 'Paradise Found' paper. I inked the edges of the leaves with Saltwater Taffy Distress Ink and curved the leaves. Then I arranged them in a frame around the 'Love This Day' paper. I used foam tape to add shape to the leaves.


I cut the two birds from the 'Tropical Vibes' paper, and I made a tag for my journalling from the scraps of this paper too. 


I used DMC Threads in a variety of colours to match the papers, I threaded them through the hole made in the tag. Then I unravelled the individual coloured threads so they all mingled together. Then I wrote my journalling on the tag.


Together with the Prima paper flower from the kit, I arranged the birds and tag onto the page.
Selecting from the kit, I used the ephemera and the chipboard phrases on the page too.
My title was cut from some metallic card, using a Tim Holtz BigsXL Sizzix die - Society. The title was added to the top of the page, across the leaves. I decorated the leaves with tiny dots of Nuvo Crystal Drops in White.


Finally, the date was created with Rosie's Studio Simply Charming puffy letter stickers.


Fun in the Sun - A photo of my daughter, complete with face paint, taken on a day out to Pecorama, when on holiday in Devon.

I trimmed the 'Pink Skies' paper to measure 11.5" x 11.5" and mounted it on a 1" frame, gutted from the Ivy Bazzill cardstock.  I used a craft knife to cut round the right-hand wings of the butterfly.


I mounted my photo onto Ivy cardstock, and placed it onto the layout, tucking it under the butterfly wings I cut earlier, without sticking it in place. Then I arranged the tickets from the kit around the photo, peeking out from under the photo. I also used a scrap of film frame from last month's kit.


I cut some phrases from the 'Sightseeing ' paper, inked the edges and laid them in place. All the elements prepared so far were then stuck in place.

I used a Pretty Little Studio - Sunkissed - Fun in the Sun Word Title to make my title, and raised it with foam pads. I added my daughter's name with some alphabet beads, threaded onto some pink wire.


The date was placed into the film frame with Doodlebug Designs Alphabet Soup puffy letter stickers - Cupcake.

Finally, I scattered the heart stickers from the kit, together with gems and sequins from my stash, over the page.


That's all from the August kit, I'll be back with the September kit soon.
Thanks for looking
Lynn x