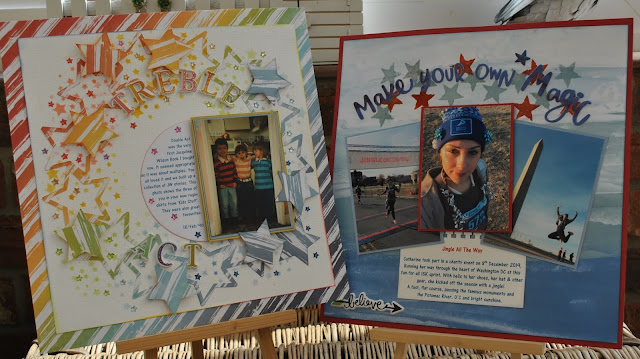
Hello, It's Lynn here today with another two layouts made using the bright, sunny June Papermaze Kit. This month I have been experimenting with the Distress Embossing Glazes.
Before we look at how these layouts were made, this is what you will find in the kit:
For a full list, links and details please see the previous post June Papermaze Kit.
Treble Act -
This layout shows the children in their new rugby style tops from Kid's
Stuff. The title of the layout is a play on words to the title of the
favourite story by Jacquline Wilson - Double Act.
This time I trimmed a piece of White Bazzill to 27.5cm x 27.5cm, and I inked the edges with different colours of the rainbow.
I gutted the centre from the Vicki Boutin - Let's Wander - Chasing Stars paper, so I had a frame 3cm deep. I mounted the bazzill centrally over the paper frame. Then I used the Cricut and an SVG file to cut a star wreath from the remaining paper.
With
the star stencil from the kit I stencilled tiny stars in a circle using
different coloured Distress Inks and a blending tool. Then I placed the
star wreath over the stencilled stars.
I mounted my photo with two
mats, from scraps of Stonewash and Candle Glow Medium Bazzill. This was
mounted to the right of the wreath. I typed my journalling into a
semi-circle and cut this out to place to the right of the photo.
I created my title with American Crafts Thickers Paige Evans Happy Thoughts
foam letter stickers in line with the wreath. Then I inked the edges of
a few of the stars left over from cutting the wreath and added these to
the page using foam tape for dimension.
Finally I added some pretty sparkly star gems from my stash.
Make Your Own Magic - This layout shows my daughter in Washington DC, taking part in a Christmas charity run called 'Jingle All the Way'.
For this page I gutted the Red Rock Bazzill to give me a frame of 2.5cm.
I trimmed the Heidi Swapp - Art Walk - Sea to Sky paper to measure 29.5cm x 29.5cm. I took a Tim Holtz Layering stencil, a Ranger Clear Emboss It Dabber and Distress Embossing Glazes in Fried Brick and Weathered Wood;
I had been keen to try these glazes as I was interested to see how they
worked, The translucent quality of them means they can be overlapped to
give another shade of colour where the two combine. They give a high
shiny finish and any pattern on the paper underneath will show through
too. They give more of a tint of
colour compared traditional embossing powders.
I
mounted my photos onto cardstock, using scraps of Red Rock and
Stonewash, and arranged them across the middle of the page under the
stars.
I printed my journalling in similar colours to the stars, onto some card, and trimmed the top of the panel with a binding edge EK Success punch. I placed this below the photos.
I used the 'Believe' puffy sticker from the kit at the bottom left of the layout.
The title was made with the words 'Make Your Own Magic' from the Truly Grateful Puffy Phrase & Accent Sticker - AC Thickers set.
That's is all for today, but I have two more layouts to share - coming soon.
Thanks for looking
Lynn x


3 comments:
Super pages Lynn, loving that ring of stars! xx
Lovely layouts Lynn. I particularly like the positive and negative stripey stars ⭐⭐⭐ in the first one. x x
Those stars on the wreath are just Devine!
Post a Comment