Showing posts with label Cards. Show all posts

Wednesday, 16 April 2025

Mintay Paper Blossom Serenity

Hello Karen here! Today I have another project to share with you, featuring the beautiful Blossom Serenity collection from Mintay Paper. I've created two birthday cards using papers from the collection and the coordinating paper die-cut pack. I really enjoy making cards with scrapbooking papers and embelishments - it's like designing a tiny, photo-free scrapbook page!


As well as papers and die cuts, I also used some pink cardstock, white glitter cardstock and some ribbon and sequins from my stash,

I die cut, using a manual die cutting machine, some glittery doilies from the glitter cardstock to add some sparkle to the cards and also layered more glitter cardstock beneath the paper and cardstock layers.


The die cuts in this collection are so pretty and for these cards I chose to use the girly die cuts as well as some birds and butterflies.


Some sheer ribbon was attached horizontally to the cards and a die cut pink cardstock sentiment was added.


Finally I added some pink sequins for even more sparkle.

Thank you for dropping by today and I hope I've inspired you to create some cards with your scrapbooking supplies.

Until next time, Take Care. Karen x x


Monday, 6 January 2025

Mintay Papers - Christmas Blessings - Pop-up Gift Card Holder

Happy New Year! Karen here today with one last project using Mintay's Christmas Blessings collection. Today I am sharing a Pop-up Gift Card Holder. Whilst I have made this using a Christmassy collection, it could be made with any papers and cardstock to suit any occasion.


Full instructions for making this gift card holder can be found here at simplysimplestamping.com. The instructions are for a card holder with stamped images but as I am not really a stamper, I used patterned papers and some die cuts instead and I think it turned out great.


For my card holder I used papers from the 6x8 Paper Pad, die cuts from the Paper Elements pack and co-ordinating cardstock. 

I also added some cotton lace and a wood veneer star from my stash.


Whilst this project uses the beautiful Christmas Blessings collection from Mintay I would love to make another using one of their other collections. 

I'll be back again soon with another project to share, but in the meantime I hope 2025 brings you lots of crafting time and treats you well.

Take Care,
Karen x x

Friday, 29 November 2024

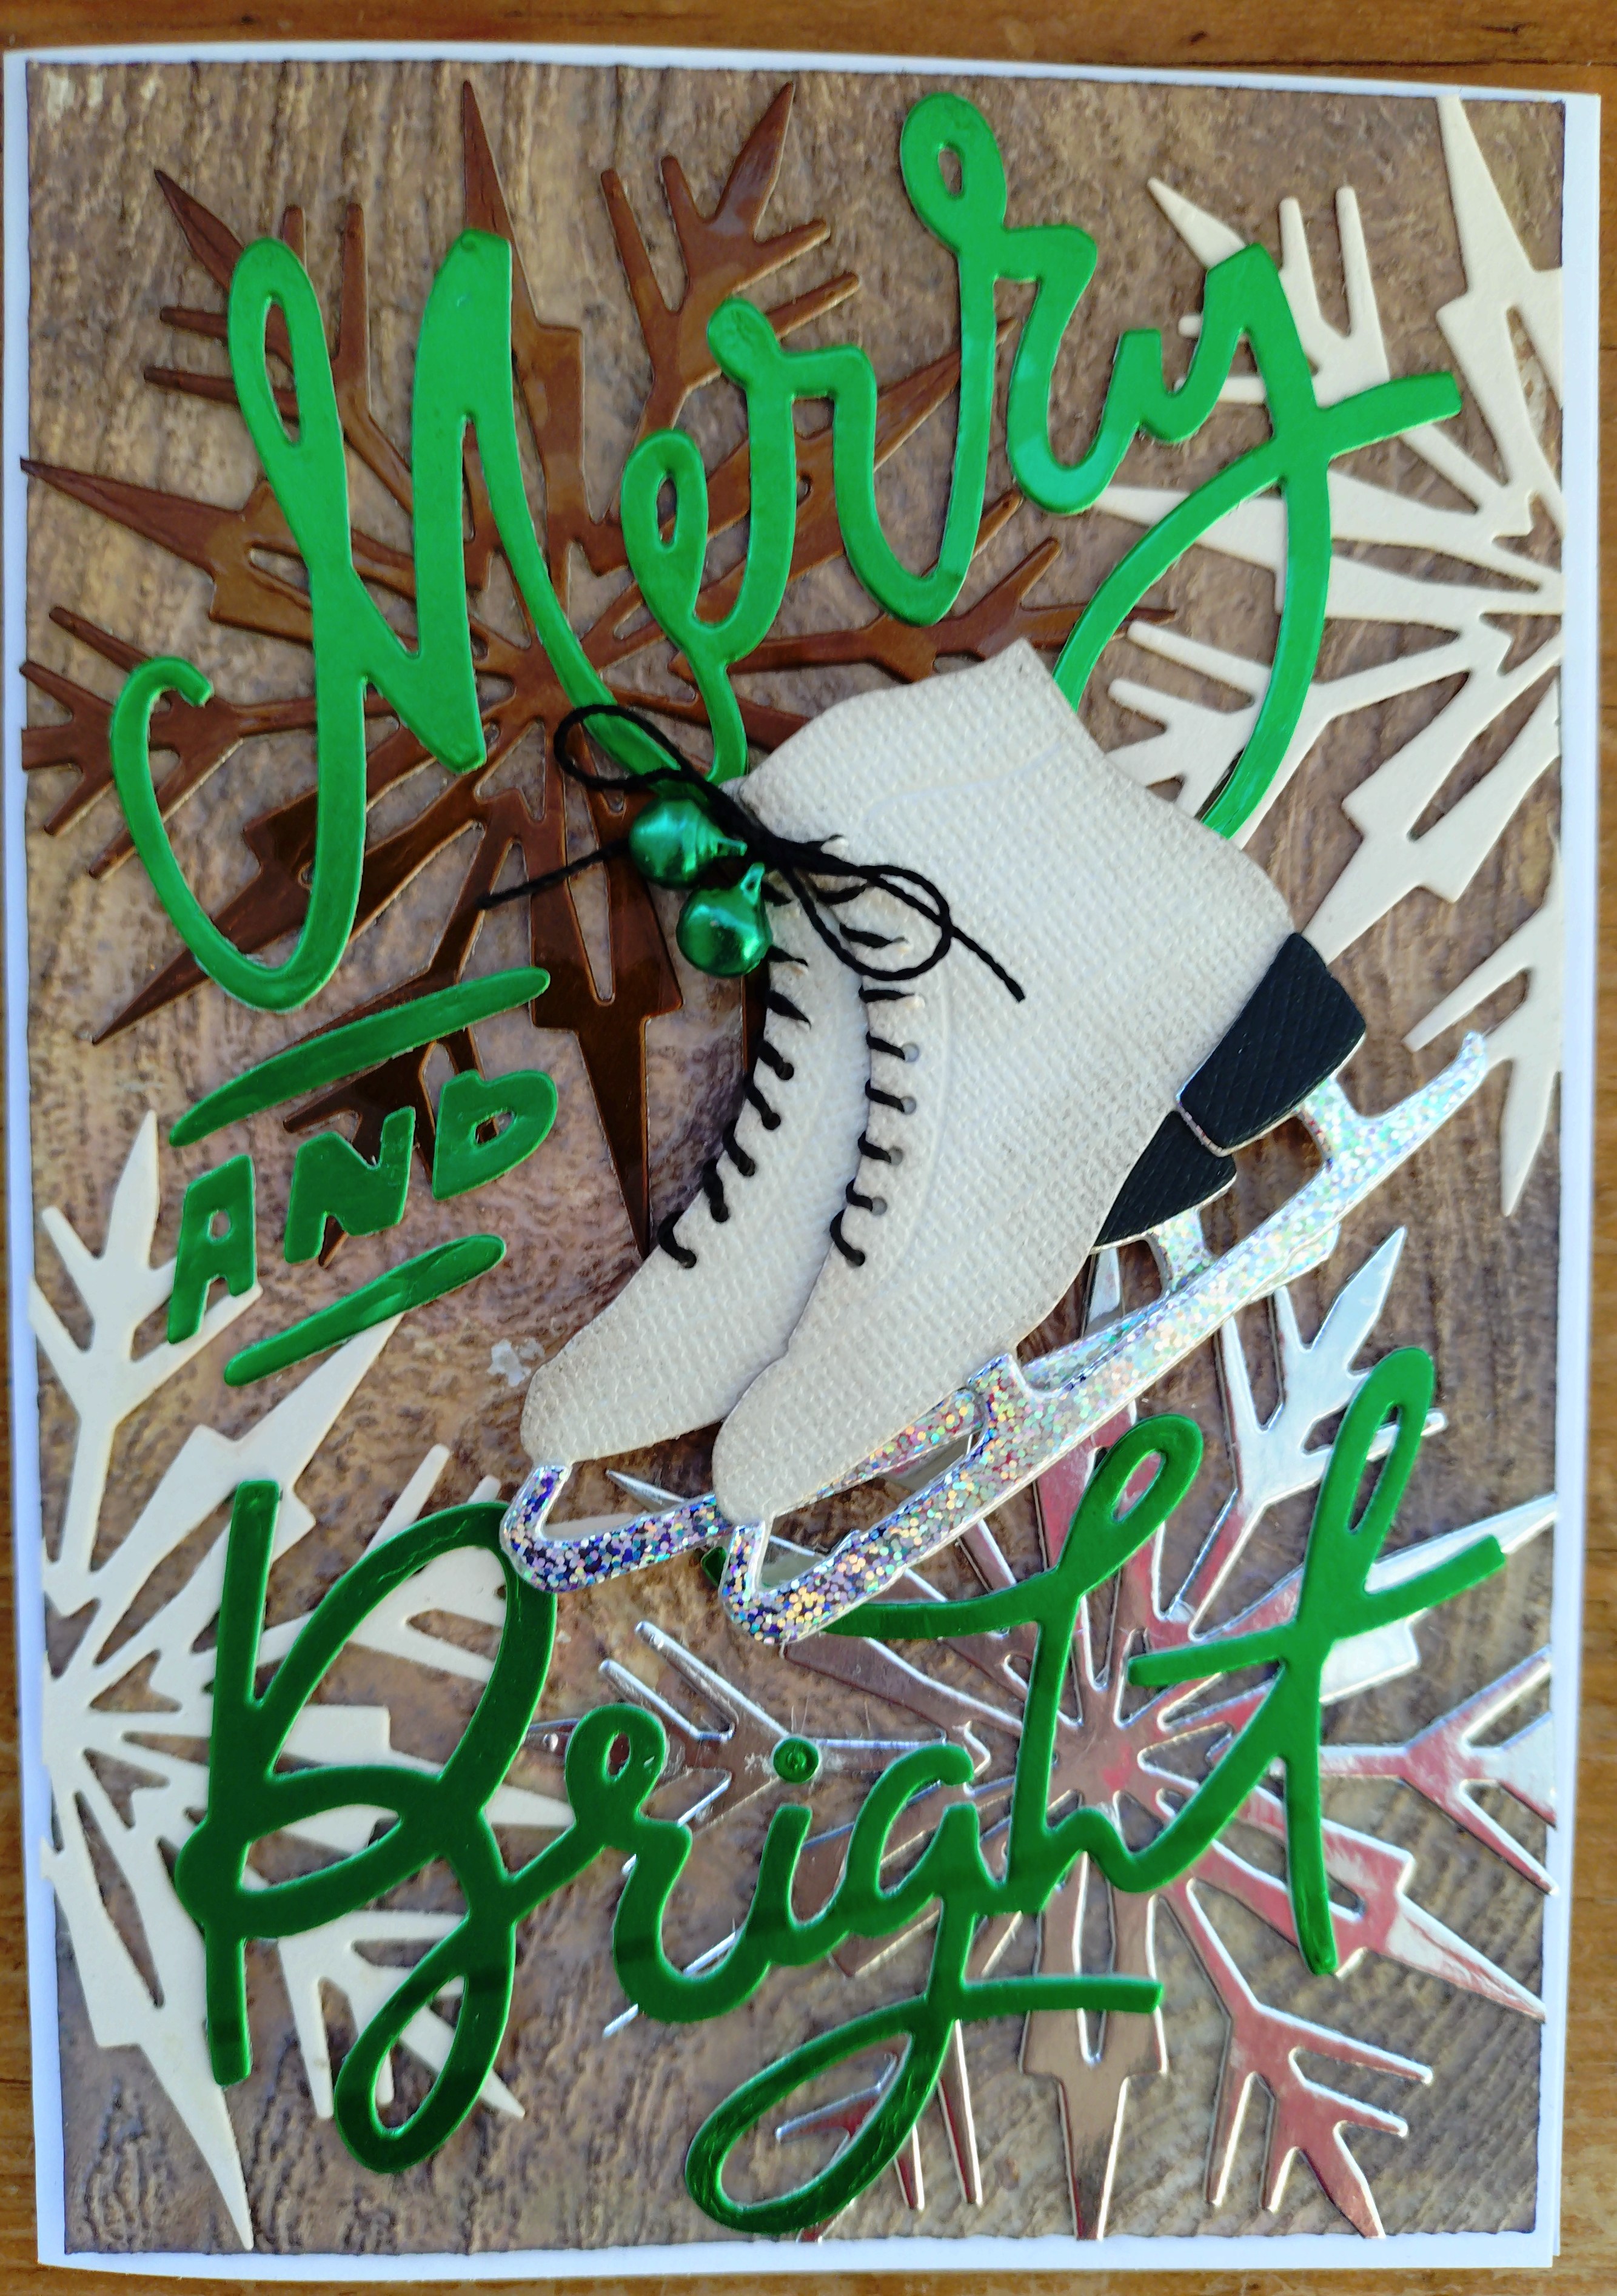
Vault Winter Wishes - Sizzix Christmas Cards

Hello, Lynn here today to share some Christmas cards I made using one of the Vault Christmas Sizzix Die Sets from Tim Holtz. I added in another of Tim's die sets and some 3D Texture Fades. Then got busy creating backgrounds with some multi media.


I used:

Sizzix Tim Holtz Thinlits Die - Vault Winter Wishes
Sizzix Tim Holtz Thinlits Die - Merry and Bright
Sizzix 3D Texture Fades - Arched, Brickwork, Lumbar, Quilted, Sparkle and Woodgrain.
Distress Oxide Inks
Distress Inks
Tiny Bells
DMC Crochet Cotton
Watercolour Paper
Card Blanks and Envelopes

Selection of cardstock and metallic cardstock scraps
3D Foam Pads

      
For each card I trimmed a piece of watercolour paper to measure slightly smaller than my card blank. I placed a selection of colours of Distress Oxide ink onto a messy mat. spritzed them with water and ran the paper back and forth through the colours to create the background for the card.

While the paper was still slightly damp, I place it into the 3D Texture Fade folder, and passed it through the Sizzix Big Shot. Then this was set aside to dry off completely.

I highlighted the embossed patterns by rubbing over with some Distress Inks and a blending tool.

With the Winter Wishes Die set, I cut two ice skates, heels and blades and three snowflakes,  from a selection of the scraps of cardstock and metallic card I had collected together. I also used the Merry and Bright die set to cut the phrase in metallic card.

I applied the snowflakes to the background, overlapping the edges in places and trimmed off the excess. This was then stuck to the front of the card blank.

I added the greeting placing it as seen in the photos.

Next I made up the ice skates, stitching the crochet cotton through the tiny holes in the boots to make them appear to be laced up, leaving enough
cotton to tie on the bells later. I placed one boot over the other at a slight angle so you can still see they are a pair. Then I tied the laces together in a knot. I threaded a tiny bell onto each lace, then tied the laces together into a bow, and trimmed the ends off neatly.

With 3D foam pads applied to the back of the ice skates, I attached them to the centre of the card.

Here is a closer view of each card.


That's all for today. Back with more for Christmas soon.
Lynn x

Tuesday, 4 October 2022

Happy Belated World Card Making Day

 Hello, Lisa here with a quick simple card.

Did you create over the weekend to celebrate World Card Making Day?

I don't make cards as often as I used to, but I still love to send a handmade card to those who appreciate it.

I've been playing with the very pretty Garden Shoppe collection from Paige Evans.

Have you seen it? It's stunning!


I needed to make a quick card for my great niece. And as always I left it to the last minute.

This literally look me 5 mins if that.


I used the yellow paper as a base, tearing it to size so I had that cool textured edge.

The strip along the bottom is the branding strip. It looks so cool!

I added the spotty paper in the centre and layered some of the matching die cuts.

I wanted to add a '2', but it wasn't standing out enough.

There was a long tag with a fancy bit at the bottom.

I tore the fancy bit off and popped it on with a foam bit, added a '2' from the doodlebug alpha stickers and tied some embroidery thread.

To make it look so pretty, I added some blobs of glue to hold it in place.


It's such a pretty card and came together in no time at all.

Happy card making to you,
Lisa x


Monday, 4 April 2022

Photoplay Notting Hill - A Few Cards

Hello, Karen here. Today I have a set of cards to share that I made using the scraps of paper and cut-apart sheets left over from my previous projects using the Notting Hill collection from Photoplay.


The eight cards are all made using 6x6 card blanks and are all a variation of the same design.


The first card is designed to hold a gift of a book token in a pocket inside and I used two of the tags from the My Library sheet of paper on the front.


All papers used on the cards were matted with black cardstock to make the colours pop.


With the addition of the word 'thanks' the typewriter journalling card from the One More Chapter paper was perfect for a thank you card. 


Die cut sentiments cut from cardstock were added to some of the cards.


Card Candi (from my stash) were used to embelish the cards.


Where tags were added to the front of the cards, I added bakers twine to the tag holes.


All the cards were Tent Fold Cards - my preferred style of card.


The position of the the journalling card or tag on the card front varied depending on how it looked best against the background.


Thank you for dropping by today. I hope I've given you some inspiration for using up your leftover collections and shown how versatile the Notting Hill collecton is.

Take Care
Karen x x

Monday, 22 March 2021

Echo Park Coffee & Friends - Cards from Scraps

Hello, Karen C here again. Recently I have been sharing with you the scrapbook layouts I've created using the Coffee and Friends collection from Echo Park. After creating three layouts with my DT kit I was left with a few random sized scraps of patterned paper and some of the die cut Ephemera Frames and Tags

None of the scraps were bigger than about 6" square so rather than try and make another scrapbook layout I decided to challenge myself to make as many cards from the scraps as I could. On YouTube I follow American cardmaker Kristie Marcotte. Kristie has a series of videos where she takes a 6x6 paper pad and turns the entire paper pad (plus cardstock and minimal embelishments) into a set of cards. I love Kristie's style which uses a lot of black cardstock and took inspiration for my cards from her. By coincidence, Kristie has recently used the 6x6 Coffee & Friends paper pad to make cards. Unlike Kristie I didn't have a full 6x6 paper pad so didn't have as many papers or patterns to choose from but double sided papers help. 


I managed to make 9 cards.


Four of the cards were just under 6" square and five were 4.5" square


I used a lot of black cardstock to mat the patterned papers and die cuts. This made the colours pop.


The die cuts were mounted on 3D foam to add some dimension to the cards.


I used some cardstock in colours picked out from the patterned papers and die cuts on some of the cards.


Embelishments were minimal - sequins, ribbon and card candy all from my stash.


Because I didn't have much patterned paper left I had to be creative on some of the cards. Some of the papers were joined and the join hidden behind another element,


For this card I was able to add blue cardstock to emphasis the blue cups on this paper and the die cut.


Some of the sentiments were printed onto white cardstock. 


I hope I've inspired you to try and use up the scraps left over from a collection or kit to make some cards or if you have no scraps a few sheets of patterned paper can go a long way. and there's plenty available in the shop.

Take Care
Karen x x