Showing posts with label phrase ephemera. Show all posts

Monday, 10 October 2022

Vicki Boutin - Print Shop - Moments

Hi everyone!

I'm kicking off this beautiful new week with the newest collection from Vicki Boutin - Print Shop! This collection is a stunner - you're definitely going to want this one. It's jam packed with beautiful colours, bold patterns and is so versatile, you could scrap anything!

For my first layout, I'm channelling my love of graphic design, and creating a heart of hearts.


I started with two pieces of Premium White Cardstock.  I cut a plain heart shape from the first piece, centred on the page. I trimmed 1/4 inch from each side and added machine stitching, before applying sticky foam to the back, before mounting it centrally to the second sheet of white cardstock.


This left a hollow, heart shaped aperture - perfect for filling!

I cut almost all the large hearts from the Cross My Heart paper. To create dimension, I curled the sides of each heart around a pencil to give them extra lift, and then stuck just the centre of the hearts down with Glossy Accents.


When filling the heart, I started with the largest hearts and worked down to the smallest, overlapping and layering the hearts throughout the shape. In the smaller gaps, I fussy cut some of the smaller hearts from the paper and glued these flat.

I left a small space in the centre for my photo to sit. As the heart was so colourful, I wanted the photo to be black and white. To echo this, I backed it on a piece of the Typeset Paper. I double backed the photo with foam so that it would stand just a little bit taller than the hearts.


I love the extra little ink splatters that come on the Typeset paper. It's one of my favourites in the collection - really understated but so perfect for so many pages. I can't wait to see how you'll all use it.

Next, I opened the Floral Ephemera Pack and used the 'Moments' piece for my title. I love the simplicity of this piece against the colourful heart - it was the perfect element for this style of layout.


As a finishing touch, I added a row of black Nuvo Drops all the way around the heart. This really helped tie in all the black and white elements against the colour.


I love the simplicity of this page, contrasted against the high impact from all those colourful hearts - I hope it's inspired you to try something a little bit different.

I'll be back later this month with another Print Shop layout, but until then, take care.


Claire xx

@Scrappysoulmate

Sunday, 27 March 2022

Pebbles ~ Kid at Heart ๐Ÿงก #4

Hi all, hoping you are all well and enjoying the Spring sunshine!  

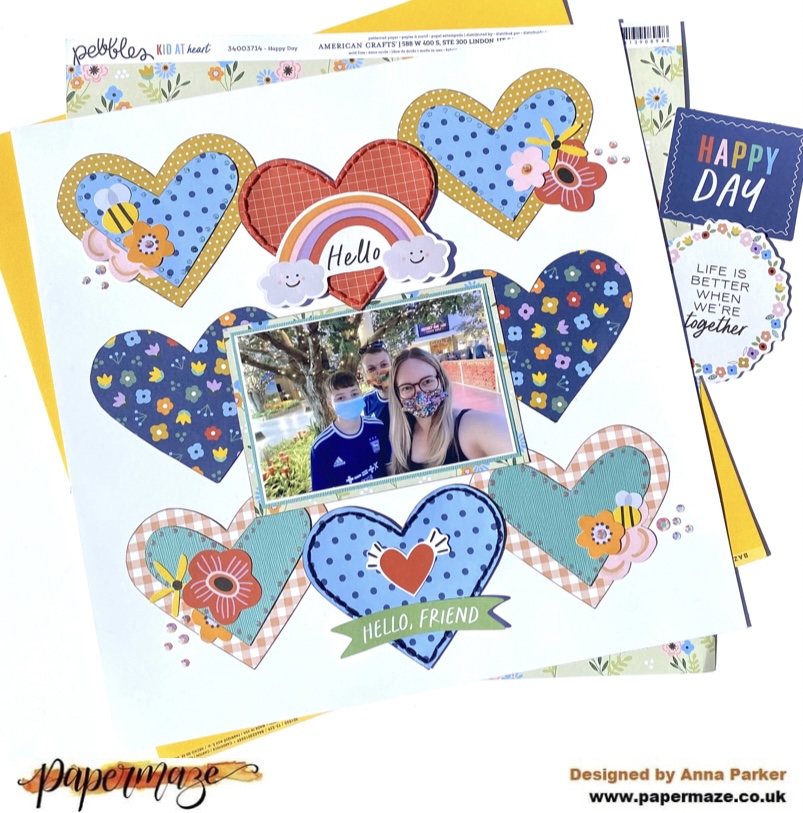
I’m still creating with Pebbles Kid at Heart as I’ve had so much fun with it! But I’m nearing the end of my supplies now, so this layout is very much created by using up some scraps. So I went with a heart’s background... 

To create this layout I began with a sheet of Bazzill white cardstock. I then created a heart template using some scrap cardstock. I then used this to create 8 hearts using various patterned papers. I also created a smaller template to cut out some smaller hearts to layer on top of the larger ones. I hand stitched around the two central hearts using coordinating threads. 


I mounted my photograph onto Bazzill whirlpool and the  ‘Happy Day’ patterned paper. 


I added in a couple of pieces from the phrase ephemera pack and fussy cut some florals from the ‘Scatter Happiness’  patterned paper.


I wanted to add in a few sparkly details, so I dotted some Nuvo drops around the central hearts and added some Pinkfresh Studio Jewels in clusters. 


Thanks so much for looking! 
See you next month! 
Anna
X

Saturday, 12 February 2022

Pebbles ~ Kid at Heart ๐Ÿ’œ #1

Hello! 
It’s Anna back with you today and this month I’ve been working with the bright and colourful Pebbles collection -Kid at Heart collection. 
I love colourful collections, so I was so pleased to be working with these beautifully bright papers!
So, as I looked through the papers Hi, Friend really stood out at me. All the little squares were calling out to me to be cut out and made into a grid layout. 

I decided to document our staycation last year. I always create a separate album or mini book for a holiday. But I like to have one page like this in my regular yearly albums to document a holiday. 
I began by printing out 2 or 3 small square photos from each day of the holiday. I then cut out some of the Hi, Friend 2x2 squares and selected a few pieces from the phrase ephemera pack.


I assembled each element on a sheet of white 12x12 bazzill cardstock, laying them out in chronological order. Once I was happy with the layout, I began to adhere all of the elements to my layout. 
I then added in a few more pieces from the phrase ephemera. I particularly loved the days of the week words, which went perfectly with this layout, enabling me to define each day. 


I added a strip of the scalloped paper from the Playful patterned paper along the top edge of the layout. 


Finally, I added a title using Simple Stories colour vibe alpha stickers. 


See you soon with another layout using this collection! 
Thanks for looking! 
Anna
X