Showing posts with label Stencil Girl. Show all posts

Wednesday, 16 March 2022

March Papermaze Kit - Part 1

Lynn here today to show you the March Papermaze kit, which is now available in the shop and online. A varied collection of papers, embellishments and cardstock. I have two layouts to share, one with the pretty Carta Bella floral paper and the other with Vicki Boutin Fernwood collection.

 Before looking at how the layouts were made here are the details of the kit:

American Crafts - Vicki Boutin - Fernwood - Focused & Climbing Vines
Carta Bella - Sunflower Market - Busy Buzzing
Carta Bella - Gather At Home - Fresh Floral
Echo Park - Wedding - Pretty In Pink
Simple Stories - Happy Hearts - Happy Heart Day
Bazzill Basics Cardstock - Pigment & Rain


Reverse side of papers


Embellishments

12" black lace, Dusty Attic chipboard heart banner, 2 heart doilies, Carta Bella Chipboard Frame, Kaisercraft Curio, Puffy Camera Sticker, 4 wooden heart buttons, 2 Prima flowers, 7 Rosie's Studio puffy stickers & pinch of Pinkfresh Studio Jewel Essentials

Extra Bazzill Basics Pack - Coral Cream, CS White, Capers & Blackberry Swirl


Janet - This photo from the 1950's is another for the family history album.

I used the Blackberry Swirl Bazzill as a background for this layout, flicking some Peeled Paint and Iced Spruce Distress Oxide Spray onto the surface. 


An 11cm strip was torn from the
Carta Bella - Gather At Home - Fresh Floral, was placed down the centre of the card, with the floral side up. Then I tore two more strips from the same paper, just 2.5cm wide and these were flipped to the green check side and placed either side of the floral band. I cut one of the heart doilies in half and tucked each piece either side of the layout.


I picked out some Distress Oxide Inks in colours to match the flowers and leaves on the paper, and then with water colour paper, I placed colour and water to the craft mat to allow me to build up colour in layers onto the papers. I created several small sheets of peachy pink and blue /green colour, with water marks and flicked colourful stains. Once I was happy with the colours, and they were fully dry, I selected the dies I wanted to use, cut the layers and built my blooms and foliage. (I used Tim Holtz, Sizzix, Thinlits sets - Brushstroke Flowers #1 and Bloom Colorize.)


The photo was placed to the right for the central band and then the flowers were arranged in three clusters. Some pieces were raised with 3D foam tape, creating different levels.
 

I cut my title on my Cricut using scraps of the Distress Oxide Inked paper.
 

Finally I scattered some grey pearls over the black cardstock areas of the page.

Every Picture Tells A Story - Someone caught me on camera, photographing Lacock Abbey.


I started with the White Bazzill from the kit as a base this time. With Distress Texture Paste and a Vicki Boutin stencil from the Bountiful Mixed Media set, I created some textured circles on the layout. Then I added colour with Blackcurrant and Royal Blood Infusions from Paper Artsy - lightly shaking the crystals onto the page, before adding a little water and allowing the magic to happen!


I trimmed my photo and then two pieces of
Vicki Boutin - Fernwood - Climbing Vines paper cut to the same size. I arranged the three items on the page, showing both sides of the paper with the photo on top. 


I cut the 'Every Picture Tells A Story' cutfile from the Rain Bazzill, then backed the open letters with more of the Climbing Vines paper. This was arranged under the photo. 


From the
Vicki Boutin - Fernwood - Focused I trimmed some of the info. strip off the bottom and placed this to the left of the photo, I added a length of acetate Filmstrip Ribbon from Idea-ology.


I used some American Craft Thickers to add the word 'Click!' over a punched label, also to the left of the photo. Then I fussy cut two camera images from the Focused paper, and added these either side of the cutfile.
 

Finally I scattered the
Pinkfresh Studio Jewel Essentials across the page.

That's all for today, I'll be back with more from this kit soon
Thanks for looking
Lynn x

@lynn_paperpixie

Friday, 7 September 2018

Papermaze August Kit - Part 2

Hello, Lynn here with the second pair of layouts using the bright, summery August Papermaze Kit. The first two can be found here.


A quick reminder of the kit contents


My first layout for today is called 'Rainbows', and shows a photo of my girls the day they enrolled as Rainbow Guides.

I used the 'Intense Kiwi' Bazzill cardstock to make a 1" frame for the layout, by gutting it. Then I trimmed an extra piece of Avalanche down to measure 11.5" x 11.5". 

I created a rainbow to the left of the centre using a new stencil from Stencil Girl called 'Little Painted Rainbows'. I used several colours of Distress Ink and a blending tool.


I made a frame for my photo using some of the Photoplay - 'Encourage' paper (butterfly side up), 5.5" x 5.5". I used some of the ribbon from the kit to run along the base of the mat.

I used one of the Amy Tangerine Resist Watercolour Tags from the kit, and blended Mowed Lawn and Twisted Citron Distress Ink over the surface. More of the ribbon was tied in a bow over the hole in the top of the tag. From the 'Intense Kiwi' Bazzill I cut some fern leaves using Sizzix Thinlits dies from the Funky Florals #3 set.

 I used half of one of the Doodlebug Designs doilies above the photo, tucked behind the mat. My title letters were die cut from 'Blush Red Medium' Bazzill.

I cut lots of the butterflies from the 'Encourage' paper and scattered them at the top of the layout, and one on the tag. Finally, I used the tiny Doodlebug enamel hearts in amoungst the butterflies.

**~~~**

My second page today is called 'Artists at Work', and features my three on the patio in our garden painting at the easels. They were about 2 years old.


To start I took the sheet of Blossom Bazzill. Then the remainder of the 'Life is Good paper, and with the strives running vertically I cut a 12" deep section with a stripe of each colour which made a panel just under 5.5" wide. This was stuck to the left side of the cardstock. leaving the right hand edge unstuck so I could stuck the trimming under later. 

I used Distress Stain in Weathered Wood and Worn Lipstick to daub splats over the pink cardstock. Then I used the Woodware stamps from the kit again and inked and stamped them with Mustard Seed and Evergreen Bough Distress Ink. 

With the remains of the 'Coral Reef' paper I cut a piece 9" x 5" and stuck this horizontally across the layout from the right side overlapped the stripe paper. Then came the circles. I used a set of nesting circle dies to cut various sized circles using the '3x4 Elements' paper for the sun and the rainbow bordered circle, the pink striped side of the 'Coral Reef' paper and both sides of the 'Tidepool' paper.

My title was added to the circle with the pink stripes, using some very old Sassafraslass pink glitter alpha stickers from my stash. I added journalling notes to the other circles. I cut a doily in half and together with the photos I arranged the circles and on the page. 

Finally I added embellishment with the Tiny Prima Flowers and Crystals to some of the circles. 

The great thing is there is still plenty of kit left for a few cards. Great value for money as the kit is only £10.00 and the additional cardstock is £1.75. Four layouts and some cards or part of another layout.

Back with a new kit for September later in the month. 
Thanks for looking.
Lynn x

Sunday, 9 February 2014

A Little Bit of Sunshine

Today is day 3. The last day of my masks and stencils tutorial weekend.
Have you grabbed yourself a bargain whilst they have 25% off?
See here.

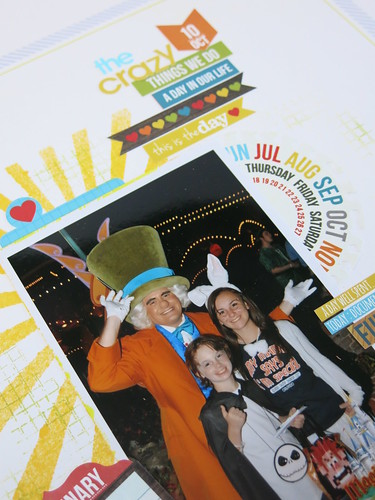
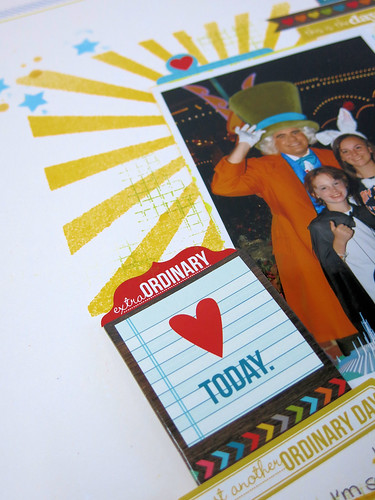
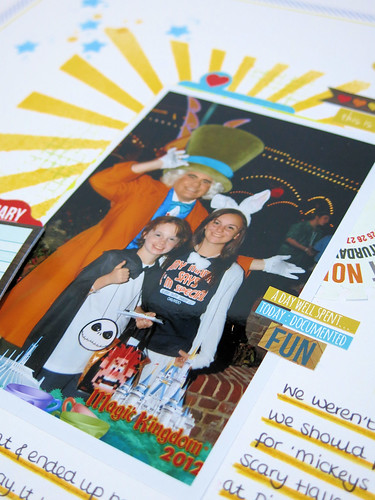
This is what we are making today.

 
Today we are taking a break from the lovely Dear Lizzy from American Crafts and playing with the very colourful Daily Grind from Simple Stories.

I didn't go a gathering for this one today. I was quite content with my 12x12 Simple Stories Sticker Sheets. They gave me so much to work with already. I didn't feel the need to reach for much else other than a piece of matching chipboard.

This whole LO starts off with a mask today.
The sunshine mask.
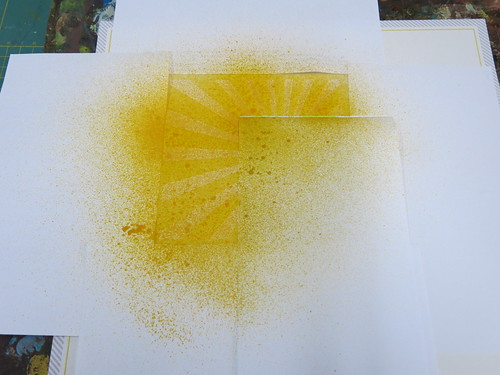
Now I call this technique, controlled misting. I don't know if it actually has a name, that's just what I call it when teaching. Misting can be a little unpredictable. Some (like me) like that, but that's not for everyone. This way is more suitable to the 'cleaner' scrapper.
So, lay your mask where you want it to be on your page. I laid my photo on top so I would get it exactly in place. I didn't want any excess misting going on today.
Now cover up EVERYWHERE else with scrap paper where you don't want to see any misting.
Like this.

 
Now you can mist over your mask.
 
 
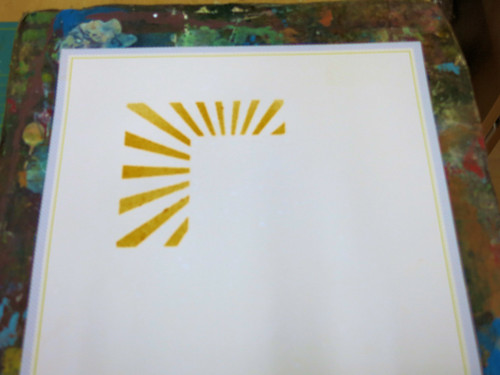
You are left with this.
 
 
Once it's dry you can add your photo and stickers.
 
 
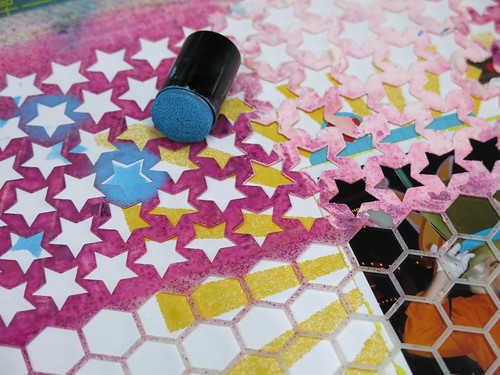
To finish it off I take another mask. One with small stars this time and lay over the LO.
I use a dauber pressed in ink and use that to press through the mask.
 
 
I love these stars.


My weekend blogging has come to an end here at Papermaze. I hope you have enjoyed.
Thank you for stopping by.
Happy Masking
 
Lisa x