Hello, Lynn back with the papers left over from the May kit.
After the four layouts I have already made, I created one more page.
This time I used a photo of my daughter Emily and her husband James
moving into their new house in Wollaton, near Nottingham.
Here is a reminder of what you get in the kit, please see my previous post for details of the content:
I used the watercolour wash side of the American Crafts - Dear Lizzy - She's Magic collection - Feeling Fine, and splattered some black ink over the page. I used the Cricut to cut the wording Home Sweet Home from the American Crafts - Heidi Swapp - Art Walk collection - Artsy. This was applied to the left side of the layout after inking the edges.
Then
I cut the word 'Sweet' again from Desert Sun Bazzill, and applied this
directly over the first cut. Using the cut-off strip from the bottom of
the paper, I trimmed and inked the words into three pieces. I applied
these to the layout with foam tape, over the second word 'Home'.
I mounted my photo onto some of the Desert Sun Bazzill and glued this towards the bottom right of the page.
From scraps of patterned paper and Bazzill, I made two tags, adding
a journalling block to one of them. The tags were added above the
photo, I linked them with a tassel and threaded in two key charms (from
my stash).
With Pinkfresh Studio Just a Little Lovely, Mini Puffy Alpha Stickers, I created a subtitle under the photo.
Finally with some old stickers from my stash I added the date to the die cut letters.
This is the last of my posts using the May kit. I will be back soon with the new kit for the month of June.
Thanks for looking.
Lynn x
Showing posts with label Dear Lizzy. Show all posts
Wednesday, 3 June 2020
Wednesday, 20 May 2020
May Papermaze Kit
Hi,
Lynn here today with the first post using the pretty spring colours of
the May Kit. The kit includes papers and embellishments in a selection of geometric patterns, hearts, rainbows and shells.
Here are my first two layouts:
Here is what you will find in the kit:
Patterned Papers:
Pink Paislee - Paige Evans - Bloom Street collection - #06 & #10
American Crafts - Heidi Swapp - Art Walk collection - Artsy
American Crafts - Dear Lizzy - She's Magic collection - Feeling Fine
Pink Fresh - My Favourite Story collection - Joyful Heart
Prima Marketing Inc. - Surfboard Collection - All The Shells
Bazzill Cardstock - Avalanche and Ocean Breeze
This shows the flip side of the papers:
Embellishments: 30cm washi tape, heart doily, 5 wooden heart buttons, charm, 50cm ribbon, 10 Prima flowers, spiral paper rose, Paige Evans Puffy Phrase Thickers, 1 strip Dear Lizzy Enamel Stickers, 1 strip pearls, Pinkfresh Studio Flair Stickers.
Optional extra Bazzill Pack: Limeade, Heather, Desert Sun and Blossom.
Maypole Dance - I have been sorting out some photos from the children's dance shows and thought it this one was perfect for the rainbow paper. Having the two arcs reflecting the ribbons on a maypole.
I took two sheets of Bazzill to start with, cutting the Ocean Breeze to 8" x 12" and the Limeade to 4" x 12". With a scrap piece of 12" x 12" paper, I placed the blue at the top and the green as the base.
From the Joyful Heart paper, I trimmed off the manufacturers strip plus 1" of the paper from the bottom. This strip was then shaped along one side with a Martha Stewart border punch. With the pink dotty side up, I glued this across the green card at the join. I then cut the rainbows from the sheet and arranged them onto the blue card, overlapping them in the centre.
I mounted my photo onto some of the white area of the Joyful Heart paper. I then attached this to the page towards the left side.
With some old Doodlebug Design cardstock letter stickers I created my title. Then I added some butterflies made with the Martha Stewart 3 in 1 butterfly punch and more of the white paper.
To reflect the fine black lines on the rainbows, I took a fine marker pen and drew lines around the edges of the rainbows, the letters and butterflies. I also did my journalling on the white areas of the rainbow.
The Prima flowers from the kit were added to the join across the layout. The butterflies were embellished with Stickles and Liquid Pearls.
Happy Birthday - These photos are from Scarlett's 2nd birthday she was fascinated with this wooden birthday cake and it keeps her entertained for hours!
This layout was based on a sketch from Pagemaps.
For this layout I used the Bloom Street #10 paper, wanting to use both sides I gutted the paper to give me a 2.5cm frame. I then trimmed the Avalanche Bazzill to 26.5cm x 26.5cm and mounted this over the frame. From the remainder of the #10 paper I flipped it over and cut a piece 13cm x 20cm and arranged it in the centre of the page.
I cut one of my photos into a 10cm diameter circle. Then both photos were placed into position.
With some Gesso I prepared a selection of Tando Creative Balloons and a chipboard bird branch from my stash. I painted these chipboard pieces with some Distress Paints. These were glued into position on the page and strings were added to the balloons with a fine marker pen.
I cut my title with a Sizzix Bigz Die - Handmade, from leftover pieces from the first layout and #10 paper. Once all this was glued in place I used Stickles on the letters and Glossy Accents on the chipboard pieces.
Finally I scattered the Dear Lizzy Enamel Stickers over the layout.
I'll be back with more from this kit soon.
Thanks for looking.
Lynn x
Here are my first two layouts:
Here is what you will find in the kit:
Patterned Papers:
Pink Paislee - Paige Evans - Bloom Street collection - #06 & #10
American Crafts - Heidi Swapp - Art Walk collection - Artsy
American Crafts - Dear Lizzy - She's Magic collection - Feeling Fine
Pink Fresh - My Favourite Story collection - Joyful Heart
Prima Marketing Inc. - Surfboard Collection - All The Shells
Bazzill Cardstock - Avalanche and Ocean Breeze
This shows the flip side of the papers:
Embellishments: 30cm washi tape, heart doily, 5 wooden heart buttons, charm, 50cm ribbon, 10 Prima flowers, spiral paper rose, Paige Evans Puffy Phrase Thickers, 1 strip Dear Lizzy Enamel Stickers, 1 strip pearls, Pinkfresh Studio Flair Stickers.
Optional extra Bazzill Pack: Limeade, Heather, Desert Sun and Blossom.
Maypole Dance - I have been sorting out some photos from the children's dance shows and thought it this one was perfect for the rainbow paper. Having the two arcs reflecting the ribbons on a maypole.
I took two sheets of Bazzill to start with, cutting the Ocean Breeze to 8" x 12" and the Limeade to 4" x 12". With a scrap piece of 12" x 12" paper, I placed the blue at the top and the green as the base.
From the Joyful Heart paper, I trimmed off the manufacturers strip plus 1" of the paper from the bottom. This strip was then shaped along one side with a Martha Stewart border punch. With the pink dotty side up, I glued this across the green card at the join. I then cut the rainbows from the sheet and arranged them onto the blue card, overlapping them in the centre.
I mounted my photo onto some of the white area of the Joyful Heart paper. I then attached this to the page towards the left side.
With some old Doodlebug Design cardstock letter stickers I created my title. Then I added some butterflies made with the Martha Stewart 3 in 1 butterfly punch and more of the white paper.
To reflect the fine black lines on the rainbows, I took a fine marker pen and drew lines around the edges of the rainbows, the letters and butterflies. I also did my journalling on the white areas of the rainbow.
The Prima flowers from the kit were added to the join across the layout. The butterflies were embellished with Stickles and Liquid Pearls.
Happy Birthday - These photos are from Scarlett's 2nd birthday she was fascinated with this wooden birthday cake and it keeps her entertained for hours!
This layout was based on a sketch from Pagemaps.
For this layout I used the Bloom Street #10 paper, wanting to use both sides I gutted the paper to give me a 2.5cm frame. I then trimmed the Avalanche Bazzill to 26.5cm x 26.5cm and mounted this over the frame. From the remainder of the #10 paper I flipped it over and cut a piece 13cm x 20cm and arranged it in the centre of the page.
I cut one of my photos into a 10cm diameter circle. Then both photos were placed into position.
With some Gesso I prepared a selection of Tando Creative Balloons and a chipboard bird branch from my stash. I painted these chipboard pieces with some Distress Paints. These were glued into position on the page and strings were added to the balloons with a fine marker pen.
I cut my title with a Sizzix Bigz Die - Handmade, from leftover pieces from the first layout and #10 paper. Once all this was glued in place I used Stickles on the letters and Glossy Accents on the chipboard pieces.
Finally I scattered the Dear Lizzy Enamel Stickers over the layout.
I'll be back with more from this kit soon.
Thanks for looking.
Lynn x
Monday, 6 April 2020
March Papermaze Kit - Part 2
Lynn here today, back with more from the brightly colourful March Papermaze Kit. I have had more fun creating with rainbow colours for these two layouts.
Before the details on making these layouts, here is a reminder of what you get in the kit, but for more details please see March Kit Part 1 post HERE.
Easter 1998 This photo was taken by a professional photographer who came to the twins club in the Easter holidays when the triplets were 6 years old.
I gutted the sheet of Crafty and Happy paper and with the striped side up, I made a frame for my layout. I cut the Pear Bazzil to measure 27cm x 27cm, and the white to measure 28cm x 28cm. I also gutted the white to give me plenty of card to cut my leaves. Then I layered these papers as in the photo.
With a Vicki Boutin stencil I created some daisies on the Pear Bazzill with white texture Paste. Once this was dry I attached the green lace across the middle of the page. I applied my photo with 3D tape, leaving the edges free from adhesive to allow for the leaves to be tucked underneath later.
With a Tim Holtz Sizzix Thinlits die set - Cut Out Leaves, I cut three sets of the leaves. The dies cut the intricate internal patterns of the leaves only, so I then trimmed around each leaf with my scissors. I arranged the leaves around the bottom of the photo.
I die cut my title using more of the Crafty and Happy paper and White Bazzill. I created shadows with the white letters under the coloured letters. Then I drew around the letters with a fine marker.
Centres were added to the daisies with some Nuvo Crystal Drops, then I added random smaller drops in various colours, scattered over the page.
Girl On Tour - My daughter is on tour with PW Productions and The Woman In Black, and they travelled to Washington DC last December, as Stage Manager she had to organise the costume and prop luggage as well as her own!
I was initially inspired by a layout made by Neftali Zambrano, although she used stitching and I went for paint, making for a very different finished effect.
For this page I chose the sheet of Petalsoft Bazzill. From the sheet of Round Trip paper I cut out a selection of tickets, I wanted a few in each colour of the rainbow. Then I arranged them along the top of the Bazzill. Before sticking them doen I marked in pencil where the colour changes would be, then removed the tickets and started with the paint.
Using acrylic paint I ran drips of each colour from the top of the page, allowing them to take their own path downwards. Once each colour was dry I started the next, and so on ...
The tickets were placed back onto the Bazzill and glued in place. I added two pale pink tickets to the bottom left of the page.
Using a set of Tim Holtz tag dies, I cut come luggage labels, one in White Bazzill, and three in Crafty and Happy paper. I arranged these around my photo, leaving enough room to write my journalling on the white tag and place my title on the larger striped tag.
From the kit I used the puffy words stickers for the title, one of the chipboard quotes and the two stitched hearts. I made ties for the tags using thin strips of Pear Bazzill.
After making four layouts this month, I still have a complete sheet of Bazzill and one of patterned paper as well a several embellishments, so plenty to make another layout.
Thanks for looking, back with the kit for April later this month.
Lynn x
Friday, 20 March 2020
March Papermaze Kit
Lynn here today - With many other activities off the agenda for the unforeseeable future, maybe you will have a little more time for crafting. Wishing you all well and safe in very unusual and unpredictable times.
The Papermaze shop is closed to customers, but you can still order your crafting supplies online.
I'm sharing the layouts made with the bright and colourful March Papermaze Kit. I have the first two pages to show you here. This kit will be available from Monday 23rd March.
Patterned Papers:
Dear Lizzy - She's Magic collection - Round Trip and Dreaming
Simple Stories - Hey Crafty Girl collection - Crafty & Happy and Create Beauty
Simple Stories - So Happy Together collection - Time Together
Pink Paislee - Paige Evans - Truly Grateful collection - #13
Bazzill Basics Cardstock: Pear and Arroyo
Extra Bazzill Basics Matchmaker pack: Lagoon, Petalsoft, White and Yukon Gold
Embellishments - 4 lines of Pink Paislee puffy words stickers, 2 Pink Paislee wood buttons, 2 strips of Freckled Fawn chipboard words, 3 opals, 12" lace, 2 Prima flowers, 3 puffy stars, 2 Pinkfresh Studio stitched hearts, 1 pink flower.
Merry Go Round - Amazing Adventure at Legoland - This page was designed using a photo of the girls on our first trip to Legoland back in 1997.
I started by gutting the Lagoon Bazzill, then trimming the Create Beauty paper to 29.5cm x 29.5cm and mounting it over the Lagoon frame.
I mounted my photos onto Arryo Bazzill and arranged them onto the page. Then with pencil I drew a swirl onto the paper. Next came the fussy cutting of letters from the Truly Grateful #3 paper. Starting just below the photos I arranged the letters along my pencil curves, sticking them down lightly with re-positional tape. I stitched the letters into place with grey sewing thread and the sewing machine.
I finished by adding the puffy star stickers, the opals and one of the chipboard quote stickers, all from the kit.
Terrific Trio - This layout features a photograph of a pencil drawing of the triplets, drawn by my father in 1995 when they were three years old.
The base for this layout is the sheet of white Bazzill. I cut the Dreaming paper so I was left with a piece 9 blocks deep and 12 blocks wide - I arranged the cutting from the gold, through orange, red and darker pink blocks, reserving the pale pink blocks to use later.
I used Worn Lipstick Distress Oxide Ink to ink the edged of all the papers. I attached the large piece with the blocks towards the bottom of the Bazzill. I trimmed about 17 individual blocks and scattered them over the white area at the top of the layout.
I mounted my photo onto some Arroyo Bazzill and attached it to the centre of the layout.
With some greyboard and the Sizzix Bottled Up Bigz die, I cut a selection of different size bottles. Some of these were treated with acrylic paint and some crackle glaze. Two of them were coated with embossing powders.
With the Sizzix Bigz Die - Branches and some scraps of brown Bazzill I cut a selection of branche,using pieces of them to fit into the bottles. I then punched and created some cherry blossom with the 3 in 1 Hydrangea punch from Martha Stewart. I arranged these on the branches. The bottles were placed either side of the photo, some flat onto the page and others raised up with 3D foam.
I used another MS 3 in 1 punch to create some butterflies to scatter at the top of the page.
I added glitter to the butterflies to with Stickles. A spot of Nuvo Crystal Drops - Metallic Caramel Cream was added to the centre of each blossom.
My title was made with Pinkfresh Studio - Office Hours Puffy Alpha Stickers.
Thanks for looking, I will be back with more from this kit in a couple of weeks.
Lynn x
The Papermaze shop is closed to customers, but you can still order your crafting supplies online.
I'm sharing the layouts made with the bright and colourful March Papermaze Kit. I have the first two pages to show you here. This kit will be available from Monday 23rd March.
Patterned Papers:
Dear Lizzy - She's Magic collection - Round Trip and Dreaming
Simple Stories - Hey Crafty Girl collection - Crafty & Happy and Create Beauty
Simple Stories - So Happy Together collection - Time Together
Pink Paislee - Paige Evans - Truly Grateful collection - #13
Bazzill Basics Cardstock: Pear and Arroyo
| Reverse Side of Papers |
Extra Bazzill Basics Matchmaker pack: Lagoon, Petalsoft, White and Yukon Gold
Embellishments - 4 lines of Pink Paislee puffy words stickers, 2 Pink Paislee wood buttons, 2 strips of Freckled Fawn chipboard words, 3 opals, 12" lace, 2 Prima flowers, 3 puffy stars, 2 Pinkfresh Studio stitched hearts, 1 pink flower.
Merry Go Round - Amazing Adventure at Legoland - This page was designed using a photo of the girls on our first trip to Legoland back in 1997.
I started by gutting the Lagoon Bazzill, then trimming the Create Beauty paper to 29.5cm x 29.5cm and mounting it over the Lagoon frame.
I mounted my photos onto Arryo Bazzill and arranged them onto the page. Then with pencil I drew a swirl onto the paper. Next came the fussy cutting of letters from the Truly Grateful #3 paper. Starting just below the photos I arranged the letters along my pencil curves, sticking them down lightly with re-positional tape. I stitched the letters into place with grey sewing thread and the sewing machine.
I finished by adding the puffy star stickers, the opals and one of the chipboard quote stickers, all from the kit.
Terrific Trio - This layout features a photograph of a pencil drawing of the triplets, drawn by my father in 1995 when they were three years old.
The base for this layout is the sheet of white Bazzill. I cut the Dreaming paper so I was left with a piece 9 blocks deep and 12 blocks wide - I arranged the cutting from the gold, through orange, red and darker pink blocks, reserving the pale pink blocks to use later.
I used Worn Lipstick Distress Oxide Ink to ink the edged of all the papers. I attached the large piece with the blocks towards the bottom of the Bazzill. I trimmed about 17 individual blocks and scattered them over the white area at the top of the layout.
I mounted my photo onto some Arroyo Bazzill and attached it to the centre of the layout.
With some greyboard and the Sizzix Bottled Up Bigz die, I cut a selection of different size bottles. Some of these were treated with acrylic paint and some crackle glaze. Two of them were coated with embossing powders.
With the Sizzix Bigz Die - Branches and some scraps of brown Bazzill I cut a selection of branche,using pieces of them to fit into the bottles. I then punched and created some cherry blossom with the 3 in 1 Hydrangea punch from Martha Stewart. I arranged these on the branches. The bottles were placed either side of the photo, some flat onto the page and others raised up with 3D foam.
I used another MS 3 in 1 punch to create some butterflies to scatter at the top of the page.
I added glitter to the butterflies to with Stickles. A spot of Nuvo Crystal Drops - Metallic Caramel Cream was added to the centre of each blossom.
My title was made with Pinkfresh Studio - Office Hours Puffy Alpha Stickers.
Thanks for looking, I will be back with more from this kit in a couple of weeks.
Lynn x
Monday, 21 October 2019
October Papermaze Kit
Welcome to the Papermaze October Kit! Lynn
here today with the very pretty, subtle colours of the latest kit put
together by Vanessa. It's as if the kit was designed for my daughter's
wedding which was in July! So here are my first pair of wedding layouts,
made using this month's kit.
Before explaining how I made the layouts, here are the details of the kit itself:
The patterned papers are:
Pink Paislee - Indigo & Ivy - 03 & 08
Cocoa Vanilla Studio - More Than Words - Precious
Cocoa Vanilla Studio - Midnight - Moonlight
Kaisercraft - Two Souls Collection - Leafy
American Crafts Dear Lizzy - It's All Good - Seek Magic
Bazzill included - Coral Cream & Bazzill White
Embellishments included -
Pinkfresh Studio phrase stickers, 3 large pearls, 1 kraft die-cut butterfly, 6" x12" American Crafts acetate, 1m twine, 2 Tando chipboard butterflies, 1 prima flower, 2 paper flowers, 12" frayed ribbon, 5 cream buttons, 1 mini butterfly stamp, 1 strip mini pearls.
Extra Bazzill Pack
Four sheets of Bazzill - Powder Blue, Pinkini, Beewax & Stonehenge.
This is Your Moment
I took the sheet of paper from the Indigo and Ivy collection - No. 03. I used some Distress Oxide Ink pads (Spun Sugar, Worn Lipstick, Hickory Smoke and Gathered Twigs), and with a blending tool applied them over the centre of the paper, in an area just larger then my matted photo.
The photo was matted onto a piece of Stonehenge Bazzill and then a piece of Vellum, all the edges were torn and distressed. Before attaching the photo I trimmed and frayed the piece of linen ribbon from the kit and layed this across the page. On top of this I used the manufacturer's strip to add a thin banner of the contrasting pattern.
Once the photo was in place, I tucked a tiny piece of lace from my stash under the mat.
The cascading leaves were die cut from Stonehenge Bazzill and Tim Holtz, Sizzix Thinlits set - Skeleton Leaves and tucked under the photo.
I used the two paper flowers from the kit, as they were the same cherry blossom flowers I had used for a lot of the table decorations at the wedding, I added a few more from my stash, along with some other flowers.
I didn't add a big title as the layout will be part of an album and the little Pinkfresh Studio phrase stickers said all I wanted them to. There seems little point in putting the wedding details on every layout within the album.
#happilyevermarshall
This layout involved some painting with Distress Oxide Inks and the White Bazzill. I used a palette of five colours to match the flowers on the 'Precious' paper and arranged them in rainbow order. I swiped each colour onto the craft mat and spritzed it with some water. Then with a wide, flat paint brush, I applied a strip of each colour across the page. Then making the ink a little wetter I dripped some more colour onto each strip and over the ends.
The colours of Distress Oxide Ink I chose were - a mix of worn Lipstick and Spun Sugar, Dried Marigold, Fossilized Amber, Tumbled Glass and Hickory Smoke.
The next job was to fussy cut flowers from about half the sheet of patterned paper. I placed my photo onto a mat cut from the reverse of the other half of the 'Precious' paper. This was stuck into place and the flowers were arranged down the left side of the layout overlapping the photo. I curved the flowers with a scissor blade to give structure and raised them using 3D foam pads for extra dimension. Sparkle was added to the flower centres with Crystal Stickles. The leaves were die cut using scraps from the 'Precious' paper and the same leaf die as before. These were inked with some of the Worn Lisptick Distress Oxide Ink.
The two Tando chipboard butterflies from the kit were also treated to some of the distress Oxides, then a coat of Glossy Accents. I added flower stamen from my stash to each butterfly. I added smaller butterflies with the tiny stamp in the kit and some Hickory Smoke Oxide ink.
The title was added with two layers of die cut letters using Tim Holtz Sizzix Thinlits Cut Out Script set. They were cut from Bazzill and inked with Worn Lipstick Oxide.
That's all for today, back with more from this kit soon.
Thanks for looking,
Lynn x
Before explaining how I made the layouts, here are the details of the kit itself:
The patterned papers are:
Pink Paislee - Indigo & Ivy - 03 & 08
Cocoa Vanilla Studio - More Than Words - Precious
Cocoa Vanilla Studio - Midnight - Moonlight
Kaisercraft - Two Souls Collection - Leafy
American Crafts Dear Lizzy - It's All Good - Seek Magic
| Reverse side of the papers |
Embellishments included -
Pinkfresh Studio phrase stickers, 3 large pearls, 1 kraft die-cut butterfly, 6" x12" American Crafts acetate, 1m twine, 2 Tando chipboard butterflies, 1 prima flower, 2 paper flowers, 12" frayed ribbon, 5 cream buttons, 1 mini butterfly stamp, 1 strip mini pearls.
Extra Bazzill Pack
Four sheets of Bazzill - Powder Blue, Pinkini, Beewax & Stonehenge.
This is Your Moment
I took the sheet of paper from the Indigo and Ivy collection - No. 03. I used some Distress Oxide Ink pads (Spun Sugar, Worn Lipstick, Hickory Smoke and Gathered Twigs), and with a blending tool applied them over the centre of the paper, in an area just larger then my matted photo.
The photo was matted onto a piece of Stonehenge Bazzill and then a piece of Vellum, all the edges were torn and distressed. Before attaching the photo I trimmed and frayed the piece of linen ribbon from the kit and layed this across the page. On top of this I used the manufacturer's strip to add a thin banner of the contrasting pattern.
Once the photo was in place, I tucked a tiny piece of lace from my stash under the mat.
The cascading leaves were die cut from Stonehenge Bazzill and Tim Holtz, Sizzix Thinlits set - Skeleton Leaves and tucked under the photo.
I used the two paper flowers from the kit, as they were the same cherry blossom flowers I had used for a lot of the table decorations at the wedding, I added a few more from my stash, along with some other flowers.
I didn't add a big title as the layout will be part of an album and the little Pinkfresh Studio phrase stickers said all I wanted them to. There seems little point in putting the wedding details on every layout within the album.
#happilyevermarshall
This layout involved some painting with Distress Oxide Inks and the White Bazzill. I used a palette of five colours to match the flowers on the 'Precious' paper and arranged them in rainbow order. I swiped each colour onto the craft mat and spritzed it with some water. Then with a wide, flat paint brush, I applied a strip of each colour across the page. Then making the ink a little wetter I dripped some more colour onto each strip and over the ends.
The colours of Distress Oxide Ink I chose were - a mix of worn Lipstick and Spun Sugar, Dried Marigold, Fossilized Amber, Tumbled Glass and Hickory Smoke.
The next job was to fussy cut flowers from about half the sheet of patterned paper. I placed my photo onto a mat cut from the reverse of the other half of the 'Precious' paper. This was stuck into place and the flowers were arranged down the left side of the layout overlapping the photo. I curved the flowers with a scissor blade to give structure and raised them using 3D foam pads for extra dimension. Sparkle was added to the flower centres with Crystal Stickles. The leaves were die cut using scraps from the 'Precious' paper and the same leaf die as before. These were inked with some of the Worn Lisptick Distress Oxide Ink.
The two Tando chipboard butterflies from the kit were also treated to some of the distress Oxides, then a coat of Glossy Accents. I added flower stamen from my stash to each butterfly. I added smaller butterflies with the tiny stamp in the kit and some Hickory Smoke Oxide ink.
The title was added with two layers of die cut letters using Tim Holtz Sizzix Thinlits Cut Out Script set. They were cut from Bazzill and inked with Worn Lipstick Oxide.
That's all for today, back with more from this kit soon.
Thanks for looking,
Lynn x
Friday, 7 February 2014
A Few of my Favourite Things
That's what todays blog post is about.
A few of my favourite things.
The secret to a good LO for me is to collate a few of my favourite things before starting.
For me a good colour combo is necessary.
I like to have one in mind and then start gathering.
It's blue, aqua with pops of hot pink and sunshine yellow today.
I'm like a little squirrel, I start gathering pretty things from around my studio that all fit my colour combo and set them on my desk altogether.
Then I stand back to see what I have and start piecing it together.
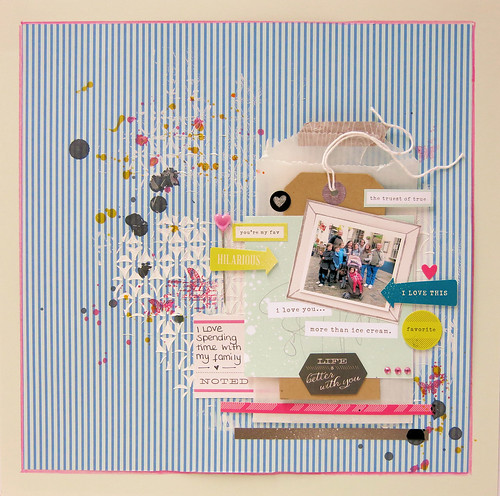
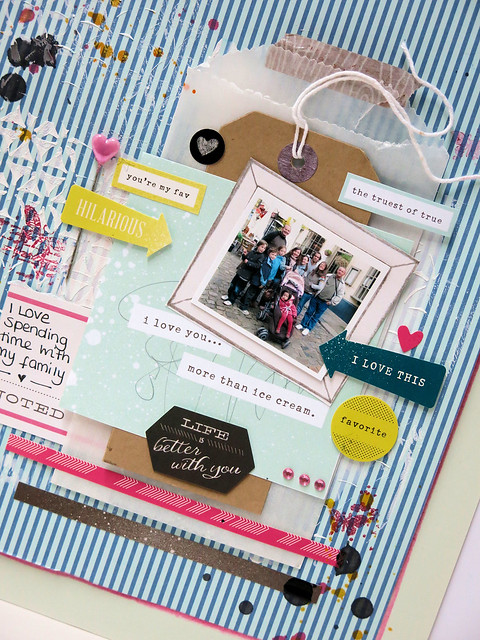
This is what I made.
Today on my desk I had some pretty American Crafts - Dear Lizzy - Polka Dot Party Papers, the matching pretty stickers, A pack of Thickers, some pink gems, Twine, a couple of heart topped pins, along with mists and a tag and glassine envelope.
Everything laid out in front of me ready to use.
I love this way of scrapping. It makes it so fun.
And just because it's on my desk it doesn't mean I will always use it.
I started with using my favourite scrapbooking tool. A mask.
I use these on pretty much all of my LO's. I have so many now in loads of different sizes.
You will be pleased to hear that we have 25% off all masks & stencils for the whole of this weekend.
Take a look at the large range that we stock. (discount gets taken off at checkout)
I used to loose my masks, so now I keep them all in a 12x12 pizza box. The kind that companies like Papermaze deliver their wonderful products in. They make great storage for masks.
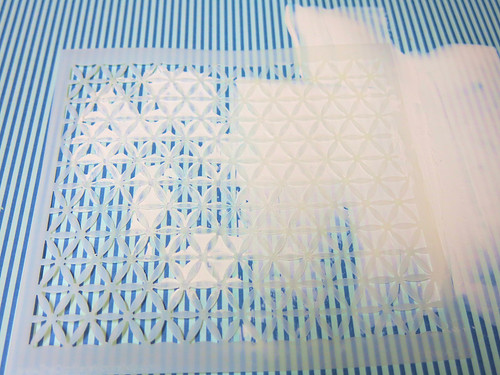
This is the mask I used today. Crafters Wokshop - Kaleidoscope. Designed by the very lovely Ronda Palazzari.
A few of my favourite things.
The secret to a good LO for me is to collate a few of my favourite things before starting.
For me a good colour combo is necessary.
I like to have one in mind and then start gathering.
It's blue, aqua with pops of hot pink and sunshine yellow today.
I'm like a little squirrel, I start gathering pretty things from around my studio that all fit my colour combo and set them on my desk altogether.
Then I stand back to see what I have and start piecing it together.
This is what I made.
Everything laid out in front of me ready to use.
I love this way of scrapping. It makes it so fun.
And just because it's on my desk it doesn't mean I will always use it.
I started with using my favourite scrapbooking tool. A mask.
I use these on pretty much all of my LO's. I have so many now in loads of different sizes.
You will be pleased to hear that we have 25% off all masks & stencils for the whole of this weekend.
Take a look at the large range that we stock. (discount gets taken off at checkout)
I used to loose my masks, so now I keep them all in a 12x12 pizza box. The kind that companies like Papermaze deliver their wonderful products in. They make great storage for masks.
This is the mask I used today. Crafters Wokshop - Kaleidoscope. Designed by the very lovely Ronda Palazzari.
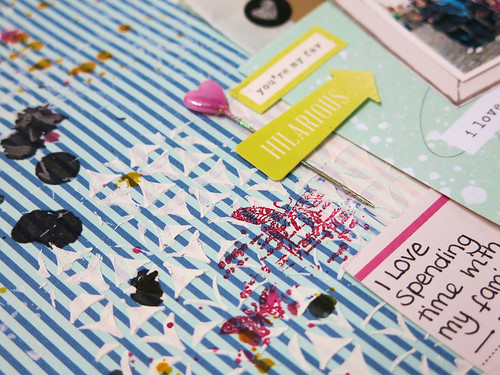
I thought I'd show you a fun technique using a mask and some moulding paste.
Place a blob of paste on your base. I then like to take an old credit card to spread it around the area where I want it.
I then lay the 6x6 mask half over the paste and half on the part that doesn't have any paste.
As my credit card still has some paste on it, I start scraping and pressing down on the mask over the area with no moulding paste underneath. I then continue scraping hard over the area that is sitting on the paste. It should look like this. If you need to add more paste you can.
Then for the good bit. Carefully peel off the mask.
The area with no paste underneath now has the pattern of the mask showing and the pasted area has the indentations of the mask. Leave to dry.
Once the base is dry it time for my other favourite technique. Layering. I love adding bits and pieces and building up layers.
I've used the American Crafts, Dear Lizzy papers, cutting them up and stacking them. The stickers that match make a perfect addition and add the pops of colour that I need to bring this LO to life. It would look quite plain and bland without them.
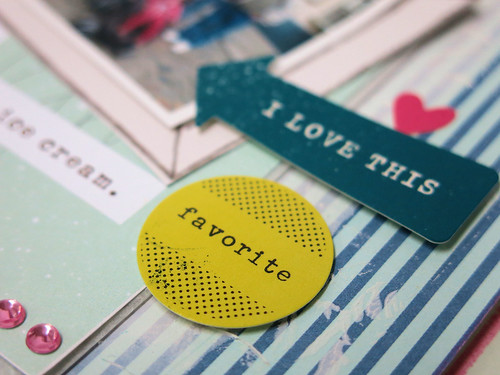
To help your stickers stand out more, stick a 3d foam pad to it. They really stand out from the page then.
I start adding the final bits and pieces. I go with 1 pin and 3 diamantes. I decide that I want a little more of the pink so grab a stamp and some hot pink ink. I've just stamped in a couple of areas.
Time for a little mist. I've unscrewed the top and literally let it drip drop on to the LO.
The LO is now finished and I used one last favourite of mine..
A photo of my family : )
Like I said, just because I laid out everything on my desk to use, it doesn't mean I have to use it. I left off the Thickers and the twine.
I really love this way of scrapping. I find it a really good way of finding things that I'd forgotten I had. It's like a little personal challenge each time I scrap.
Why don't you give it a go : )
Don't forget to grab yourself a bargain this weekend with the 25% off all masks and stencils.
I will be back for more ideas and tips using masks over the weekend.
Lisa xx
Labels:
American Crafts,
Crafters Workshop,
Dear Lizzy,
Kaisercraft
Subscribe to:
Posts (Atom)