Showing posts with label Sticker Book. Show all posts

Wednesday, 28 August 2024

Summer - Simple Stories - Summer Snapshots Collection

Hi everyone, it's Rebecca with you today, back from the gorgeous Isle of Wight and sharing my second layout of August with you. This month I've been working with the cheerful Summer Snapshots collection by Simple Stories. It's a fabulous summer-themed offering, perfect for all your beach and holiday layouts. You can find the full collection in the shop here.  


I started with a 9 x 6 inch strip of the 'Keep it Sunny' patterned paper and a 10 x 4 inch strip of the 'Take the Shot' paper (both B sides). I tore the top and bottom edges of both pieces, and positioned them, layered, in the centre of a sheet of Premium White Cardstock. I love tearing the edges of papers as it helps to introduce some texture to the page. 

In the centre of the layout, I added my 3 x 4 inch photo and one of the tags from the 'Tag Elements' paper. I usually use the tags as layers behind my photos, or like on my previous layout, sticking out behind layers, however I really liked the image on this particular tag so placed it square on the page, with a metal eyelet through the top.


Underneath my photo and tag, I added my title. I've gone for a large title from the Bits & Pieces to make a statement. I liked the way the shadowing matched the colours in my photo. Just underneath this, I added a small Foam Sticker to extend my title.


With all of these larger elements in place, I focused on embellishing with the smaller elements in the collection. I've used elements from the Sticker Book (which is amazing value for money and includes 469 stickers!), the Layered Chipboard, the Bits & Pieces, the Journal Bits and Pieces and the Cardstock Stickers. 


I then finished the layout off with some of the Glossy Enamel Dots.


Thanks so much for reading. I hope you've enjoyed the layouts I've created with this collection. I've got a whole heap of fresh holiday photos to scrap so you'll definitely be seeing more of this collection!

Take care

Rebecca x

@preciouspagespapercraft


Friday, 19 July 2024

Beautiful - Simple Stories - Simple Vintage Meadow Flowers Collection

Hi everyone, it's Rebecca with you today sharing my second layout created with the gorgeous Simple Vintage Meadow Flowers collection from Simple Stories. I always adore the Simple Vintage collections, and this one is no exception. You can find the full collection in the shop here. 


To start, I cut a section of the Dream on, Dreamer patterned paper, tore the bottom and distressed all the edges to add some texture. To the centre of this, I added my photo, raised up on foam and with a large frame behind it which I'd selected from the Ephemera packet.


Either side of my photo I adhered some ticket stubbs, some from the Ephemera pack, and one from the Sticker Book. I raised the tops of these up with foam to introduce some dimension to the page. To build on these clusters, I added a sprig of lavender from the Chipboard Stickers and a floral die cut from the Floral Bits & Pieces. To help extend the right hand cluster higher, I layered in some florals from the Sentiment Bits & Pieces.


For my title, I wanted something bold and dramatic, so I selected the word 'beautiful' from the Chipboard Stickers, and positioned it just under my photo.


Flicking through the Sticker Book, I noticed a horizontal branch of dangling purple flowers and the colours matched my layout so perfectly that I just had to use it! I added it above my photo extending to the left just like my title.


Underneath my title I had an empty area of patterned paper that was really bugging me and so I positioned two stickers from the Cardstock Stickers on foam pads there to fill the gap.


To finish off the layout, I added a couple of butterfly die cuts from the Floral Bits & Pieces and some Glitter Enamel Dots. 


Thanks so much for reading, I hope you've enjoyed this layout. 

Take care

Rebecca x

@preciouspagespapercraft


Wednesday, 6 December 2023

Echo Park - Christmas Time - Tis The Season

Hi everyone,

Claire here today sharing my first festive layout using the Christmas Time collection from Echo Park.

I really love this collection - its packed full of traditional colours, patterns and florals that I love to use for festive scrapping. You can find it in the shop here.


For this layout, I'm documenting a photograph from a friend's husband, @orangeymart_46, who kindly let me scrap this incredible photograph of some deer he captured on camera!

I started by prepping a piece of Premium White Cardstock with gesso before adding watercolour with a brayer. Once the ink was dry, I added some Distress Oxide with a brush through some Vicki Boutin stencils, creating additional depth to the background.


To create some extra interest, I wanted to double mat the photo, leaving the bottom edges long to showcase this beautiful patterned paper. To do this, I chose a the more delicate Santa Swirl paper, and the vibrant Magical Christmas paper.

For an extra layer, I added a small fishtail banner, cut from the Snowflakes Falling paper, and raised the ends on foam to help give separation.


I also cut a strip of Kraft cardstock and punched along the edge to create a lacey pattern. I like this rustic colour as it helps to draw out the woodland feel of the page.

Once all the photo layers and papers were in place, I started to embellish.

I cut some of the florals from the Festive Floral paper and layered these around the photo, raising some on foam for extra height and curling the leaves to give movement. I also added a fir cone from the Element Stickers to again echo the brown woodland feel. 


To this, I also added a sleigh from the sticker sheet and my title, both of which run along the bottom edge of my photo. 


For an extra pop of red, I found this lovely trim in the Sticker Book. Really love the extra colour this gives - it really lifted the page.


On the opposite side of the photo, I wanted to create a small tree cluster using trees from the Sticker Book and of course, that awesome deer - How could I resist?!


To the top edge, I added another small cluster using the stickers to tie in the design.


As a finishing touch, I added a torn strip of the red paid Magical Christmas paper to the bottom of the page to balance and anchor the design.

This page has been a really fun one to put together, and I look forward to sharing another layout with you soon.

Until then, enjoy the festivities!

Claire xx
@scrappysoulmate.

Wednesday, 8 March 2023

Happy Day - Simple Stories - Simple Vintage Life in Bloom Collection

Hello, it’s Rebecca with you today and I’m really excited to be sharing my first layout created with Simple Vintage Life in Bloom - another beautiful collection from Simple Stories. The colours in this collection, mixed with the pops of black, are just simply stunning and I’m loving creating with it. I’m also loving that there are some new products with this collection - including rub-ons, ephemera and washi tape! You can find the full collection in the shop now! 


The patterned papers in this collection are beautiful, so I wanted to create a layout which showcased several of them. To do this, I decided to cut circles from several of the papers. I’m a sucker for circles and hexagons on a layout, and it’s my go-to technique when I want to use lots of different papers, without overcrowding the page and making it look too busy. To cut my circles, I used a set of metal nesting dies. These allowed me to easily cut several circles of varying sizes. 


I arranged the circles on my background - offset slightly and more towards the right hand side of the page, and with a circular photo in the centre. I decided to go for a black and white photo today - mainly because there were so many different colours in the photo and I thought it would take away from the beautiful colours in the collection - but also because the collection has pops of black, and so a black and white photo seemed the obvious choice! 


With my circles and photo in place, it was time to add my title. I selected the ‘Happy Day’ Foam Sticker as it describes the photo perfectly, but also because I felt it was well-suited to a circular photo and had a natural spot for the photo to nestle in. 


Now it was time to add the beautiful florals! This collection is certainly not short of florals - it has floral patterned papers (perfect for fussy cutting), Floral Bits and Pieces and florals in the sticker book, so I was spoilt for choice. I selected a couple from the Floral Bits and Pieces, and some from the Sticker Book and arranged them around my circles. 


I embellished further with a couple of fussy-cut butterflies from the ‘Shine Bright’ patterned paper, a few chipboard hearts from the chipboard stickers, and a couple of phrases from the element stickers.


As my design was offset towards the right of the page, it left me some space on the left, which I felt needed some colour. I tore a strip of floral patterned paper and layered it with some bazzill cardstock behind it for contrast. I then added a chipboard sticker and a tiny fussy cut butterfly to finish. 


I absolutely adore how this layout turned out. I always love the Simple Vintage collections from Simple Stories but this has to be one of the most beautiful collections I’ve ever seen. It’s definitely love at first sight!


If you’d like to watch this layout come together, there is a process video over on my YouTube channel.  


Thanks for reading, I’ll be back later in the month with another Life in Bloom layout. 


Take care,


Rebecca x

@preciouspagespapercraft

Monday, 28 November 2022

Fall - Simple Stories - Harvest Market Collection

Hello, Rebecca here sharing another colourful layout created with Simple Stories’ Harvest Market collection. I am really enjoying this collection and I’m so glad that I have an abundance of photos still to scrap with it! The full collection can be found in the store here.


I have fallen in love with so many of the patterned papers in this collection and I’ve been having a really hard time deciding which to use - so for this layout I went for a design that allowed me to use several papers! 


I chose 3 papers and cut circles from them in different sizes. After distressing all the edges, I machine stitched around them too to bring extra texture to the page. I layered them on top of each other, and by placing some craft foam between the layers, I was able to introduce some dimension and height to the page. 


Using a Distress Ink Pad in ‘Spiced Marmade’, I added a circle of colour to a sheet of premium white cardstock, enough that a little would show around the edges of my largest circle. I finished this off with some splatters in the same colour, and adhered my circles in the centre of the page. 


I cut my photo in a circle, making sure it was smaller than my smallest patterned paper circle, and stuck it down with some foam behind it. The Foam Stickers make for perfect titles for autumn layouts so I used one that says ‘Fall’ and placed it underneath my photo. The foam stickers are always one of my favourite products in a Simple Stories collection!


Using some floral stickers from the Sticker Book, I embellished around my title, creating a cluster either side of it. I also created a cluster above my photo using stickers from both the sticker book and the Combo Stickers sheet. 


I’d been looking online for funny quotes relating to pumpkins, and came across ‘Having a gourd time’ and I wanted to add this to my page. I decided to use the colourful stickers from the sticker book, and have the quote following the curve of my largest circle. 


I finished the layout off with a few small leaves from the Chipboard Stickers, some nuvo drops and some distress oxide splatters in ‘Mermaid Lagoon’. 


Thank you for reading, I hope you’ve enjoyed this layout. I’ll be back next month when it will be time for those festive layouts! 


Take care


Rebecca x

@preciouspagespapercraft


Friday, 28 October 2022

Hitchin Lavender - Paige Evans’ Garden Shoppe Collection

Hello, it’s Rebecca with you today sharing my final layout created with Paige Evans’ Garden Shoppe collection. I’ve used this collection to document a few summer photos now, as the bright colours are perfect - but I also think this collection could work for Autumnal layouts too - so that’s my next challenge! You can shop the full collection here.


I started with Paper #19 and cut a strip about 7 inches wide, tearing it diagonally along the bottom to add some texture. I placed this centrally onto a sheet of Premium White Cardstock - sticking the top flat, but raising the torn edge up on foam pads. To the top of this, I added the flower border sticker from the Accent and Phrase Stickers. I then replaced all the internal flowers, but raised up on foam to add a bit of interest. 


I matted my photo with a layer of the B Side of Paper #19 to coordinate with the colours in my photo, and placed it onto the layout, raised up with foam. 


I then moved on to embellishing the layout. The photo I’m documenting today is of my little boy sat among a field of lavender - so I wanted lots of florals on this page. The Floral Ephemera pack was perfect for this - I added a few flowers to the page, arranging them in  three clusters to create a visual triangle around my photo, and curled the edges up to add dimension. 


For my title, I selected some of the alphabet stickers from the Sticker Book. I went for a mixture of colours for ‘Hitchin’ to coordinate with the background paper, and then focused on the purples for the word ‘Lavender’. (The Lavender Farm is in a place called Hitchin!)


To complete the layout, I added a sprinkling of sequins among my floral clusters to add a bit of sparkle. 


Thank you for reading! I hope you’ve enjoyed this layout and the previous 2 I’ve created with the Garden Shoppe collection. I’ll be back next month, creating with Simple Stories ‘Harvest Market’ collection. 


Take care,


Rebecca x

@preciouspagespapercraft

Friday, 14 October 2022

Brighter Days - Paige Evans - Garden Shoppe Collection

Hello, it's Rebecca with you today sharing a colourful new layout using Paige Evans' 'Garden Shoppe' collection. When creating my last layout, I limited my colour scheme to just yellows and greens, so today I wanted to embrace all the colours in the collection and create something fun. I love all the florals and brights in this collection - it's perfect for Spring, Summer, Autumn.... its so versatile! The collection can be found in the store here.


I started with Paper #11 and cut a section approximately 3x9 inches to act as an anchor for my layout. I love that this paper almost matches the background of my photo with all the flowers and colours. Using a starburst stencil, I added colour to my background with some Distress Oxide Ink Pads.


I placed my photo over to the right of the strip of patterned paper, with a layer of pink cardstock behind it. I used a set of metal dies to cut some tag shapes from some of the other papers in this collection - opting for the more 'solid' patterns on the B sides of Paper #19, Paper #7 and Paper #18. I slotted the tags behind my strip of floral paper - two at the top and one at the bottom. 


For my title, I've used an acrylic perspextive from Bramble Fox. 


Next, I started to embellish my page using the Floral Die Cuts. I love that this pack includes florals and leaves in all different colours. I also added some stickers from the Sticker Book, and some of the Accent and Phrase Stickers. I arranged the embellishments in a way that creates a 'visual triangle' around my photo. This helps to keep the photo as the focal point of the page as your eye is drawn to it. I like to raise my embellishments up with foam pads to introduce some dimension to the layout.


To finish the layout, I fussy cut some of the phrases from Paper #23, and staggered them under my photo, picking phrases that worked for my photo, but also so that I introduced different colours to that section of my page. 

I hope you've enjoyed this layout. I'll be back later in the month with another Garden Shoppe layout.

Take care,


Rebecca x

@preciouspagespapercraft


Friday, 23 September 2022

Simple Stories ~ Say Cheese at the Park #4 🐭

Hi it’s Anna back with you today! 
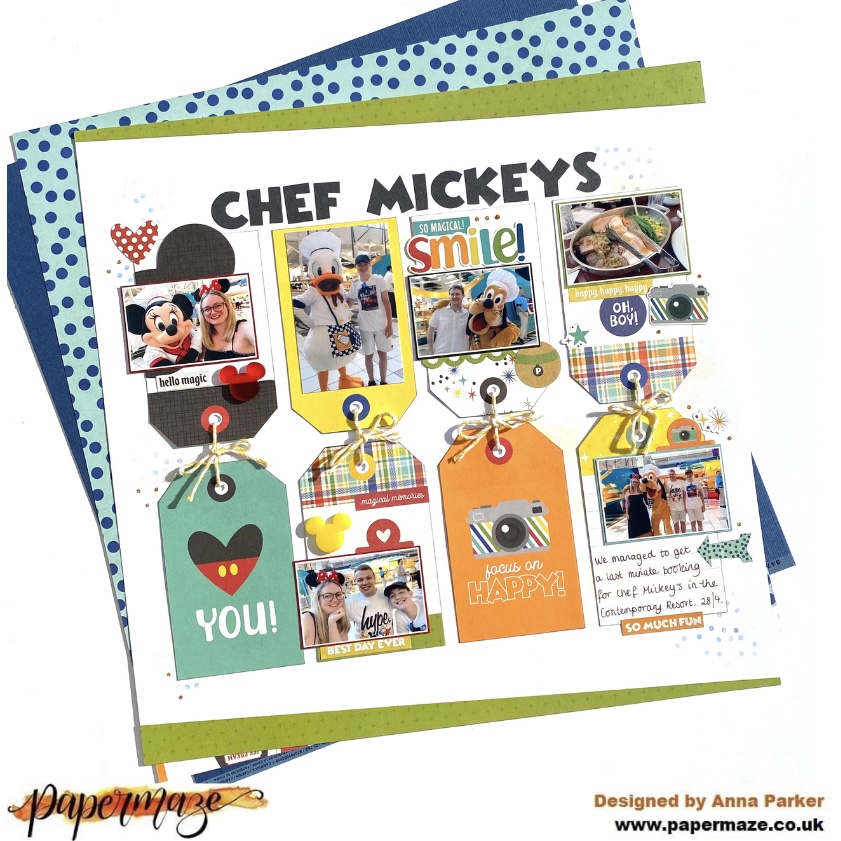
I have another layout to share with you using Simple Stories Say cheese at the Park - I have had a whale of a time with this collection, it’s been perfect for documenting magical Disney memories. 
You can find all of the collections as part of this release in the shop here.. 

For this layout, I have used the Say Cheese at the Park part of the release and in particular the ‘Tags’ paper. 


I began with a 12x12 piece of white bazzill cardstock. I then selected 8 tags that I wanted to use. 
I decided that something was needed on the background, so I added some Distress Ink in the shade of Fossilised Amber. I then used a stencil to apply some more Distress Ink in the shade of faded jeans. 


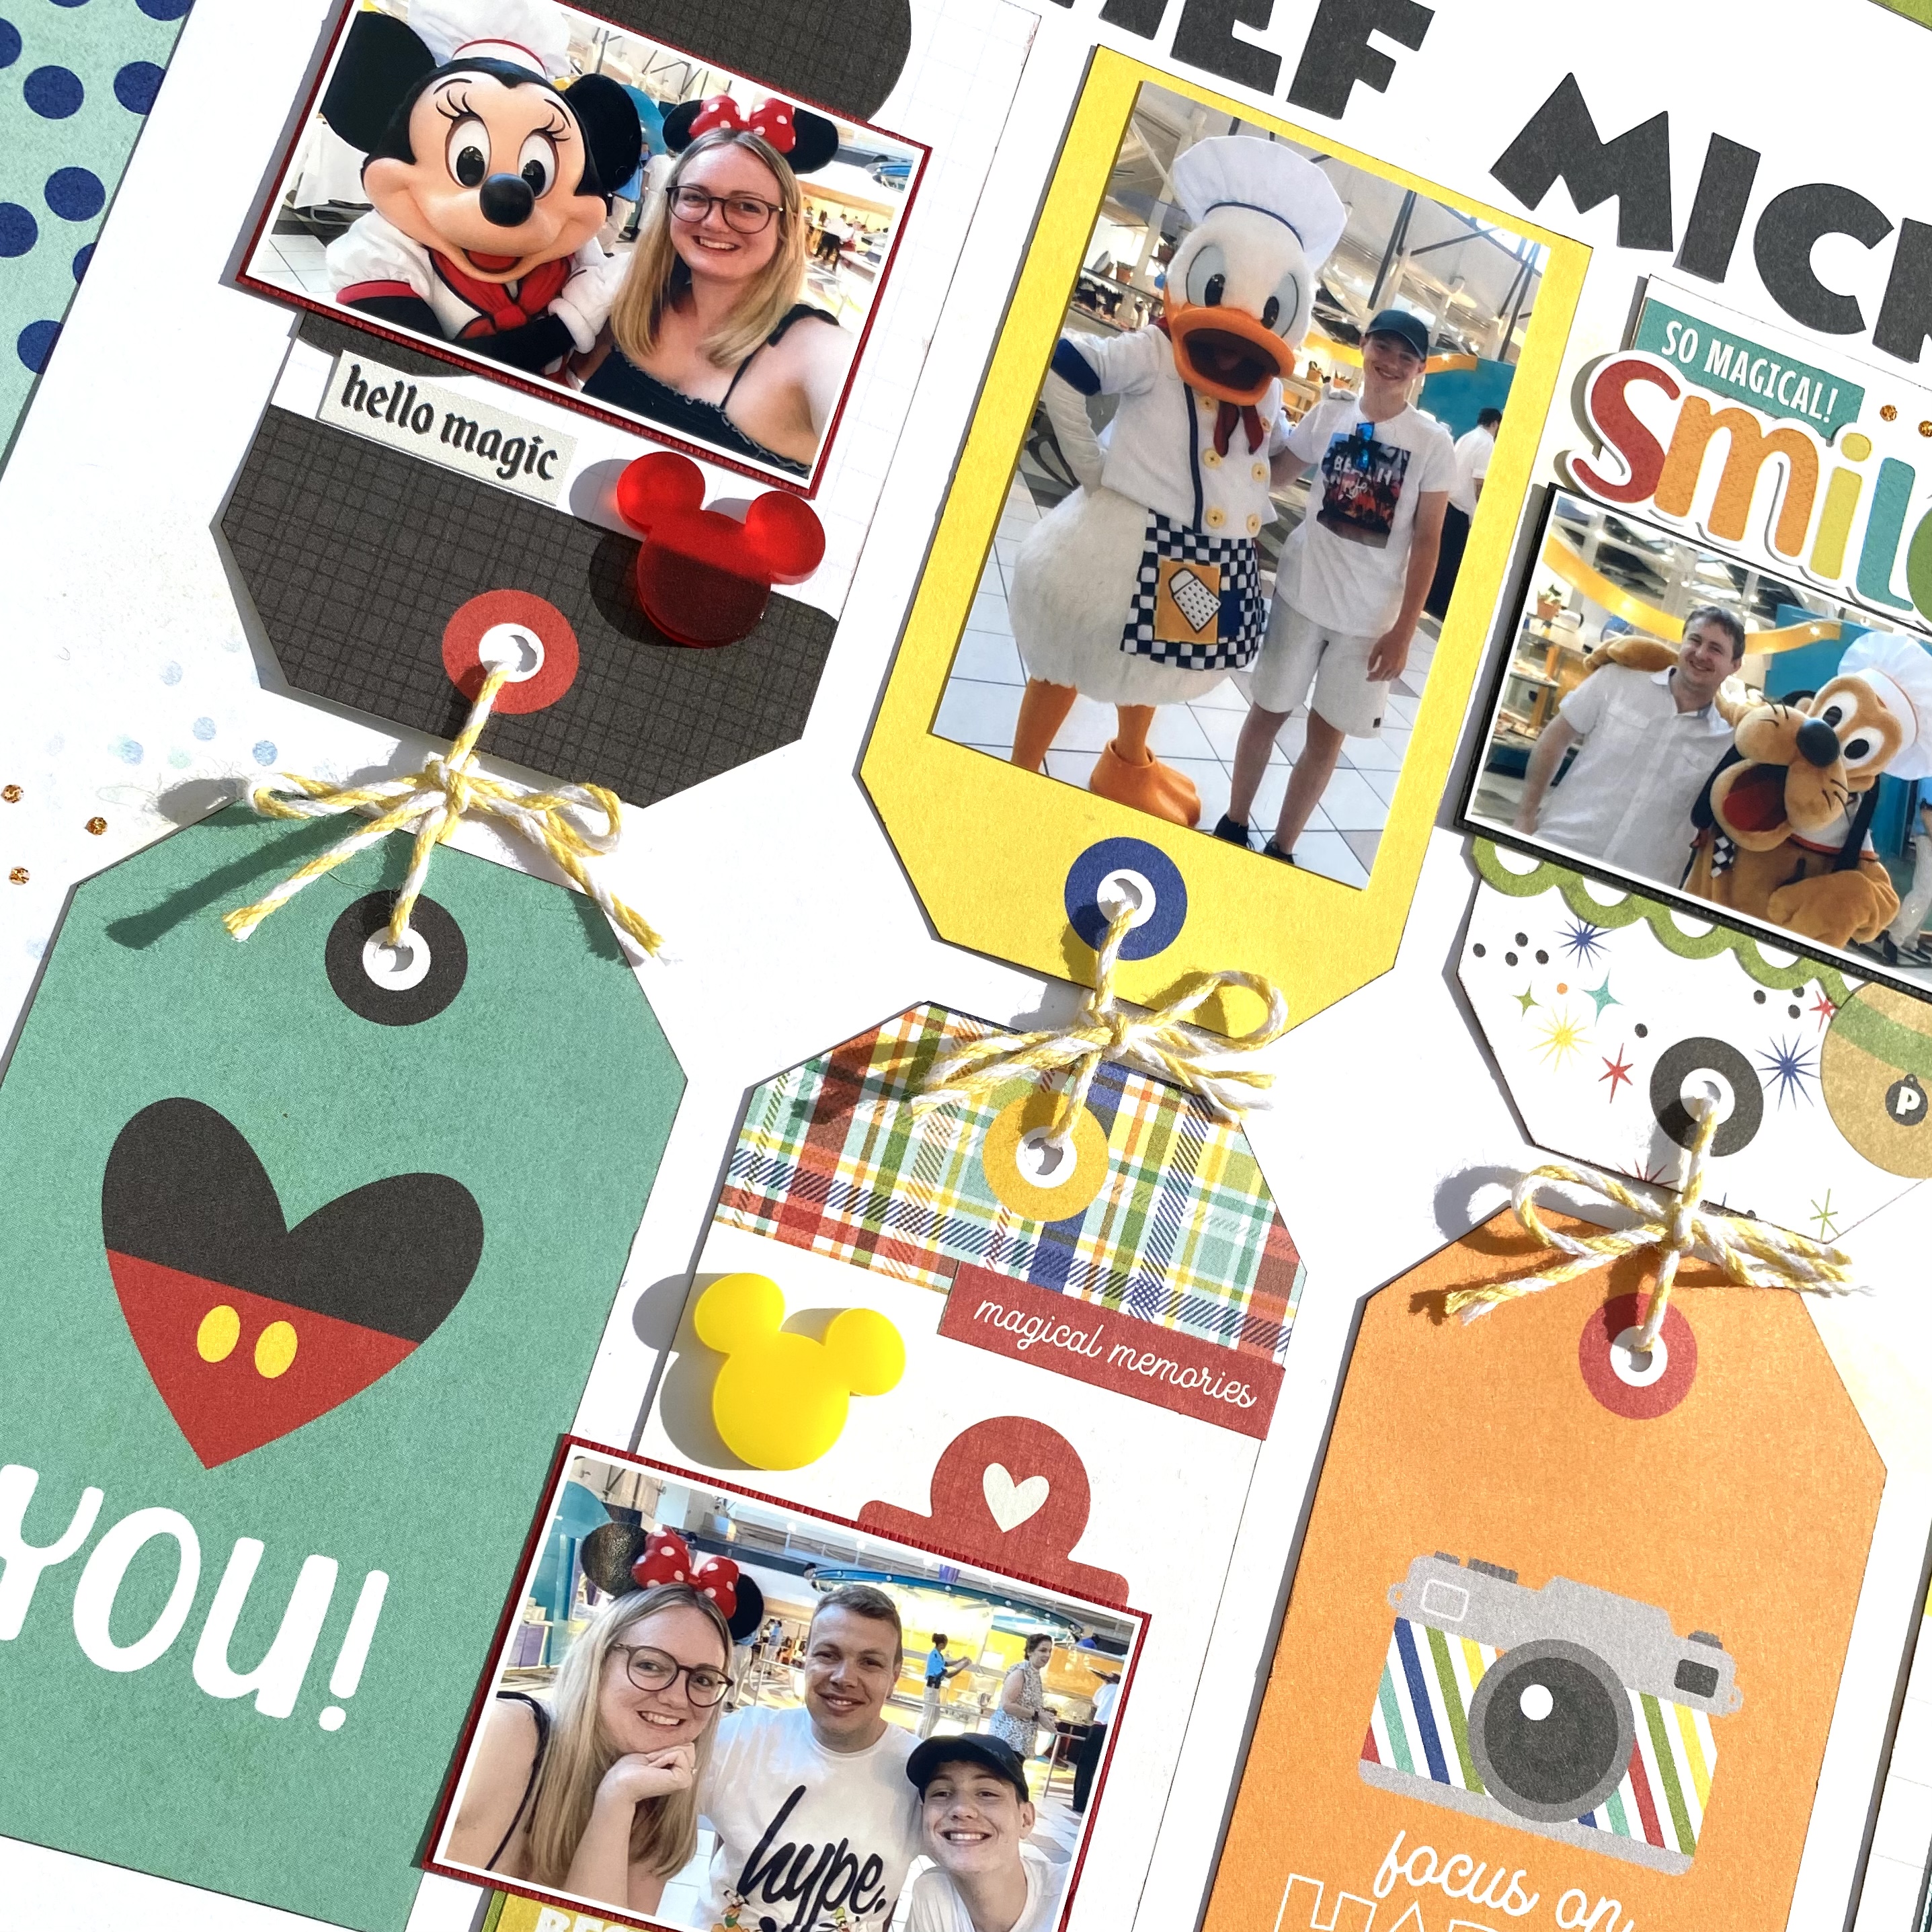
I arranged the tags on my layout and added my photos to some of them, mounting them with cardstock first. 


I used stickers from the Combo Stickers and Sticker Book to embellish the tags. 

I added a few finishing touches, by randomly adding some Nuvo Drops. 


I used the alpha stickers from the sticker book for my title. 


I finished the layout off by adding some twine, tying it between each of top and bottom tags. 


Thank you so much for looking! 
See you again soon. 
Anna 
X