Friday, 8 March 2024

Adventure - Cocoa Vanilla Studio - Great Escape

Hi everyone!

It's Rebecca with you today sharing my first layout for March. It feels like forever since I created a proper 'boyish' layout, so this month I've chosen to work with the new Great Escape collection from Cocoa Vanilla Studio. You can always count on CVS to release a cracking 'boy' collection! You can find it in the shop here.


As soon as I saw the grey woodgrain paper (the B side of 'Starry Night'), I was in love! It's a really lovely paper, and it's not too busy so it's perfect for a background! I cut small sections out of two of the edges and after distressing them, backed them with patterned papers from the collection.

Next, I die cut 2 large stars from the same 2 patterned papers (Happy Camper and Journey) and placed them central on the page. On top of these, I added my circular photo. I knew I wanted this layout to be quite minimalistic, so I kept everything clustered tightly in the centre of the page. 

Underneath the photo, I added 2 strips of patterned papers with fishtails cut into each end. I offset these slightly so that they weren't too 'blocky' and on top of these I added one of the Puffy Title Stickers.


Either side of my photo I added elements from the Die-Cut Ephemera. My photo is of my little boy playing in the village park on holiday, and so I've used the 'Fun Times' signpost, a compass and the words 'wild' and 'roam'. 


Underneath my title, I placed one of the Chipboard Stickers. I love this piece because the shape matches the banners I've created under my photo.

Wanting to extend the design down slightly, I've staggered some phrase stickers.


To finish off the layout, I've arranged lots of the star Puffy Stickers around the central cluster, trying to get an even spread of colours, and doodled a black border around the edge of the background.


Thanks for reading! I hope my layout inspires you to create with this fabulous collection.

Take care,

Rebecca x

@preciouspagespapercraft


Wednesday, 6 March 2024

Pinkfresh Studio - Making the Best of It - The Good Life

Hi everyone!

Claire here and this month I am back sharing a Spring layout, created with the new Making the Best of It collection from Pinkfresh Studio.

It's been a minute since I've created with Pinkfresh Studio collections and I've really missed it. This new collection definitely doesn't disappoint. It has a beautiful colour palette, and is filled with gorgeous florals and a mixture of materials with vellum floral embellishments, cardstock stickers, puffy stickers and more! You can check the collection out in full here.


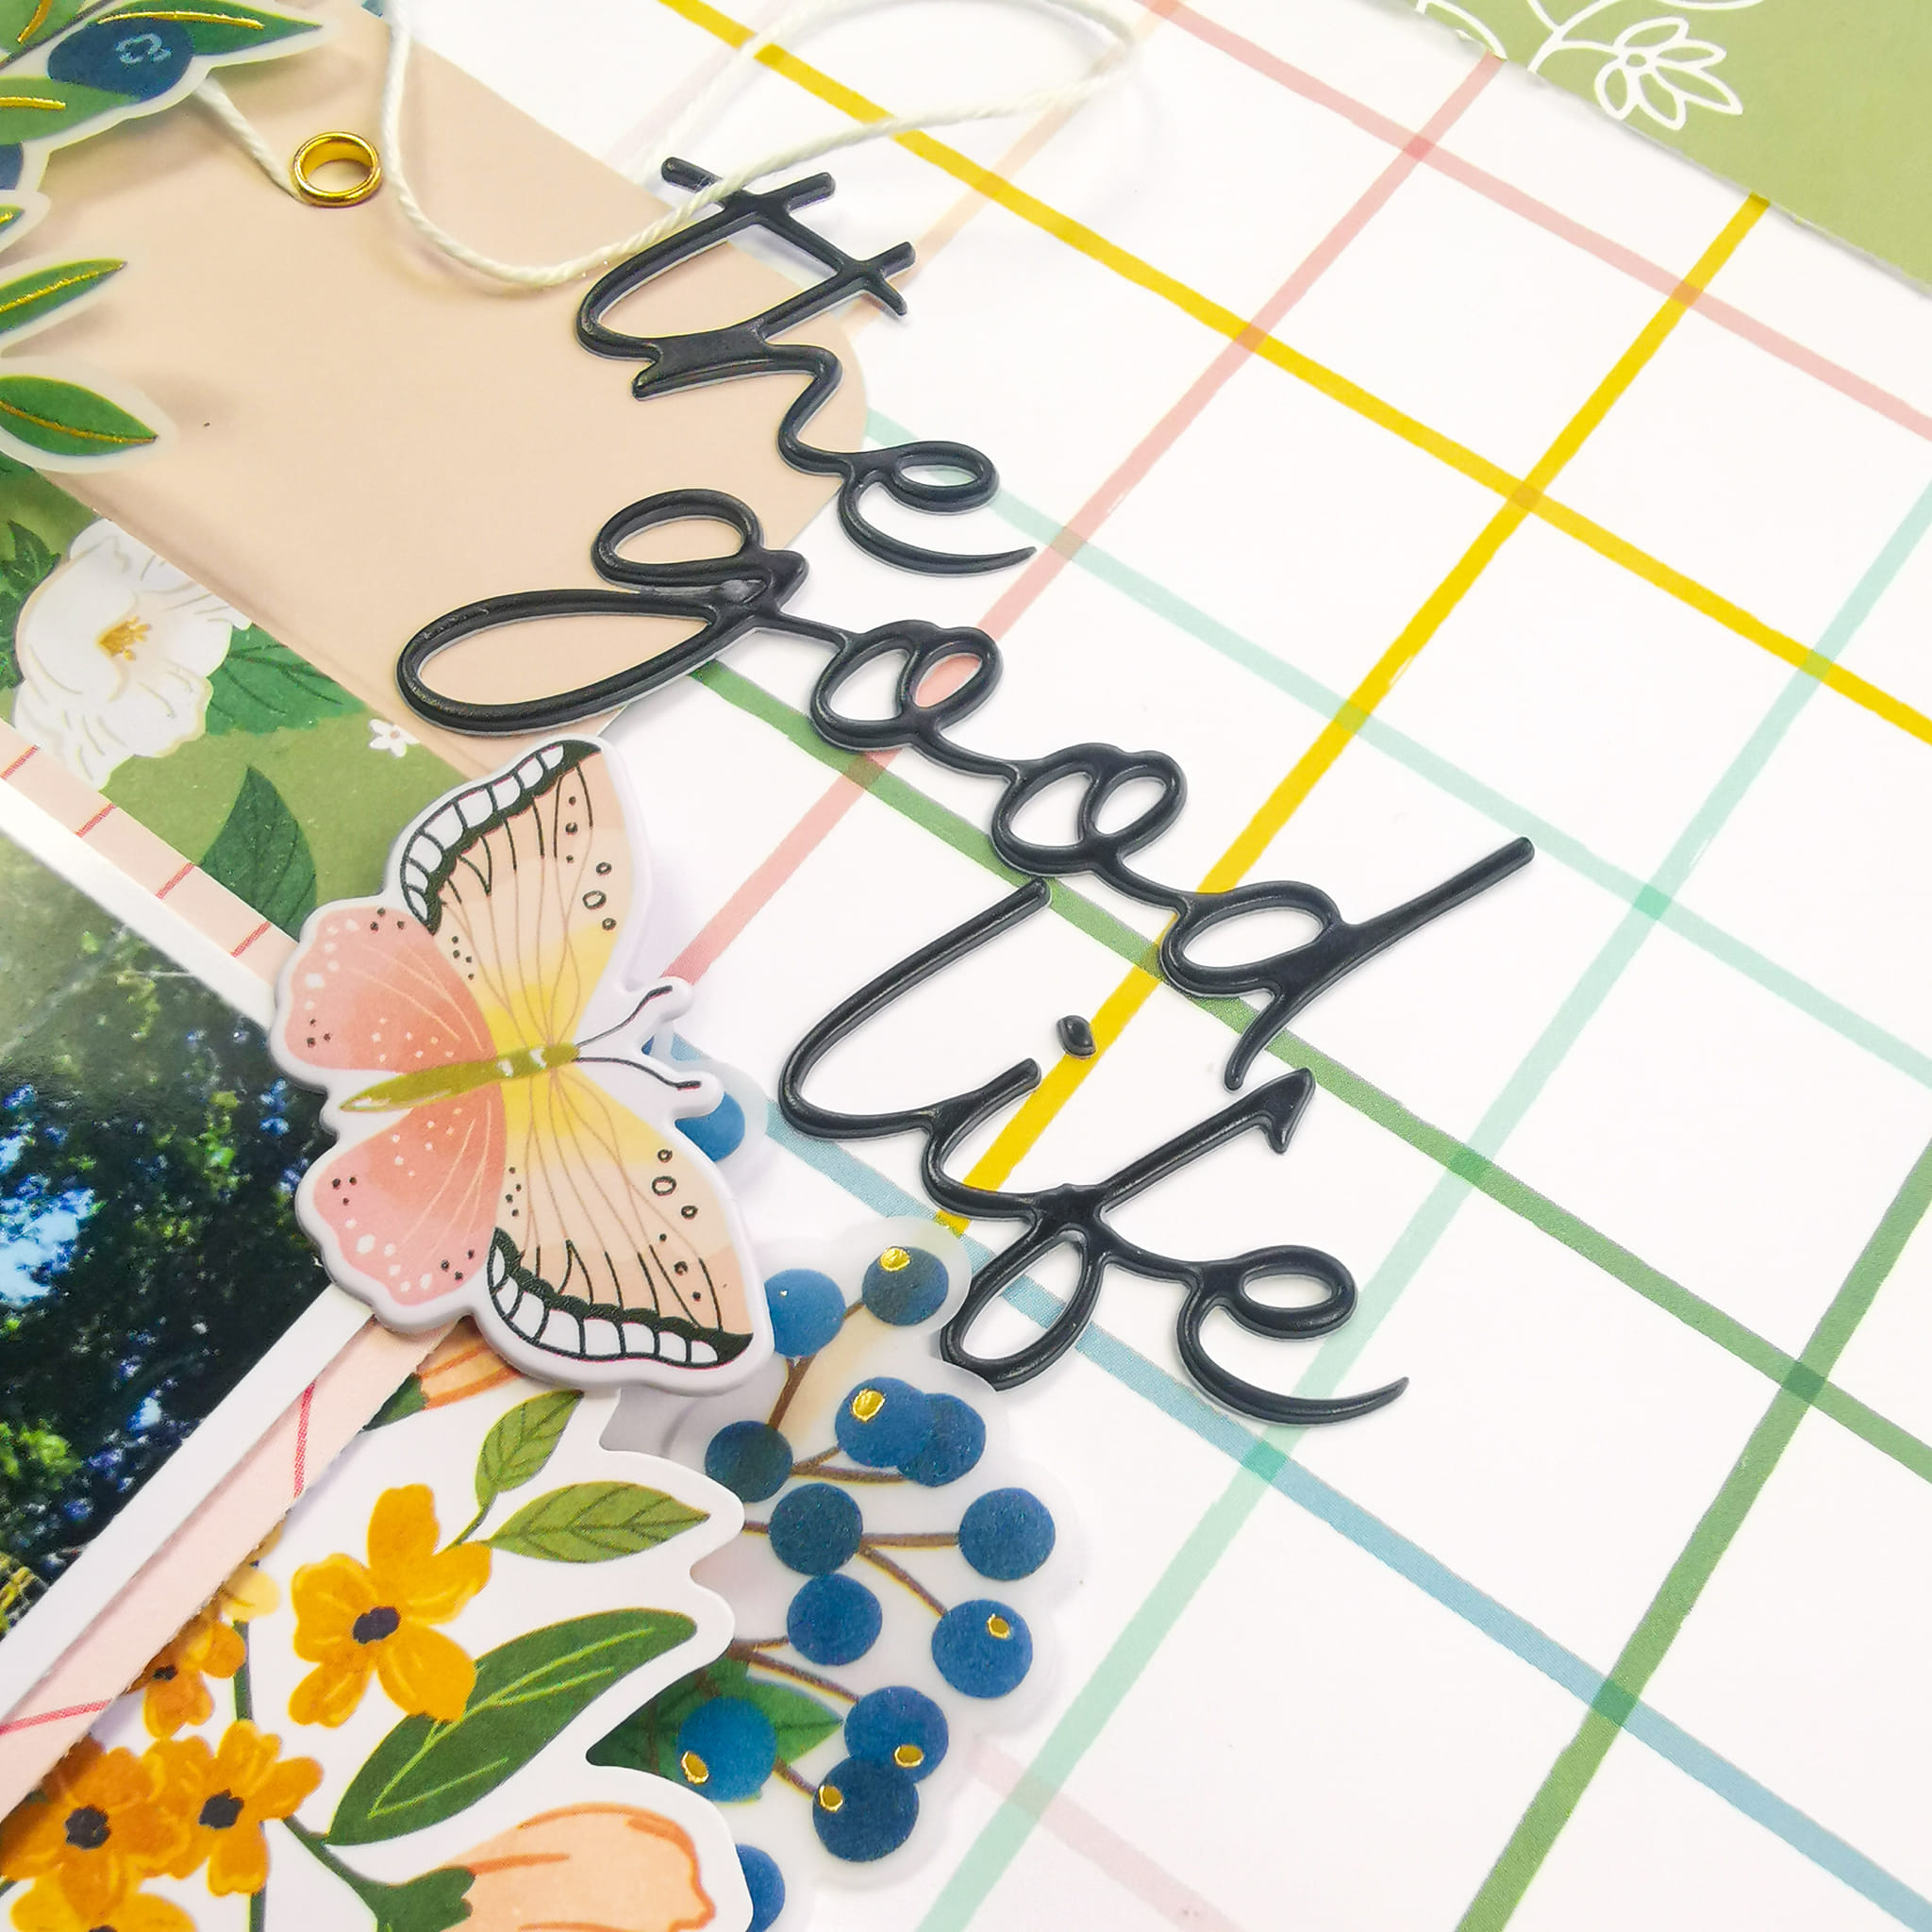
For a change, I steered away from my usual crisp white cardstock background, opting for the Be the Sunshine paper which has this fun multicoloured grid pattern.

To create my layered design, I started with a large envelope and red scalloped card from the Journaling Bits, and used this as an anchor to build from.


I backed my photo with a piece of the Live for the Hope of It paper as the pink tones echo the pink of the envelope and the journaling card. To create depth, I raised the photo on foam before adhering it to the envelope.

The photograph was taken last year in my garden, and just behind the fence is a small river running through a wooded area, so I wanted to try and depict this in the layout. 

I fussy cut the blue scalloped border from the No Risk, No Magic paper, slotting this under the envelope to mimic the stream.


Next, the embellishing - and there are so many options to choose from!

I was immediately drawn to the Vellum Die Cut Ephemera. The florals and leaves are beautifully designed, and the vellum provides great movement and texture for clusters. They even have gold foiling which adds that little something special!


I mixed the vellum florals with a circular sticker from the Chipboard Stickers and added some Die Cut Ephemera and Puffy Stickers amongst the other clusters to add that extra interest created by mixing materials. For example, I also fussy cut some leaves from the Good Feelings paper, echoing the blue tones and adding movement.


To create my title, I opted for one of the Puffy Title Stickers, adding a butterfly from the Puffy Stickers just underneath.


I made a smaller subtitle to sit along the bottom of the photo, using a banner from the Journaling Bits and another Puffy Sticker.  To create extra dimension, I rolled the banner between my fingers to curl the edges.


At this point, I liked the design but it didn't feel finished. I felt like it needed more green to really reflect the photograph, but I liked the central design all clustered together, 

I decided to offset the page, mounting it on a piece of the Beautiful Story paper and it immediately brought the layout to life! I love how this green reflects the envelope and the outdoorsy feel of the photograph.


I hope you've enjoyed this blog post, and I hope you'll check out this lovely new collection. It's honestly been a joy to create with,

I'll pop back later this month with another layout using this collection and hope to see you then.

Happy Scrapping!

Claire xx

@scrappysoulmate.

Monday, 4 March 2024

Simple Stories ~ Noteworthy #1 🗒️

Hello everyone and welcome back to the Papermaze blog! 

March is here and this month I’m working with Noteworthy by Simple Stories. It’s a gorgeous collection which features a sheet of patterned paper for each month of the year, with cut apart pieces. The reverse side is a patterned paper. So it makes the papers really versatile! I love to use the monthly cut apart pieces in my year albums. 

You can find the whole collection in the shop here. 


At the end of the year I like to create a year in review page, so for 2023’s page I have created a layout using lots of grid photos and a cutfile by Paige Evans. 

I backed the cutfile using the b sides of the various months of the year patterned papers. 


I used the b side of ‘February’ as my base.


I used an app on my phone to create grids of photographs from throughout 2023 and arranged them all together on my page. 


I then used the journal bits and pieces and cardstock stickers to embellish my layout. 


These style pages are a great way to reflect on the year and give opportunities for adding lots of photos that you might not of scrapbooked. 
Why not give it a try?


Thanks so much for looking. See you later on this month with a second layout using this collection. 

Anna
X

Friday, 1 March 2024

February Papermaze Kit - Part 2


Lynn here today with a second pair of layouts using the romantic Papermaze Kit for February.
I have used the red and pink papers this time, and created a bold and a delicate layout with embellishments from the kit and a few from my own stash.


Here are the details of what you will find in the kit:


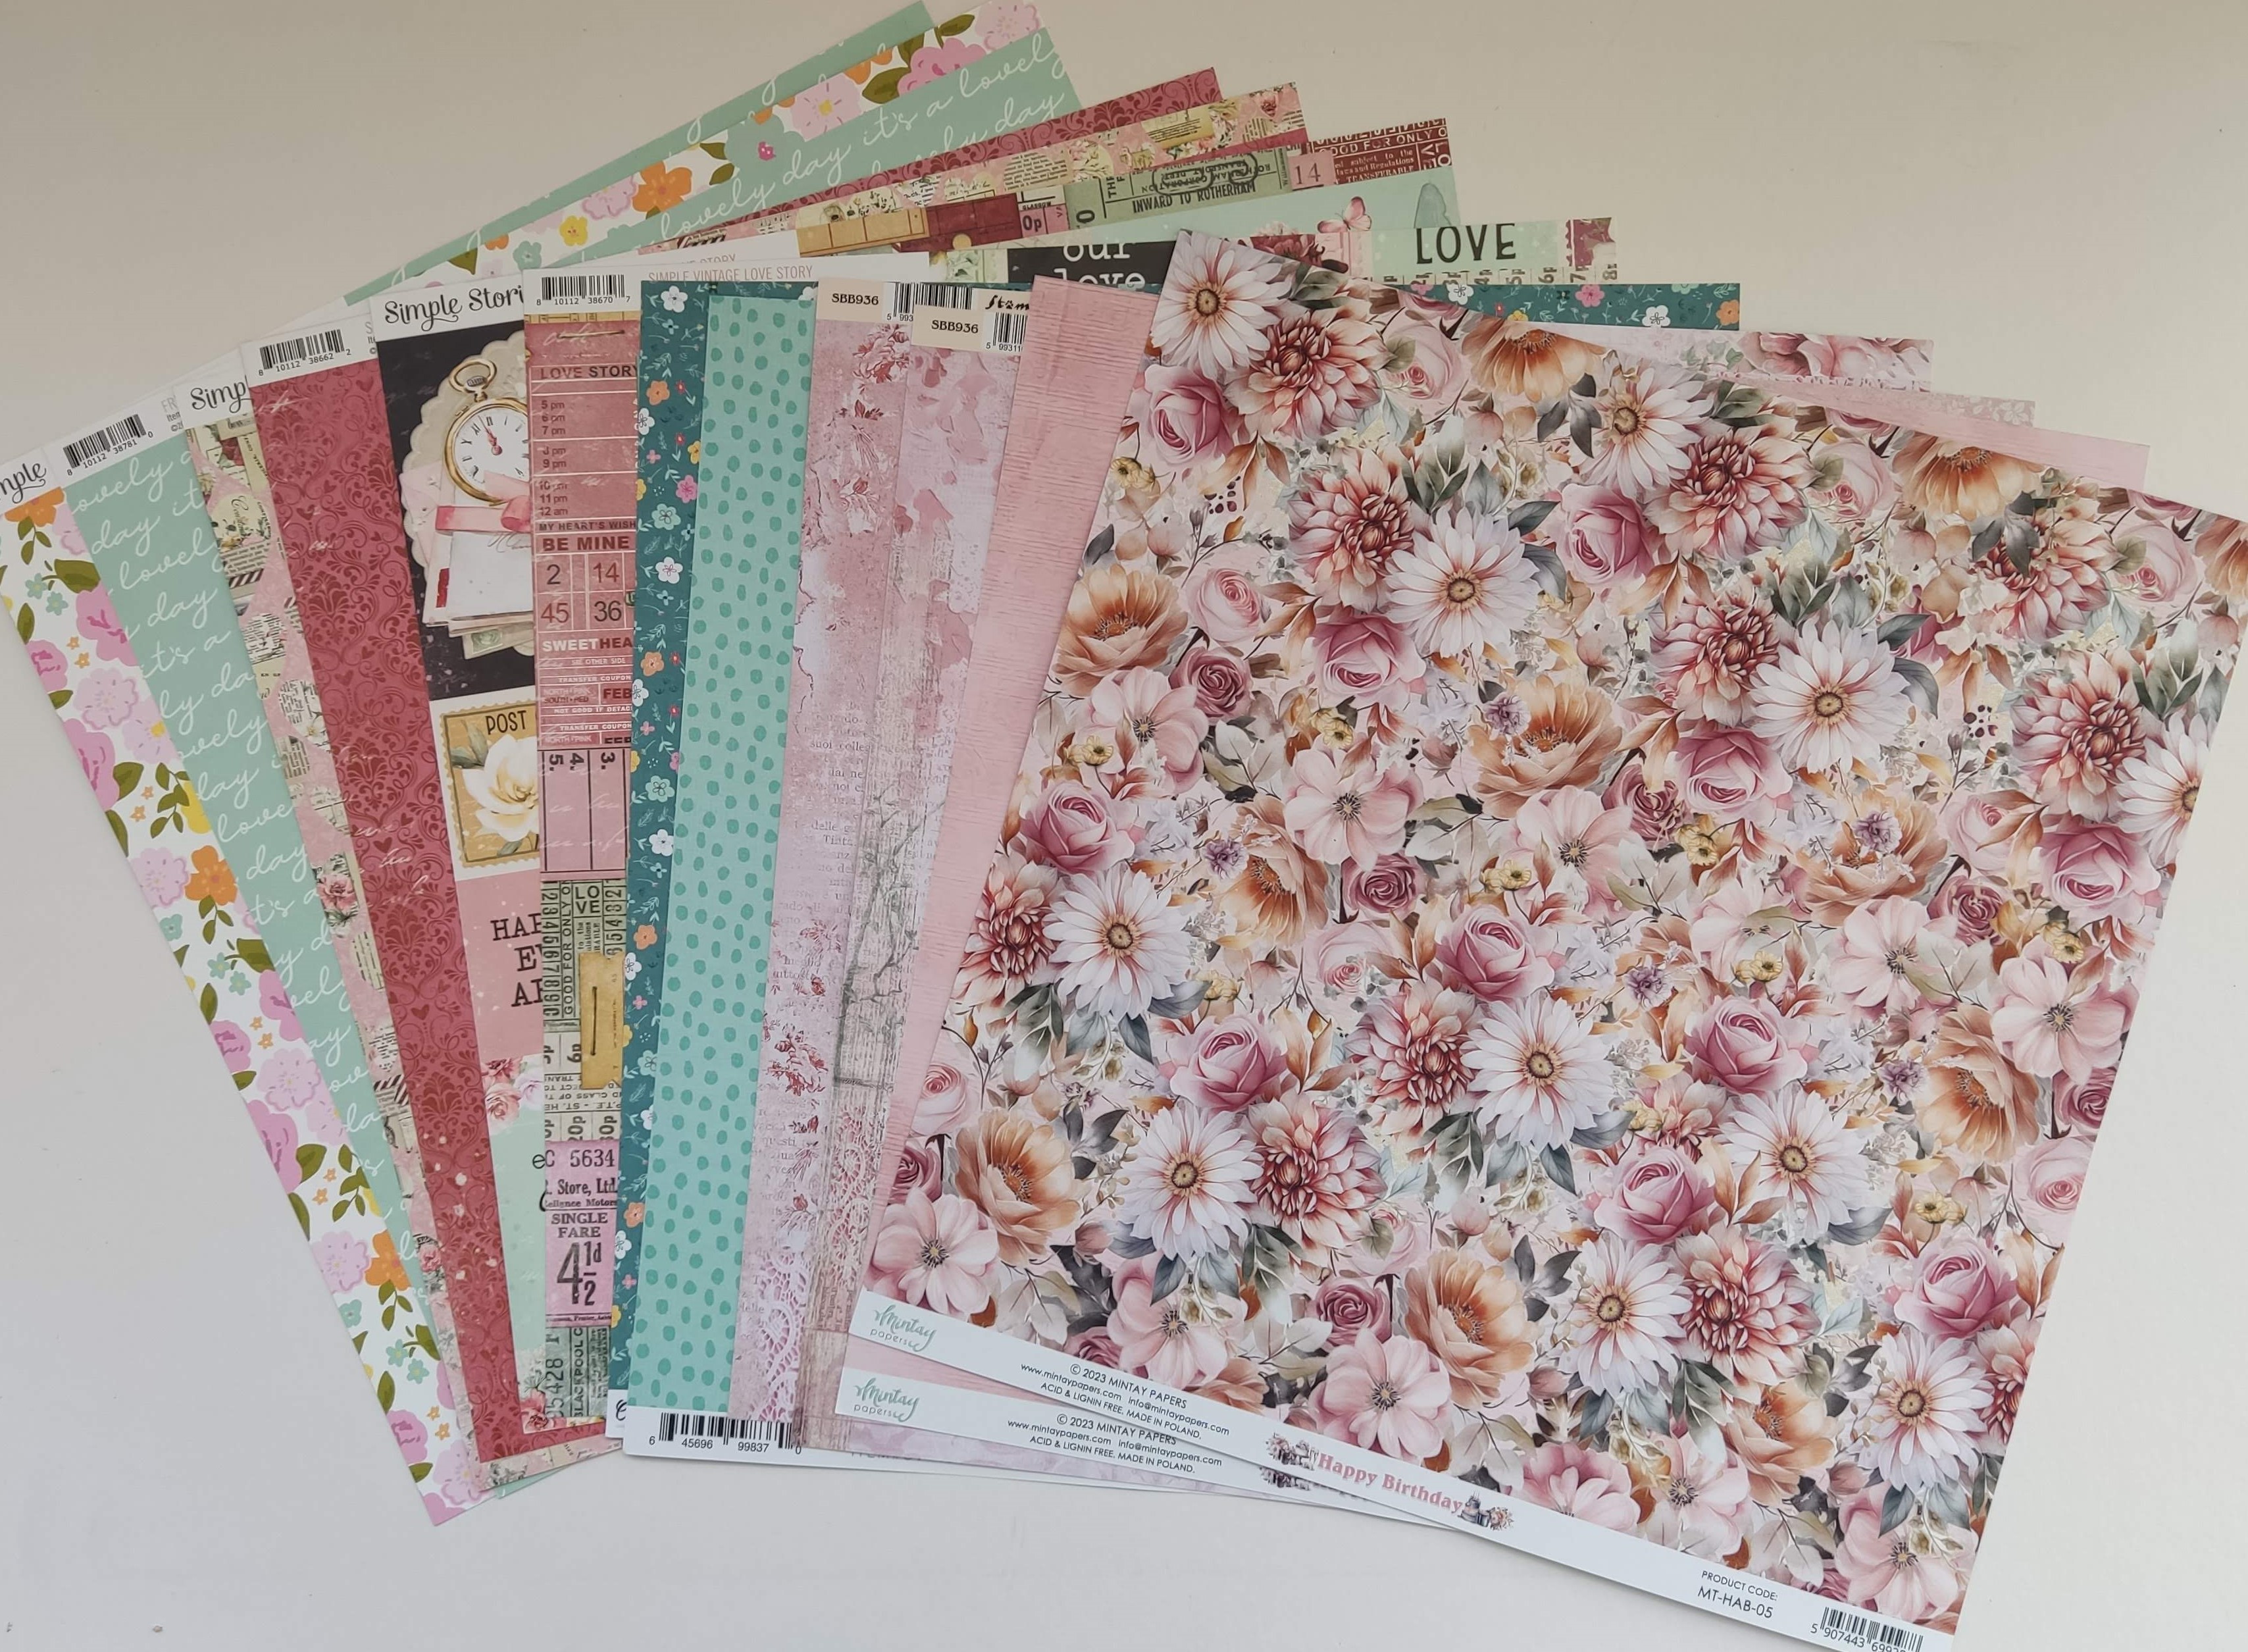
Patterned Papers: (The photo below shows both sides of the six papers)
Mintay Papers - Happy Birthday collection - MT-HAB-05
Stamperia - Roseland collection - Flowers
Simple Stories - Simple Vintage Love Story collection - 2x2/4x4 Elements & My Heart
Simple Stories  - Fresh air collection - Fresh Start
Cocoa Vanilla Studio - Happy Days - Little Blossom


Bazzill Basics Cardstock - Cherry Splash and Walnut Cream (included in the kit). Yukon Gold, Blossom, Flintstone and Sea Glass (extra Bazzill pack).


Embellishments:
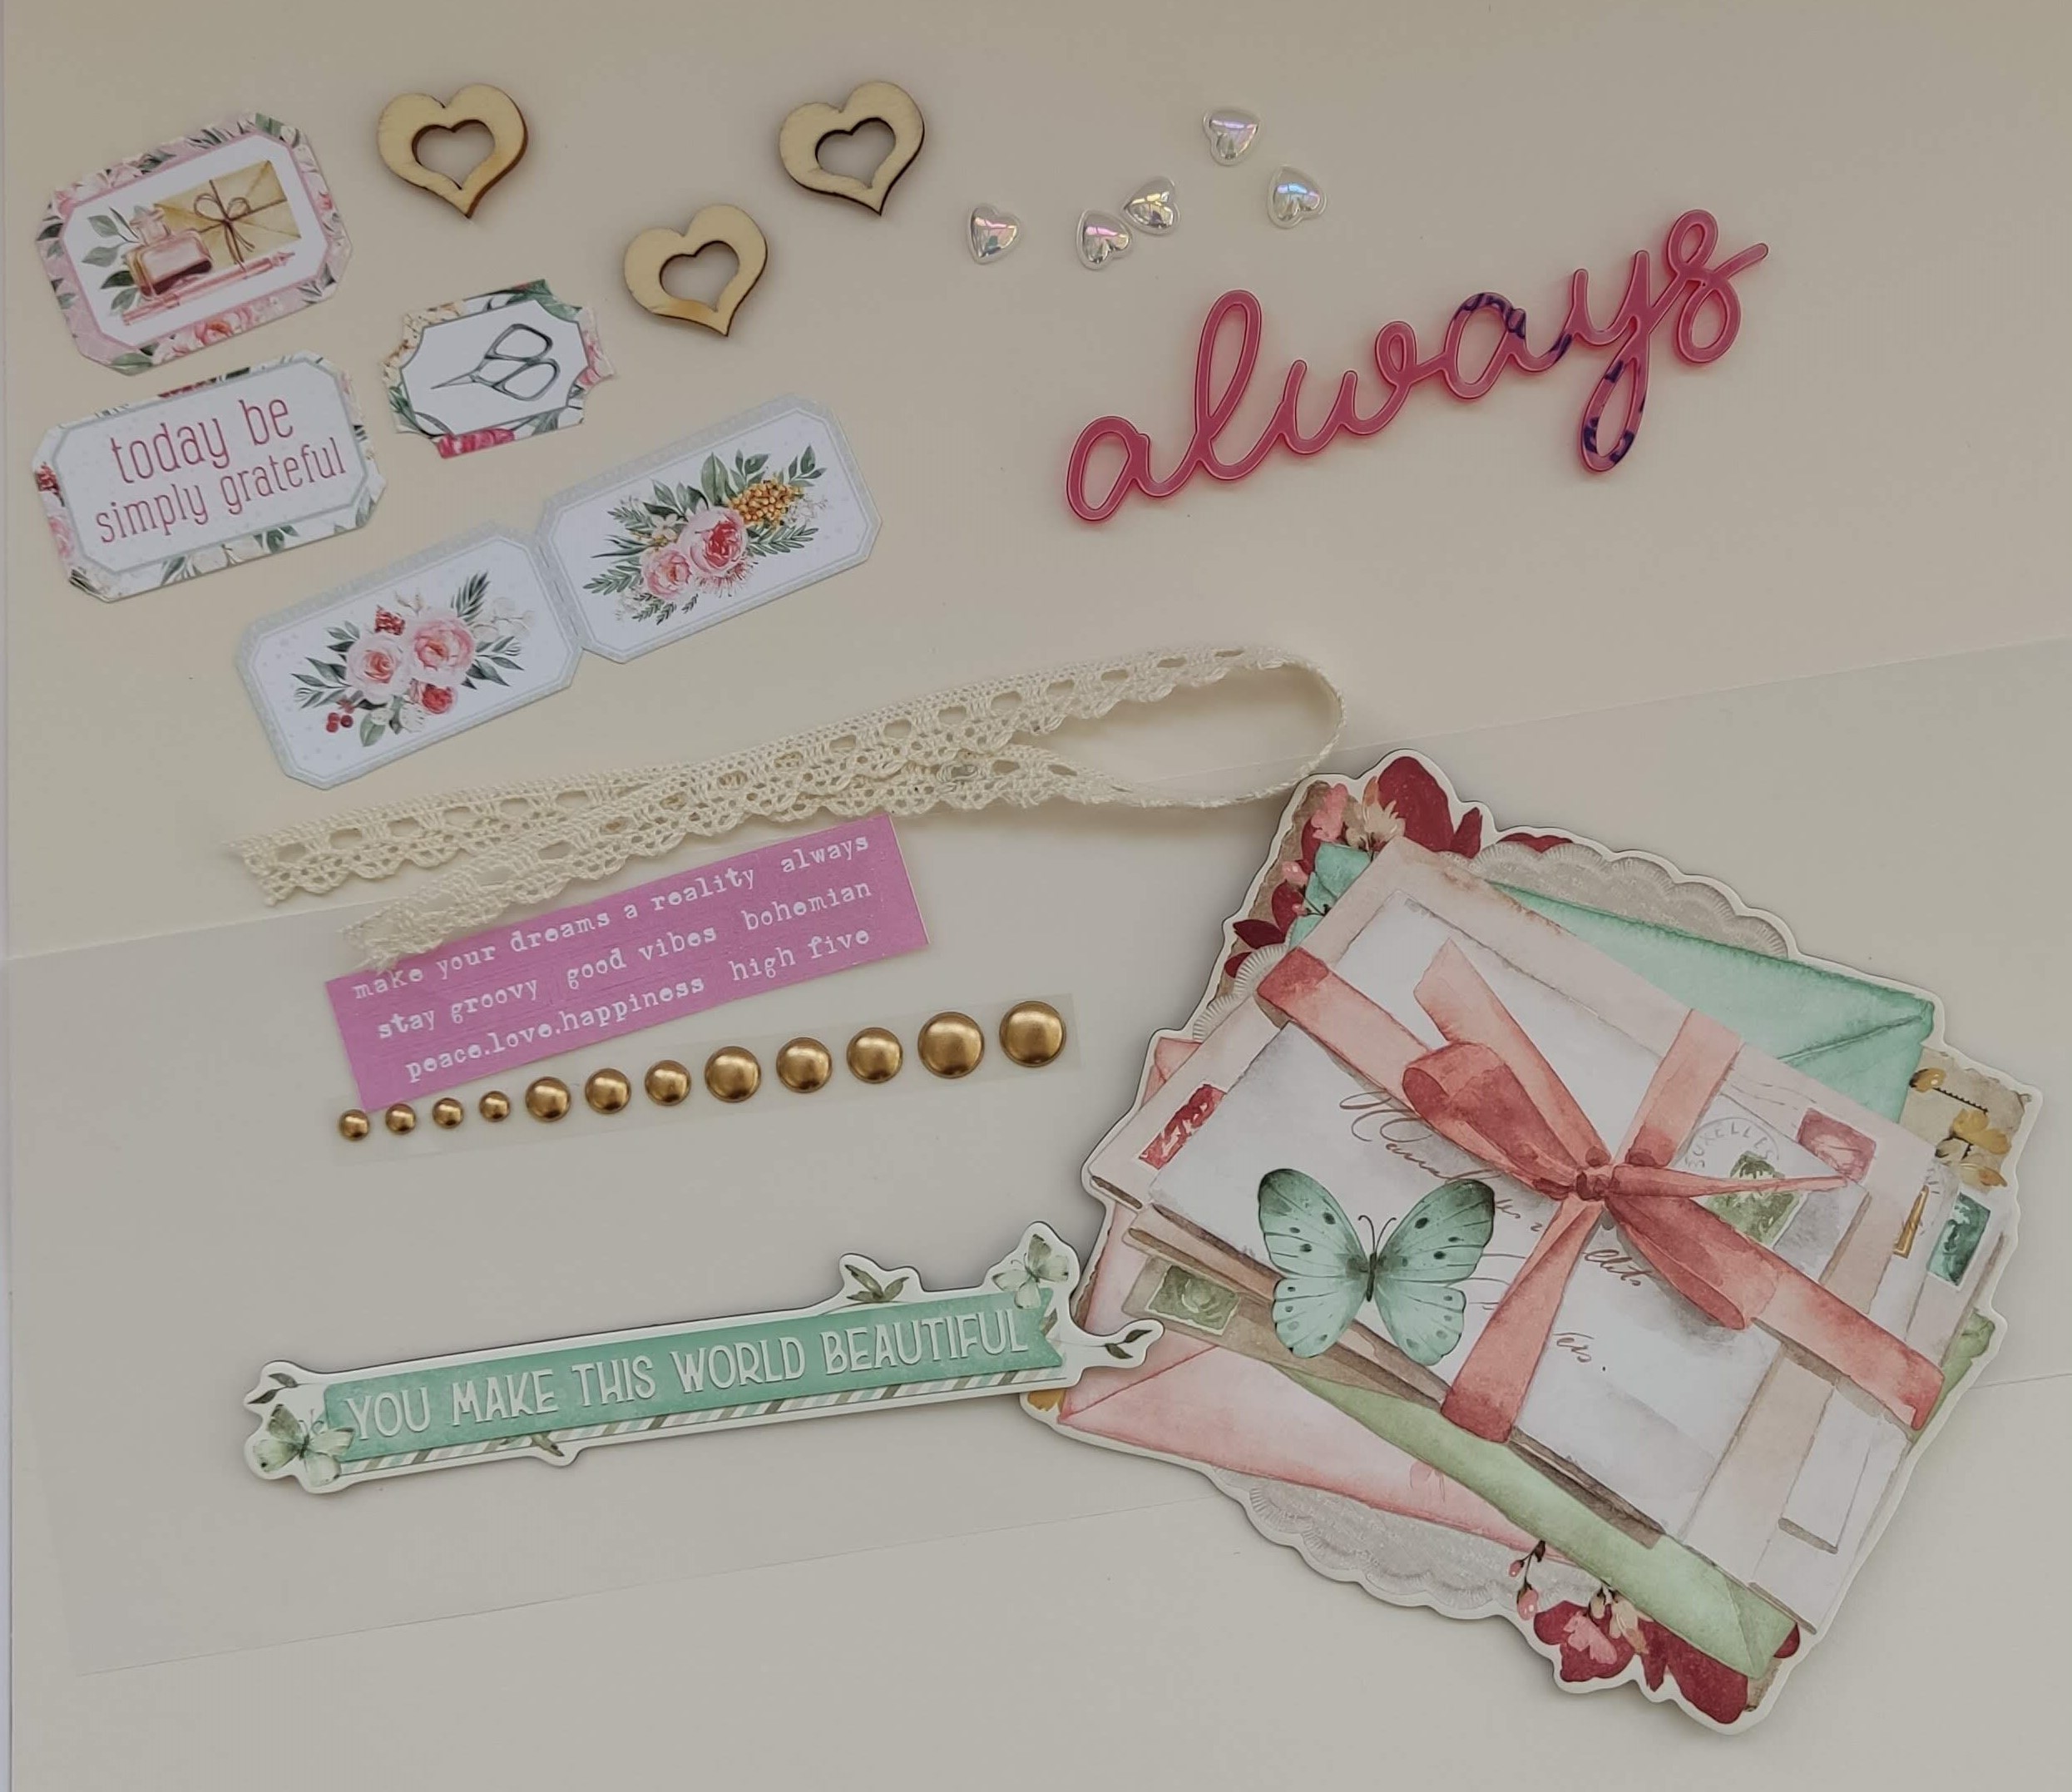
3 wooden hearts, 12" lace, 5 water droplet unicorn hearts, 1 exclusive acrylic word, vellum, 2 Simple Stories Chipboard Clusters, 1 strip of Pinkfresh enamel dots, 5 P13 tickets and a selection of word stickers.


Cutest Couple - My daughter and her boyfriend at the school prom, declared to be the 'Cutest Couple'.


This layout was made using a Paige Evans cutfile and her inspiration. I chose the bunch of balloons as I wanted to highlight the balloons in this rather poor quality photo (the only one we have of the event). I cut the cutfile from the Cherry Splash Bazzill.


I backed the cutfile with both sides of the 'My Heart' paper. Then I cut four extra balloons from the same paper, scored a fold down the centre of each one, then attached them over the cutfile by adding glue to the fold only. Then I tucked some 3D foam under each side to raise it up from the base layer. 


I placed the balloons onto the 'Happy Birthday' Mintay paper. I tied Divine Twine to each balloon then gathered them into a bunch and tied them with a ribbon. The bow was then glued to the page.


My photo was placed to the bottom left of the layout. My title was created with Thickers 'Be Kind' foam letter stickers. 


I cut images from the elements paper (butterflies and phrases) and attached them to the page and balloons.


I wrote my journalling on one of the balloons.


The Marriage - This layout shows a photo from my parents wedding in 1957.


Both sides of this Stamperia paper are really beautiful but I went for the less busy side, with all it's pretty lacy patterns. I placed the lace from the kit across the paper, about 3" up from the bottom.


I place the photo in the centre of the paper. Then set about fussy cutting, birds, letters and books from the 'Elements' paper. I inked around the edges, and layered them around the photo.


I cut two oval shapes from the vellum in the kit, I wrote the wedding details onto them with a dark pink pen. Then I placed these either side of the photo, above the cut-outs.


I added the P13 tickets, cascading down from the base of the cut-outs. Then I tied three bows in some delicate, pale pink, seam binding ribbon. These were arranged on the page, one to appear as if it was tied around the watch winder.


I found some heart shaped paper clips in my stash, and added these to the photo and the cut-outs.


Finally, I added the gold enamel dots in clusters of three about the page.


That's all from the February kit. Please see back in a few weeks for the first post using the March kit.
Thanks for looking.
Lynn x

Wednesday, 28 February 2024

Hello Spring Time Memories


 Hello!!

I'm creating a page in my travel journal today from a fun day out last Spring.

I'm using this Simple Stories collection today. Vintage Spring Garden.

It was this paper here that first caught my eye and drew me in. I knew I had to use it.


I used one strip of the tags as a pocket at the bottom of my page and then cut out some more to place in the pocket with photos one side and journaling on the other.


The 12x12 sticker sheet is so fun to use.
Look at this big 'hello' and I popped a blue heart on the tip.


I kept a brown paper bag from the gift shop so I used this. The contract worked so well.


And using this paper here, I cut a piece to use as my hidden journaling.

I added a little 'I love you' tab at the top using the stickers to easily pull out.


This collection is so so pretty and perfect for any Spring memories.


So happy with how this turned out.

If you'd like to see this page being made, I have a video here.

Happy scrapping!

Lisa xx

Monday, 26 February 2024

Simple Stories Winter Wonder - Hello Winter

Hello again. Karen here with one final layout using Winter Wonder from Simple Stories. I have really enjoyed using this collection and am sorry that I've come to the end of my design team kit.

I began the layout by layering sheets of white and kraft cardstock on top of each other. Careful gutting of the cardstock beforehand meant that I was able to use only one sheet of each colour.

Once I had created the base for my layout I machine stitched with white thread a straight stitch round the edges of two of the pieces of cardstock. I love adding machine stitching to my layouts. It give the layout more texture and interest.

I cut five 3x4 cards from the 2x2/4x4 Elements paper and one from a piece of the Brr Brr Brr paper.  I rounded the corners of the cards with a paper punch and then attached them in a grid design onto the background with the B sides upmost.

From some white glitter cardstock I die cut some snowflakes and placed these in a row horizontally across the middle of the layout and machine stitched through them all.

I attached photos to four of the cards with 3D foam underneath and tag from the Tag Elements paper onto another. I then set about embellishing the cards with die cuts from the Floral Bits and Pieces pack. I chose the pink flowers to co-ordinate with the tag.


More glittery die cut snowflakes were added too.


I strung the tag with some white twine and added some words cut from the 2x2/4x4 Elements paper as a title.


Using some pale pink watercolour paint, I picked out a few of the phrases on the card made from the Brr Brr Brr paper. It's quite subtle, but brings some pink to that part of the layout.


Finally, I scattered a few sequins here and there,

I hope I've inspired you today to scrapbook some snowy photos or have a go at a grid layout or pop over to the shop and have a look at the Winter Wonder collection from Simple Stories. Whatever you do, take care and I'll be back soon with another project.

Karen x x