Showing posts with label Embossing Enamel. Show all posts

Monday, 16 February 2026

Papermaze February Kit - Part 1

Lynn here today to introduce you to the romantic February Papermaze Kit. This beautiful collection is ideal for St. Valentine, Wedding and other romantic photos, but they are also perfect for heritage layouts. As the weather is cold and miserable, I have been working on my family tree, and making new links on Ancestry. I came across these lovely photos of our family ancestors. I will add details of these characters on my own blog (should you wish to read about them). 


Before looking at how the layouts were created, here is what you will find in the kit:


Patterned Papers:
Simple Stories - Simple Vintage Junk Drawer collection - Notes And Things
49 and Market - Dennis Burton - Nostalgic Memories collection - Moment & Forever
49 and Market - Vicki Boutin - Curiosities in Willow Grove collection - Starters Paper #5
Graphic 45 - Journalling Through Time collection - Wild Flowers & Golden Rod Pattern & Solid Sheet

The photo below shows both sides of the papers. 


Embellishments - 49 and Market Nostalgic Memories chipboard words, 49 and Market Colourswatch Tickets, 12" lace ribbon, Bare Essentials wooden domes, assorted flowers, 
Mintay paper stickers phrases - beige: & Simple Stories Simple Vintage Woodlands floral bits.


Bazzill Basics Cardstock - Touch of Pink, Mocha Divine, (included with kit) Apricot, Ivy, Fawn & Beeswax (extra pack).


Laura Susannah - A recently discovered photo of a great grand aunt on my husband's side of the family. 


I gutted the Notes And Things paper, making a frame of 1"x12"x12", which I set aside for use on another layout. From the gutted centre I cut a 9" circle from the centre. Then I placed this onto the Fawn Bazzill and gently pencilled the circle onto the cardstock. Using a Tim Holtz Layering stencil (THS077 - Floral) and some Embossing Paste I created the flowery design so it would peep from the circle. I used Stampendous Frantage Shabby White Embossing Enamel over the paste and heat embossed it to fix it in place, making a raised sparkly design. 


I took the circle, cut earlier and punched holes with the smaller hole on the crop-a-dile, 1cm in from the outer edge, and 1 cm apart. Using some cream crochet cotton and a 3.5mm crochet hook I croched around the outer edge of the circle. I worked double crochet stitched through the holes all around the circle first, then my second round was 1 dc, 3tr, 1dc, into each dc created on the first round. The circle was placed onto the centre of the Fawn Bazzill.


I added the photo to the left side of the circle. With the Sizzix and a Tim Holtz Bigz XL die (Wonderland), and some scrap greyboard, I cut the letters for the title. These letters were embossed with Sizzix Caramel Toffy embossing powder. The letters were arranged inside the crochet edging. 


I used the 49 and Market Nostalgic Memories chipboard word from the kit along the base of the photo, I raised this up on 3D foam pads so it sat happily over the crochet. 


From the kit I used the assorted flowers and the Simple Stories Simple Vintage Woodlands floral bits. I trimmed the white halo's away from the butterflies and toadstools, as I felt they looked better this way for a heritage layout. The butterfly wings were raised up on 3D foam pads, while the bodies were glued in place. 


The Kiff Family c1905 - This photo was sent to me by a someone I have linked up with through Ancestry. It shows George and Irene Kiff with Charles, Leonard, Irene, Thomas and Dorothy.


I started making this layout with the Moment paper, I cut off the barcode strip and set it aside for later. I turned the paper so the flower borders ran down either side of the paper, rather than across the top and bottom. Then I cut a piece 5" x 12" from the Golden Rod Pattern & Solid Sheet paper. I glued this down the centre of the Moment paper, leaving the very edges unstuck.


I cut the 12" lace ribbon in half lengthwise, at tucked this under the edges of the Golden Rod Pattern & Solid Sheet paper. I then glued some cream velvet ricrac trim over the join. 


My photo was placed to the right side, again leaving room to tuck embellishments in later. I used the 49 and Market Colourswatch Tickets and some skeleton leaves down the sides of the photo.


I built up the floral areas by adding a selection of paper flowers and leaves, coiling the wires. I added a key embellishment to both areas, using the flower wires to hold them in place. 


Back to the barcode strip - I cut the two phrases apart, then I cut both of them into two lines. I distressed the edges, and added the phrases to the side of each cluster of flowers. They were raised up on 3D foam pads. 


I used some old domed resin stickers from my stash to add the date to the layout. The title was also made with some old stickers from my own collection.


That's all for today, I'll be back with more layouts from this kit soon.
Thanks for looking.
Lynn x

Tuesday, 23 November 2021

Hello Pumpkin! ...... Using Prima's Hello Pink Autumn

Hello, it's Anita 

 I am back with you today with my 2nd layout using Prima's Hello Pink Autumn ....my 1st layout using this can be found HERE The Nearlyweds Day

Very recently we went for a visit to our local National Trust Garden, Sheffield Park. Absolutely beautiful, full of rich colours in the trees, all shapes and sizes. We took along a few pumpkins in the hope we could maybe have a little photo shoot with my baby Grandson.

Because the Autumn colours were so vibrant in the photos it just wouldn't work with this paper range, so I printed it off in black and white instead. I shall have a look at other collections I think so I can do it in its full colour too....sooo many lovely Autumn ranges in the SHOP


 I took a sheet of Give Thanks which, like several of the other sheets in the range, has beautiful foiling details and I cut out 7 of the circles for making the wreath background. I kept the left over sheet to base the next layer on and leave a slim dark frame around the edge of the page. 

The checked background paper is the reverse side of a sheet called Hello Pink Autumn, the front side is beautiful with a gorgeous mix of pumpkins, lots of flowers and lovely foiling details, however for this photo I needed a less feminine design. I trimmed off 1 cm from the top and one side of the sheet and splattered some white, gold and copper paint across the page

I decided it needed a little bit more texture and used some Frantage Embossing enamel in a couple of colours. Sprinkled across the page and then heated til it melted from underneath the layout.

The circles were laid in the shape of a wreath and the matted photo popped, overlapping 2 of the circles. Initially I tried it in the centre of the wreath but didn't like that placement.

I had a few of the Chipboard Stickers in my DT kit and used some in various places. These are really lovely and some have the same beautiful foiling details on them to compliment the papers.

The Hello, Pumpkin and toadstool elements were cut from the sheets of Sweater Weather and Fall Hugs


I finished the layout off with a raffia bow and a little cluster poking out from under the photo ( then I made myself stop... as I do have a bad habit of literally splattering embellishments, ink, paint etc ALL over the page LOL!)

This has been such a lovely range of papers to work with and is actually quite versatile on what themes you can scrap because of the reverse side patterns.

Happy Crafting.....and don't forget the Autumn Sale is still on at the moment, so why not pop over and grab a bargain!!

Til next time....Anita xx


Wednesday, 15 September 2021

September Papermaze Kit

Hello, Lynn here to introduce the versatile September Papermaze Kit - with a mix of papers and embellishments in soft neutral colours. Ideal for many different themes including heritage, nautical, masculine or feminine.

I have created four layouts, two heritage and two with very recent photos. I have used chipboard in all of my layouts, from three different companies, all available from Papermaze.


Before we start making the pages - here are the details of the kit:

Patterned Paper's:
Prima Marketing - Nature Lover collection - In Flight
Ciao Bella - Delta collection - River Wood & Seagrass
Simple Stories - Happily Ever After - We Do!
Kaisercraft - Explorer collection - Roam
Jen Hadfield - Reaching Out collection - Over The Rainbow
P13 - Soulmate collection #02
Bazzill - Truffle & White

This shows the flip side of the patterned papers:


Embellishments:
Simple Stories Colour Vibe Alphabet Sticker sheet, 25cm lace, Prima butterfly, rainbow clip, 3 Prima flowers, 5
Stamperia Chipboard Quotes, P13 film card and 5x gems

Extra Bazzill Pack:
Yukon Gold,
Powder Blue, Pigment & Dusk.

Ferrisa Banks - (1850 - 1934) The details of this ancestor's life will be on my personal blog, and I will put them on the back of the layout for future generations to find.


For this layout I used a Tumbled Glass Distress Ink pad to ink the edges of the papers and card.

I built up the page using a sheet of scrap 12" x 12" paper as a base. Working from the outer edges I first placed 2.5cm strips of Dusk Bazzill. Next came strips of 'We Do!' paper cut to 2.5cm and trimmed with a Martha Stewart border punch - I used the pale blue side. I flipped this paper to the brown floral side and tore 2.5cm strips.  With the blue side of the 'In Flight' paper I cut 3cm wide pieces for each side and trimmed them with another Martha Stewart border punch.

To these paper layers I added strips of lace.

The gap between the strips of paper and lace were filled with a piece of Powder Blue Bazzill trimmed to 21cm wide. I stamped this randomly with the script stamp from the Tim Holtz Stampers Anonymous Entomology stamp, using an Archival Ink Pad - Potting Soil.

I tied two lengths of pale blue seam binding ribbon around the cardstock with a bow to the right side.


I selected a chipboard clock face from Tando Creative and treated this with clear embossing ink and Stampendous Shabby Blue Embossing Enamel.

My photo was trimmed and attached to the film strip card from the kit.

The Flower Buds piece from a chipboard set by Dusty Attic, was treated with a coat of Gesso. Then I added Walnut Stain and Antique Linen Distress Paints.


All the above pieces and the photo were arranged onto the page, then I embellished with Tim Holtz Idea-ology Filmstrip ribbon, fussy cut butterflies from the 'In Flight' paper, and the quote chips from the kit.


I die cut a title from the Dusk Bazzill and finally added Nuvo Glitter Drops to the butterfly wings and the flower buds.

Elizabeth Humbley Banks - (1796 - 1861) - Another ancestor from the same family line as Ferrisa.

With the Pigment Bazzill as my base, I used a stencil by That Special Touch and several Distress Ink Pads in shades of brown, to create a script background. I inked the edges with more Distress Ink. 


I tore the top from the
Soulmate #02 paper at an angle, then trimmed a tiny strip from the other three sides. This was mounted towards the bottom of the Bazzill.

I chose two
Scrapiniec Chipboard pieces, a lantern and a frame. These were both treated with clear embossing ink and some copper embossing powder. 

My photo was trimmed and mounted inside the frame before attaching it to the top left, overlapping the card and paper. I used the lace from the kit to tuck along the top edge of the paper. I also tucked half a small doily under the edge of the paper, to the right of the photo. Onto this I added the butterfly from the kit.

I placed the lantern to the bottom right of the page. With a selection of paper flowers from my stash I created floral clusters over the page. To these I added some pearls to the flower centres. The leaves were made from Dusk Bazzill using a die from Tim Holtz Sizzix Thinlits Funky Foliage set.  

I cut my title on the Cricut and embossed it with clear embossing powder to give it a little shine. x


That's all for today, back with more from this kit very soon.
Thanks for looking
Lynn x

Monday, 1 March 2021

February Papermaze Kit - Part 2

Hello Lynn here today with the second pair of layouts using the Papermaze kit for February. This time I have used the teal / turquoise / aqua papers and card from the kit for both pages.


Patterned papers:
American Crafts - Vicki Boutin - Storyteller collection - Bohemian, Fresh Cut & Narrative
Simple Stories - Apron Strings collection - Live Love Eat & What's For Dinner
Echo Park Coffee and Friends collection - Letterboard

Bazzill - Vanilla & Blackberry Swirl


Beautiful Beach
- The photo for this layout was taken on our first trip to the Western Isles, the beaches are beautiful beaches look tropical. This is on Harris - Seilebost Beach.

My base for this page is the Vanilla Bazzill, and I started by using a TCW stencil, and a mix of Ranger's Transparent Gloss Texture Paste and some Distress Oxide Ink (Evergreen Bough). I then splattered some Distress Paints and Stains onto the page. 


With the 'Bohemia' paper I tore off the bottom of the sheet at an angle, then I tore off another strip about 3cm deep. I inked the edges and glued them to the bottom of the Bazzill, tucking the strip under the top of the larger piece. Between these two pieces of paper I applied a strip of frayed cheesecloth.

I mounted my photo onto white card then onto a piece of Blue Ocean Bazzill. I added it to the left side of the layout raised with 3D foam tape.

I used the 'BEAUTIFUL' Papermaze exclusive cutfile, and embossed the solid letters with Stampendous Frantage Aged Teal Embossing Enamel. Then I embossed the outer letters with a translucent teal embossing powder. I put the letters together beneath the photo, and cut the word 'BEACH' with the Cricut from Blue Ocean Bazzill.


With the tiny alpha stickers from the kit I added the details to the bottom right corner of the layout. 

Finally with the dew drops from the kit and some embellishments (glass nuggets, cork pieces, tiny shells and gems), from my stash I added the finishing touches to the torn edges of paper. 


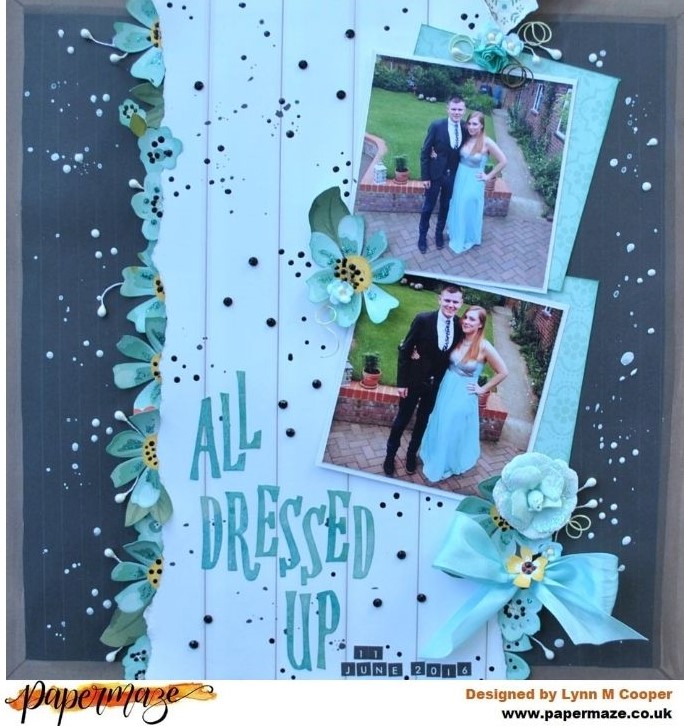
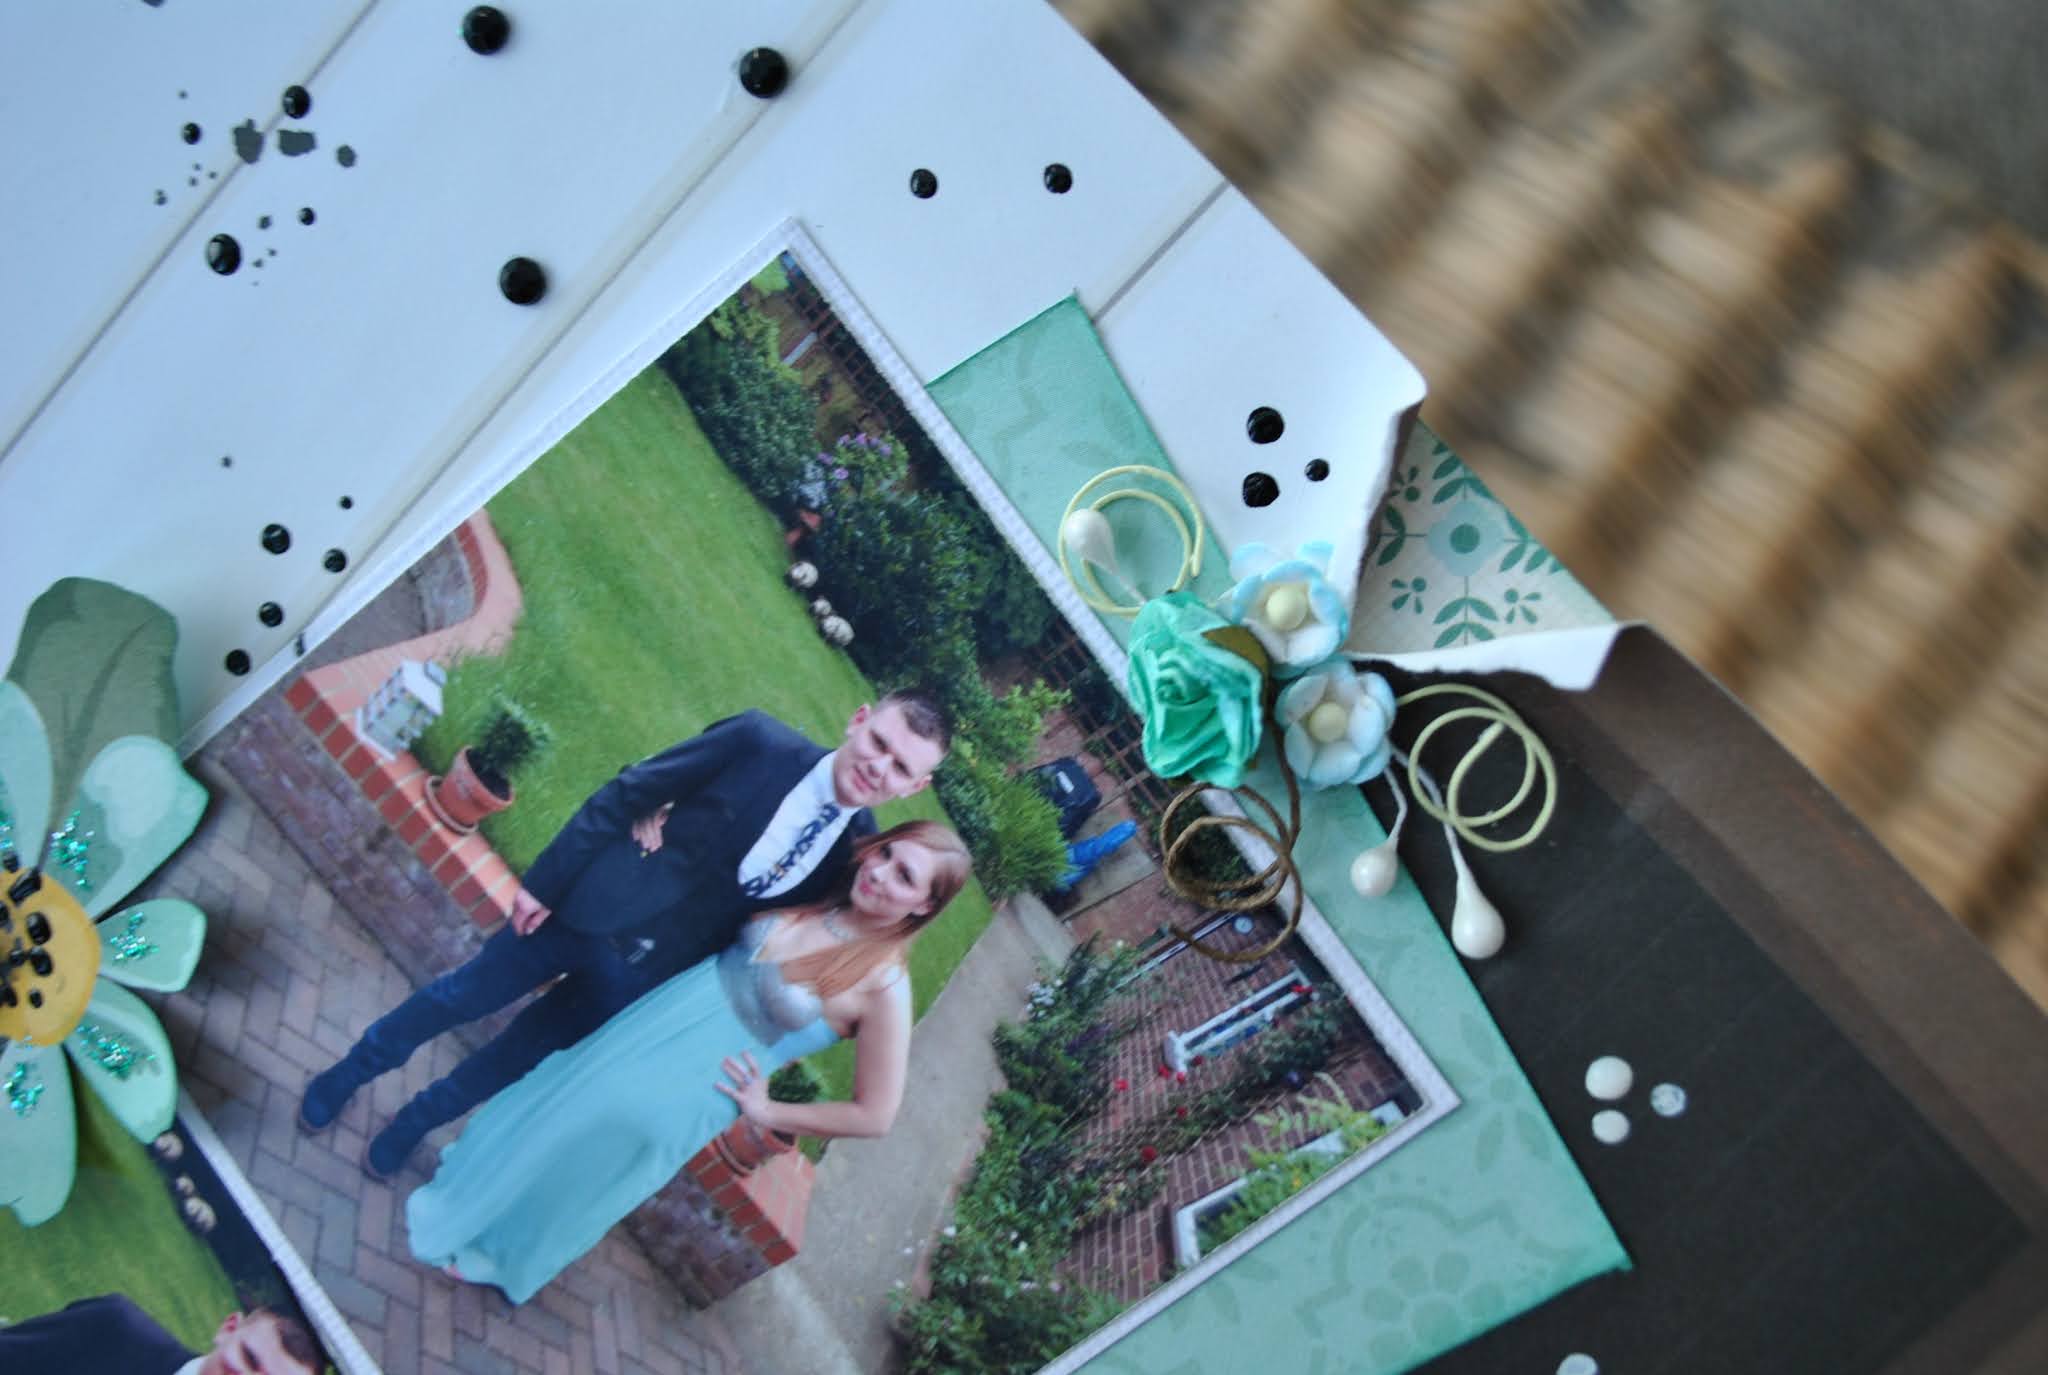
All Dressed Up - My daughter and her husband ready to go to a friend's evening wedding reception.


This time I took a sheet of scrap 12" x 12" paper as base to stick my background to. Both sides of the 'Letterboard' paper were used to build up the background, I tore a strip (about 15cm wide), from the centre of the paper, so I could retain the wooden border at the sides and corners of the blackboard side, and use the white of the letterboard for the centre of my page. These were placed onto my scrap paper, leaving the edges unstuck so I could tuck in my flowers later.

I splattered some Dylusions Black Marble Ink spray on the white paper and White Linen on the black paper!

I mounted the photos onto white cardstock and then off set them onto 'Live, Love, Eat' paper, cut to a similar size to the photos. These were stuck, one above the other over the paper join on the left side of the page. Above this join I peeled back both papers and tucked in a scrap of 'Whats for Dinner' paper. I embellished this area with some small paper flowers and a pearl stamen.


I fussy cut the flowers from what was left of the 'Live, Love, Eat' paper and sucked these all the way down the right hand join, and the bottom of the left hand join. Many of these flowers were incomplete, but because they were being tucked in, I didn't need whole flowers. I inked the cut edges with evergreen Bough Distress Ink and shaped the petals over the scissor blade.

I placed the large Prima flower at the bottom left of the photo, and added a ribbon bow in that area too. 


I scattered a few more tiny blossoms among the paper flowers, together with more stamen.

The title was cut from 'Bohemia' paper scraps using the Tim Holtz, Handmade Sizzix BigzXL die. The date was created with more of the Websters mini alphabet stickers from the kit.

To add different dimensions, I used the strip of black gems and some dots of Ebony Black Nuvo Crystal Drops on the white area. To the black areas I used some Gloss Simply White Nuvo Crystal Nuvo Drops. A little sparkle was applied to the petals with Turquoise Stickles.

That's all for the February kit, although I still have plenty more paper and other bits left, so I may make more at a later date. Off to start work on the March kit now! 

Thanks for looking.

Lynn x